Shortcut Key Guide
Activate the Signal Input Selection menu.Use
◄
and
►
to navigate and M to select the source.
Activeate the Line of Sight feature. Further press to cycle between the colors or turn off.
Activeate the ECO Mode feature.Further press to cycle through the presets.
INITIAL SETUP
Connect the monitor to a power outlet.
1.Press the POWER button on the monitor or to turn it on (The indicator will be blue).
2.Connect the relevant cable to the corresponding input on the monitor. The source will be automatically
detected.
3.To change between inputs, press the “Source” button to enter the source menu. Use the “◄” and “►”
buttons to choose the input source between Auto Select, HDMI,DP1 and DP2.
The menu for the monitor can be accessed by pressing the menu button on the control
panel. This menu is separated into the following sub menus: Picture Settings, Image
Settings, Colour Temperature, OSD Settings, Reset, and Miscellaneous options, details
of each menu can be found in the following section.
MENU OPTIONS
DP1
DP2
HDMI
WALL MOUNTING
The monitor is provided with moun�ng holes for a VESA approved wall moun ng bracket (not supplied)
The VESA moun�ng pa�ern is: 100x100mm and the size of the screws is 4 x M6 x 10 (not supplied) Do not
use screws longer than specified or damage will occur to the internal components.
NOTE:
As the monitor is considered heavy, please consult with a professional wall mount installer to
perform the installa on.
GETTING STARTED
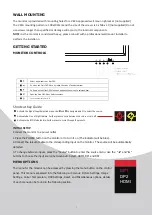
MONITOR CONTROLS
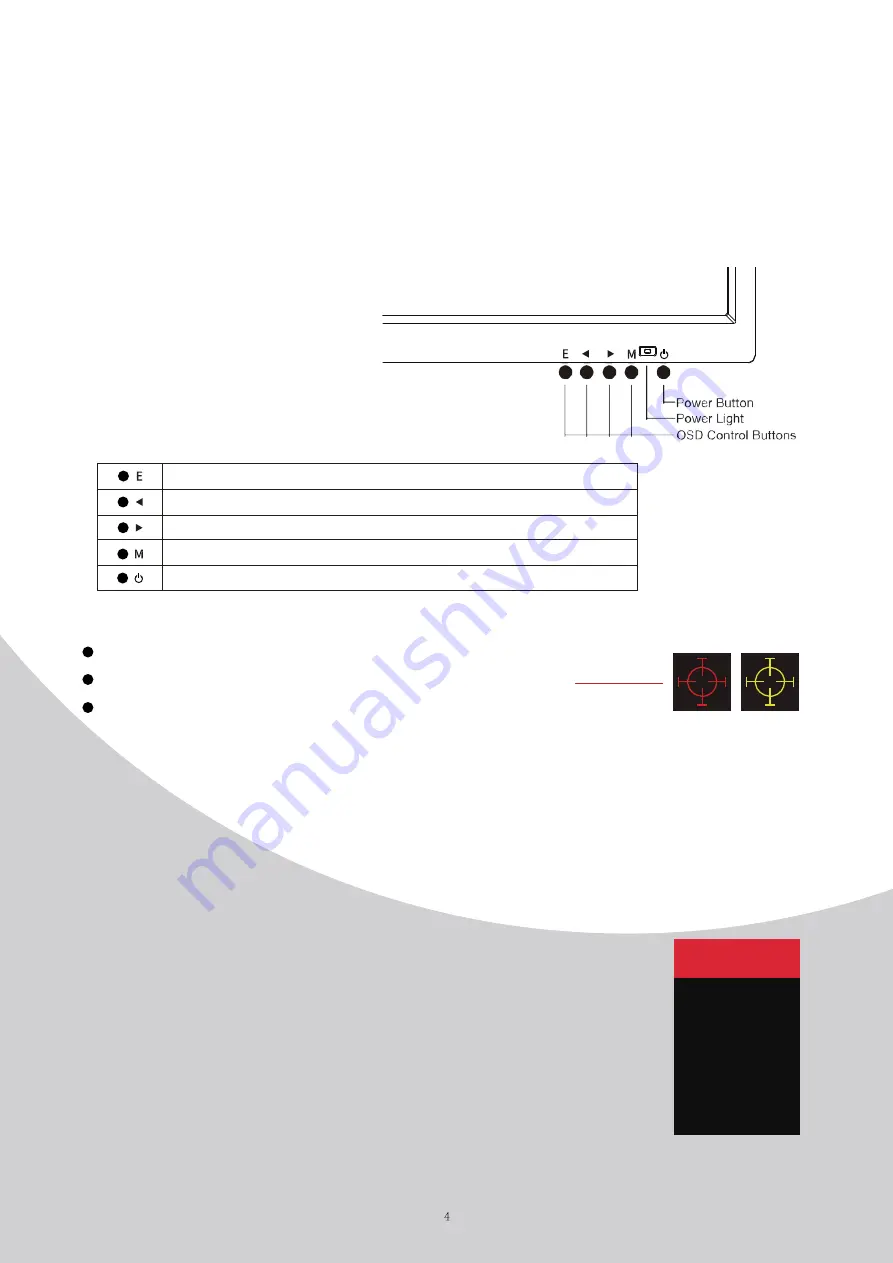
Select signal source or Exit OSD
G
o Up on the Main OSD Menu increase the value of a selected item
G
o Down on the Main OSD Menu and decrease the value of a selected item
Open the Main OSD Menu Select submenu
Turn the monitor on or Off
1
1
2
3
2
3
4
5
Содержание P25T
Страница 12: ......


