background image

Manual IB-DK2280AC

Package content

1x IB-DK2280AC, 1x external power supply, 1x power cable (EU), 
1x USB Type-C® to Type-C®/ Type-A (adapter) cable, 1x manual

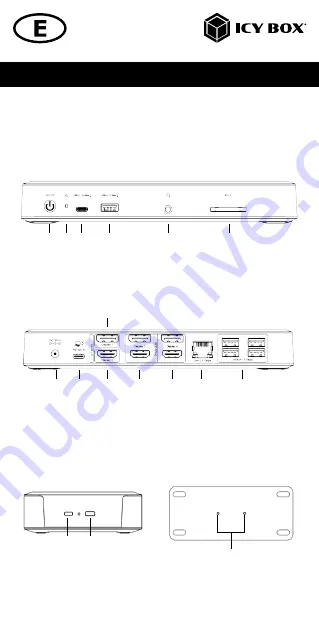
View

1. 

ON/OFF button

2. 

Power LED (green)

3. 

USB 3.2 Gen 2 Type-C® data interface with up to 10 Gbit/s

4. 

USB 3.2 Gen 1 Type-A data interface with up to 5 Gbit/s

5. 

3.5 mm headset combo jack

6. 

SD 4.0 card reader for SD memory cards 

7. 

Power jack, DC 20 V/6.75 A, 135 W

8. 

USB 3.2 Gen 2 Type-C® host interface, Power Delivery up to 100 W

9. 

DP Alt Mode DisplayPort™ 1.4 interface (Display 1)

10. 

DP Alt Mode HDMI® 2.1 interface (Display 2)

11. 

DisplayLink® HDMI® 2.0 and DisplayPort™ 1.4 interfaces (Display 3)

12. 

DisplayLink® HDMI® 2.0 and DisplayPort™ 1.4 interfaces (Display 4)

13. 

RJ45 2.5 Gigabit Ethernet interface

14. 

4x USB 3.2 Gen 1 Type-A data interface with up to 5 Gbit/s

15. 

Kensington Nano Security Slot™ support

16. 

Kensington Security Slot™ support 

17. 

Screw holes for VESA® plate (not included)

17

15

7

1

8

2

10

3

4

5

6

9

11

12

13

14

16

Содержание IB-DK2280AC

Страница 1: ...Manual IB DK2280AC DisplayLink Hybrid DockingStation with quadruple video output Handbuch IB DK2280AC DisplayLink Hybrid DockingStation mit vierfacher Videoausgabe ...

Страница 2: ...working on it Do not remove contact protection panels Avoid contact with conducting parts Do not bring plug contacts in contact with pointed and metal objects Use in intended environments only Operate the device using a power unit meeting the specifications of the type plate only Keep the device power unit away from humidity liquid vapour and dust Do not modify the device Do not connect the device...

Страница 3: ...colouration damage caused by moisture or short circuit in the device Disconnect the device prior to cleaning Aggressive or intense cleaning agents and solvents are unsuitable Make sure there is no residual moisture after cleaning We recommend cleaning devices using a dry anti static cloth 7 Disposing of the device Environmental pollution unsuitable for recycling Potential environmental pollution c...

Страница 4: ...heit sicherstellen Kontaktschutzblenden nicht entfernen Kontakt mit Spannungsführenden Komponenten vermeiden Steckkontakte nicht mit spitzen und metallischen Gegenständen berühren Verwendung nur in dafür vorgesehenen Umgebungen Gerät ausschließlich mit Typenschildkonformen Netzteil betreiben Gerät Netzteil fern von Feuchtigkeit Flüssigkeit Dampf und Staub halten Eigenständige Modifikationen sind u...

Страница 5: ...eränderungen Feuchteschäden oder Kurzschluss am Gerät vor Reinigung das Gerät außer Betrieb nehmen aggressive bzw scharfe Reinigungs und Lösungsmittel sind ungeeignet nach der Reinigung sicherstellen dass keine Restfeuchtigkeit vorhanden ist Reinigung der Geräte am besten mit trockenem Antistatiktuch durchführen 7 Entsorgung des Gerätes Umweltverschmutzung Wiederverwertung nicht möglich Mögliche U...

Страница 6: ...r jack DC 20 V 6 75 A 135 W 8 USB 3 2 Gen 2 Type C host interface Power Delivery up to 100 W 9 DP Alt Mode DisplayPort 1 4 interface Display 1 10 DP Alt Mode HDMI 2 1 interface Display 2 1 1 DisplayLink HDMI 2 0 and DisplayPort 1 4 interfaces Display 3 12 DisplayLink HDMI 2 0 and DisplayPort 1 4 interfaces Display 4 13 RJ45 2 5 Gigabit Ethernet interface 14 4x USB 3 2 Gen 1 Type A data interface w...

Страница 7: ...iver is not installed only the DP Alt Mode interfaces Display 1 and 2 can be used In case your computer does not support the DP Alt Mode protocol and only has USB 3 2 Gen 2 and the DisplayLink driver installed only the DisplayPort HDMI 3 4K and DisplayPort HDMI 4 4K interfa ces can be used USB Type C USB Type C Important This ICY BOX product requires the usage of DisplayPort Alt Mode technology ov...

Страница 8: ...tation to your computer before installing the driver from the download area of https www synaptics com products displaylink graphics downloads 1 Select your operating system and download the correct driver from the webpage mentioned above 2 Click on the executable file of the related version 3 Follow the instructions and finish the driver installation 4 Connect the DockingStation to a supported US...

Страница 9: ...Manual IB DK2280AC Starting up 1 Connect the power supply ...

Страница 10: ...he host Type C interface of the DockingStation 3 Connect the other end of the data cable either USB Type C or the inclu ded Type A adapter to a supported computer at least USB 3 2 Gen 1 DP Alt Mode DP Alt Mode DisplayLink DisplayLink DisplayLink DisplayLink DP Alt Mode DP Alt Mode ...

Страница 11: ...on when using the DockingStation via a Type A port In this case the Type A interface does in no way support DP Alt Mode via the DP Alt Mode interfaces 1 and 2 and Power Delivery which is a prerequisite for the Power Delivery charging option This means the DockingStation cannot be used to charge the computer To use this dock to its full potential ensure that the host USB Type C port of your compute...

Страница 12: ... Insert the SD card into the SD card slot with the bevelled corner first The golden PINs of the card must show downwards Displays Please set up your display settings according to your operating system and requirements For detailed information refer to the corresponding operation manual and descripti on of your operating system ...

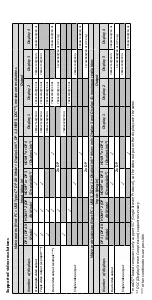
Страница 13: ...x4320 30 Hz 5120x2880 60 Hz DP only Single video output 7680x4320 30 Hz 7680x4320 30 Hz 3840x2160 60 Hz 3840x2160 60 Hz 2x DP 5120x2880 60 Hz DP only Video matrix design Host PC USB 3 2 Gen 1 DisplayLink driver only Display 3 and Display 4 maximum resolutions Inputs plug in Output Number of displays DP 1 DP Alt Mode HDMI 2 DP Alt Mode HDMI or DP 3 DisplayLink HDMI or DP 4 DisplayLink Display 1 Dis...

Страница 14: ...ror mode extended mode or to the setting of the primary display e g extending your monitors Position the mouse anywhere on the Windows desktop Right click and select Display settings to bring up the configuration window Refer to the Display configuration section Identify your monitors by clicking the Identify button Select the relevant monitor for the following settings by clicking the identified ...

Страница 15: ...his display if you wish to extend a monitor Click Keep changes to confirm and exit Once the setting is completed simply drag and drop the application icons to arrange your monitors However some applications may not support the display on the extended desktop 1 2 3 ...

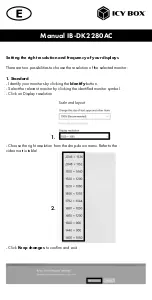
Страница 16: ...esolution of the selected monitor 1 Standard Identify your monitors by clicking the Identify button Select the relevant monitor by clicking the identified monitor symbol Click on Display resolution Choose the right resolution from the drop down menu Refer to the video matrix table Click Keep changes to confirm and exit 1 2 ...

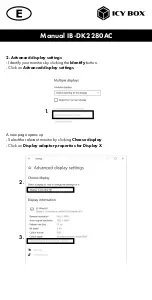
Страница 17: ...play settings Identify your monitors by clicking the Identify button Click on Advanced display settings A new page opens up Select the relevant monitor by clicking Choose display Click on Display adaptor properties for Display X 1 2 3 ...

Страница 18: ...Manual IB DK2280AC A new window opens up Click on List All Modes A new window opens up Click on a valid mode according to your demands Repeat for each attached monitor if necessary 4 ...

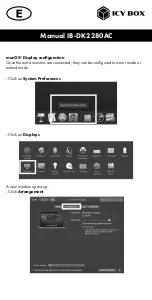
Страница 19: ...K2280AC macOS Display configuration Once the extra monitors are connected they can be configured to mirror mode or extend mode Click on System Preferences Click on Displays A new window opens up Click Arrangement ...

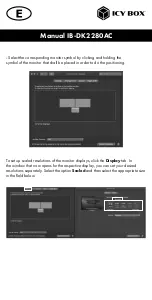
Страница 20: ...that shall be placed in order to do the positioning To set up scaled resolutions of the monitor displays click the Display tab In the window that now opens for the respective display you can set your desired resolutions separately Select the option Scaled and then select the appropriate size in the field below ...

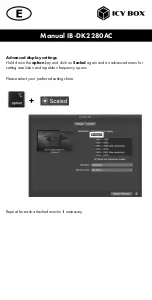
Страница 21: ...isplay settings Hold down the option key and click on Scaled again and an advanced menu for setting resolution and repetition frequency opens Please select your preferred settings here Repeat for each attached monitor if necessary ...

Страница 22: ... 6 75 A 135 W 8 USB 3 2 Gen 2 Type C Hostschnittstelle Power Delivery bis zu 100 W 9 DP Alt Mode DisplayPort 1 4 Schnittstellen Display 1 10 DP Alt Mode HDMI 2 1 Schnittstellen Display 2 1 1 DisplayLink HDMI 2 0 und DisplayPort 1 4 Schnittstellen Display 3 12 DisplayLink HDMI 2 0 und DisplayPort 1 4 Schnittstellen Display 4 13 RJ45 2 5 Gigabit Ethernet Schnittstelle 14 4x USB 3 2 Gen 1 Type A Date...

Страница 23: ...d kein DisplayLink Treiber installiert sein so stehen nur die DP Alt Mode Anschlüsse Display 1 und 2 zur Verfügung Sollte Ihr Computer das DP Alt Mode Protokoll nicht unterstützen und lediglich über USB 3 2 Gen 2 und den installierten DisplayLink Treiber verfügen so stehen nur die DisplayPort HDMI 3 4K und DisplayPort HDMI 4 4K Anschlüsse zur Verfügung USB Versionshinweis Bisherige USB Standards A...

Страница 24: ...https www synaptics com products displaylink graphics downloads heruntergeladen haben Schließen Sie erst nach dieser Installation die DockingStati on an Ihren Computer an 1 Wählen Sie Ihr Betriebssystem und laden Sie den richtigen Treiber von der obigen Webseite herunter 2 Klicken Sie auf die ausführbare Datei der entsprechenden Version 3 Folgen Sie den Anweisungen und schließen Sie die Installati...

Страница 25: ...Handbuch IB DK2280AC Inbetriebnahme 1 Verbinden Sie das Netzteil ...

Страница 26: ...tschnittstelle der DockingStation 3 Verbinden Sie nun das andere Ende des mitgelieferten Datenkabels über den USB Type C Stecker oder über den Type A Adapter mit einem unterstützten Computer mindestens USB 3 2 Gen 1 DP Alt Mode DP Alt Mode DisplayLink DisplayLink DisplayLink DisplayLink DP Alt Mode DP Alt Mode ...

Страница 27: ...ss verwenden Eine USB Type A Schnittstelle unterstützt in keiner Weise den DP Alt Mode über die DP Alt Mode Schnittstellen 1 und 2 und die Power Delivery Funktion welche Vor aussetzung für die Power Delivery Ladeoption ist Die DockingStation kann in dieser Konstellation dann nicht zum Aufladen des Computers verwendet werden Um den vollen Funktionsumfang dieser DockingStation nutzen zu können stell...

Страница 28: ... SD Karte mit der abgeschrägten Ecke voraus in den SD Karten schacht Die goldenen Kontaktpunkte zeigen dabei nach unten Monitore Zur optimalen Einstellung Ihrer Anzeigeeinheiten gehen Sie bitte entsprechend Ihres Betriebssystems und Ihrer Bedürfnisse vor Genauere Informationen entnehmen Sie bitte dem Handbuch und den Beschreibungen Ihres Betriebssystems ...

Страница 29: ... 5120x2880 60 Hz DP only Einfache Videoausgabe 7680x4320 30 Hz 7680x4320 30 Hz 3840x2160 60 Hz 3840x2160 60 Hz 2x DP 5120x2880 60 Hz DP only Videomatrix Übersicht Host PC USB 3 2 Gen 1 DisplayLink Treiber nur Display 3 und Display 4 maximale Auflösungen Anschlüsse plug in Ausgabe Anzahl der Monitore DP 1 DP Alt Mode HDMI 2 DP Alt Mode HDMI oder DP 3 DisplayLink HDMI oder DP 4 DisplayLink Display 1...

Страница 30: ...rungsmodus oder die Einstellung der Primäranzeige konfiguriert werden z B Erweiterung Ihrer Monitore Positionieren Sie die Maus an einer beliebigen Stelle auf dem Windows Desktop Klicken Sie mit der rechten Maustaste und wählen Sie Anzeigeeinstellungen um das Konfigurationsfenster aufzurufen Verwenden Sie den Abschnitt Anzeige Identifizieren Sie Ihre Monitore indem Sie auf die Schaltfläche Identif...

Страница 31: ...weitern möchten Klicken Sie zum Bestätigen und Beenden auf Einstellungen Beibehalten Sobald die Einstellungen abgeschlossen sind ziehen Sie einfach die Monitor symbole per Drag Drop um Ihre Monitore anzuordnen Einige Anwendungen unterstützen jedoch möglicherweise nicht die Anzeige auf dem erweiterten Desktop 2 1 3 ...

Страница 32: ... Identifizieren Sie Ihre Monitore indem Sie auf die Schaltfläche Identifizieren klicken Wählen Sie den betreffenden Monitor durch Klicken auf das Symbol für den identifizierten Monitor aus Klicken Sie auf Bildschirmauflösung Wählen Sie die gewünschte Auflösung aus dem Dropdown Menü Klicken Sie zum Bestätigen und Beenden auf Einstellungen Beibehalten Click Keep changes to confirm and exit 1 2 3 ...

Страница 33: ...tore indem Sie auf die Schaltfläche Identifizieren klicken Klicken Sie auf Erweiterte Anzeigeeinstellungen Eine neue Seite öffnet sich Wählen Sie den entsprechenden Monitor aus indem Sie auf Anzeige auswählen klicken Klicken Sie auf Adaptereigenschaften für Bildschirm X anzeigen 1 2 3 ...

Страница 34: ...t sich ein neues Fenster Klicken Sie auf Alle Modi auflisten Es öffnet sich ein neues Fenster Klicken Sie auf den gewünschten Modus entsprechend Ihrer Anforderung Wiederholen Sie dies bei Bedarf für jeden angeschlossenen Monitor 4 ...

Страница 35: ...Handbuch IB DK2280AC macOS Konfiguration der Anzeigeeinheiten Klicken Sie auf Systemeinstellungen Klicken Sie auf Monitore Es öffnet sich ein neues Fenster Klicken Sie auf Anordnen ...

Страница 36: ...en und halten um die Anordnung vorzunehmen Um skalierte Auflösungen der Monitoranzeigen vorzunehmen klicken Sie den Reiter Monitor In dem sich nun öffnenden Fenster der jeweiligen Anzeige können Sie separat Ihre gewünschten Ansichten einstellen Wählen Sie die Option Skaliert und dann die entsprechende Größe im Feld darunter ...

Страница 37: ...olgt vornehmen Halten Sie die Option Taste gedrückt und klicken Sie erneut auf Skaliert und ein erweitertes Menü zur Einstellung von Auflösung und Wiederholfrequenz öffnet sich Wählen Sie hier bitte Ihre gewünschten Einstellungen aus Wiederholen Sie dies bei Bedarf für jeden angeschlossenen Monitor ...

Страница 38: ... any differences between the product mentioned in this manual and the product you may have DisplayLink is the registered trademark of DisplayLink Corp in the EU the US and other countries DisplayPort and the DisplayPort logo are trademarks owned by the Video Elec tronics Standards Association VESA in the United States and other countries The terms HDMI and HDMI High Definition Multimedia Interface...

Отзывы: