background image

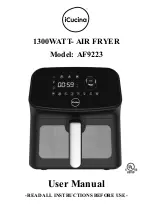
DIGITAL CONTROL PANEL 


LED DIGITAL DISPLAY: In the working state, the temperature and time 
are displayed with an interval of 5 seconds. Temperature display 3 digits; 
Press the time/temperature setting button again to display the time and the 
working time. The time is less than or equal to 1 hour, and only the next 2 
bits are displayed. The MIN lamp is on; if the time is greater than 1 hour, 
press 00:00 to display, and the MIN lamp is off. In the menu selection state, 
the temperature of the default menu is displayed at the first time of each 
selection, and then the temperature and time are exchanged. 


POWER ON/OFF BUTTON: This button is a red button. To turn ON, press 
this button, the buzzer will emit a “BEEP” sound. Press the MENU option, 
and  then  rotate  the  knob  left  and  right  to  choose  the  preprogrammed 
function. In the working state, press the power button, the heating tube will 
stop working, all the indicator lights will go out, the digital display will not 
show, and the motor will automatically stop working after 20 seconds. 


TEMPERATURE SETTING MODE: The unit is measured in Fahrenheit. 
When setting the temperature, press the TEMP key. The digital display will 
illuminate  the  default  temperature.  Set  the  temperature  to  increase  or 
decrease by rotating the knob.   


TIME SETTING MODE: When setting the time, press the TIME key. Set 
the TIME by rotating the knob. Set the time to increase or decrease by 1 
minute by rotating the knob. 


PREHEAT  FUNCTION:  The  preheat  function  is  mainly  used  with  the 
menu function but can also be used alone. After the button is touched, the 
icon will flash. The PREHEAT time cannot be adjusted. The PREHEAT 

Содержание AF9223

Страница 1: ...1300WATT AIR FRYER Model AF9223 User Manual READ ALL INSTRUCTIONS BEFORE USE...

Страница 2: ...nces There should be at least 3 inches of free space for the back side left right sides and the upper side of the appliance Do not place anything on top of appliance 12 Extreme caution must be used wh...

Страница 3: ...vided to reduce the risk of becoming entangled or tripped over Please use care when using a longer detachable power supply cord or extension cord If a longer detachable power supply cord is used 1 The...

Страница 4: ...PARTS AND ACCESSORIES 1 Control Panel 2 Hot Air Outlet Vents 3 Frying Basket 4 Handle 5 Fry Pan Assembly...

Страница 5: ...on a surface that is horizontal even and stable This appliance is intended for normal household use It is not intended to be used in environments such as staff kitchen of shops offices farms or other...

Страница 6: ...per ventilation and will adversely affect the cooking results SHAKING FOOD Some foods require shaking halfway through cooking To properly shake the food hold the handle remove the Fry Pan assembly fro...

Страница 7: ...pt to cycle through dishwasher The outer surface may be cleaned by wiping carefully with a damp dishcloth or sponge Make sure unit has cooled completely prior to cleaning COOK GUIDE Menu selection mod...

Страница 8: ...ess the MENU option and then rotate the knob left and right to choose the preprogrammed function In the working state press the power button the heating tube will stop working all the indicator lights...

Страница 9: ...is touched the icon will flash Use the rotary knob to choose the preprogrammed setting Press down the center of the START STOP knob to perform the selected function After the function is finished the...

Страница 10: ...to damages resulting from accidents abuse misuse damage caused by shipping or failure to follow safety instruction The warranty is valid only for first quality goods purchased from an authorized resa...

Страница 11: ......

Отзывы: