


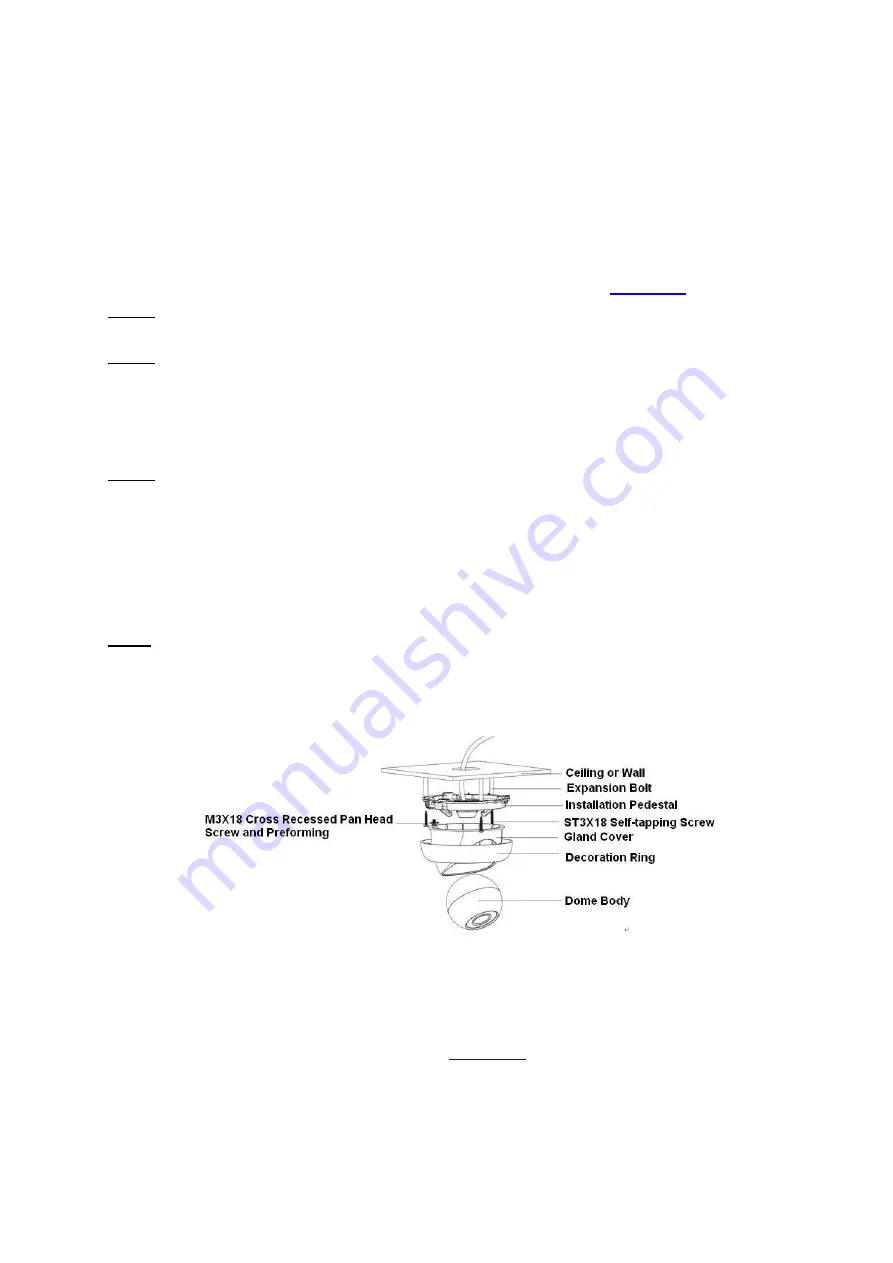
3 Device Installation
1.
Installation Steps
Important
Before the installation, please make sure the installation environments can at least support 3x weight
of the camera.
Please follow the steps listed below to install the device. Please refer to
Step 1
Turn clockwise to remove the decoration ring from the snap joints.
Step 2
Please take the installation position map in the accessories bag, and then paste it on the ceiling or the
wall according to your monitor area requirements. Draw and then dig three plastic expansion bolts
holes in the installation surface and then insert three expansion bolts in the holes. Secure these three
bolts firmly. Please draw the cable out from the cable exit when you install the device.
Step 3
Adjust the device installation pedestal to the proper position and then line up the three screw holes in
the device pedestal to the three plastic expansion bolt holes in the installation position. Put the three
self-tapping screws in the three plastic expansion bolts firmly. Loosen the M3X8 cross recessed pan
head slot screw of the pedestal to unfasten the preforming. (Do not remove, loosen a little bit will be
OK.). Adjust the lens to the proper monitor angle and then use the original preforming to turn the M3X8
cross recessed pan head slot screw back.
Step4
Line up the three spigots of the decoration ring to the jags from the bottom to the top and then turn
clockwise until you hear a clear sound ”KA”. Now the installation is complete.
Figure 3-1
Important
Please pay attention to the dome camera direction when you are installing. Please refer to
the following figure for detailed information. See
10


