ICRealtime ICR-100X Скачать руководство пользователя страница 22


Speed Dome Camera Instruction Manual 

30/57


Pattern


z

 Function 

This function is that the camera memorizes the path (mostly curve 

path) by the joystick of the controller and revives the trajectory 

operated by joystick as closely as possible. 
MAX. 4 Patterns are programmable and Maximum 1200 

communication commands can be programmed in a pattern. 

z

 Setting Patterns 

A Pattern can be created by the following methods. 


Method 1) <Set Pattern> [Pattern NO.]   

{


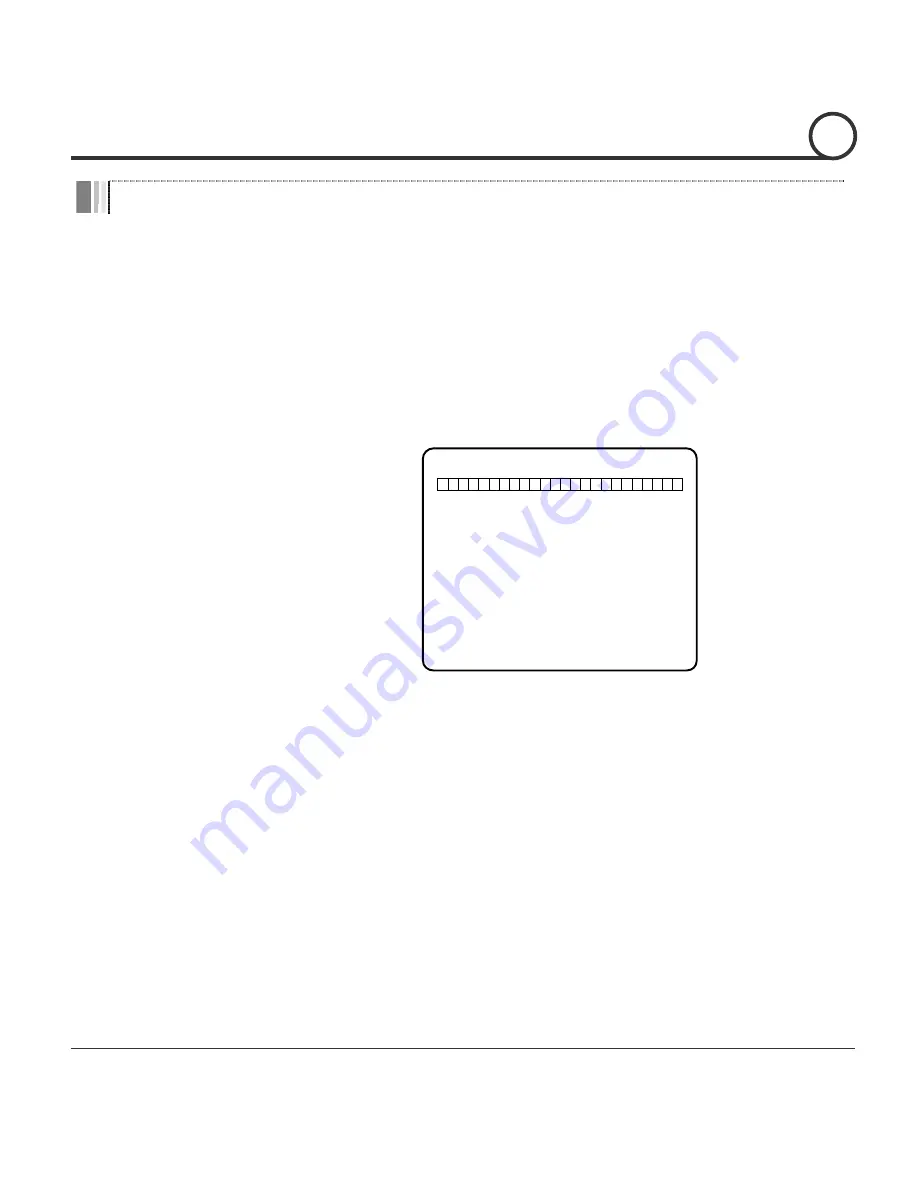
The Pattern programming window appears on the monitor as 

below. 

EDIT PATTERN 1

[NEAR:SAVE  /FAR:DELETE]
                0/0/x1/N


{


The movement by Joystick and the preset movement can be 

memorized in a pattern. 

{


After a pattern is programmed, the remaining storage is 

displayed in progress bar on the screen. 

{


To save the recording, press 

NEAR

 key and to cancel, press 

FAR

 key. 


Method 2) Programming in OSD Menu : See the section “How to use OSD Menu”. 

z

  Running Patterns  Method 1) <Run Pattern> [Pattern NO.] 

Method 2) <Go Preset> [Pattern NO. + 130] 

ex) Run Pattern 2 : <Run Pattern> [2] 
ex) Run Pattern 2 : <Go Preset> [132] 

z

    Deleting Patterns  To delete Patterns, enter into OSD menu.


Note) When the system memorizes Patterns, the commands are stored in the momories, not 

the positions of Pan/Tilt/Zoom. Hence there might be small differences between the original 

path and the revived path by path type of Patterns. Note that it is not a problem in position 

precision. 

OPERATION

Содержание ICR-100X

Страница 1: ...INSTRUCTION MANUAL Ver 1 0 ICR 100X Speed Dome Camera ...

Страница 2: ...hin the product s enclosure that may be of sufficient magnitude to constitute a risk of electric shock to persons This exclamation point symbol is intended to alert the user to the presence of important operating and maintenance servicing instructions in the literature accompanying the appliance This Device compiles with Part 15 of the FCC Rules Operation is subject to the following two conditions...

Страница 3: ...facturer z Installation should be done only by qualified personnel and conform to all the instructions by the manufacturer z Refer all servicing to qualified service personnel z Unless the product is specifically marked as IP66 more than IP66 or confirmed by the manufacturer it is designed for indoor use only and it must not be installed where exposed to rain and moisture z Do not load on the prod...

Страница 4: ...e product to shock and vibration as this can damage the product z Care must be taken when you clean the clear dome cover Especially scratch and dust will ruin the quality of the product Installation and Storage z Do not install the product in areas of extreme temperature which exceed the allowable range z Avoid installing in humid or dusty places z Avoid installing in places where radiation is pre...

Страница 5: ...t 22 Installation with Wall Mount Bracket 23 Wiring and Cabling 24 Operation Check Point before Operation 27 Check Points for Preset and Pattern Function before Operation 27 OSD Menu 28 Reserved Preset Hot Keys 28 Preset 29 Swing 29 Pattern 30 Group 31 Other Functions 31 OSD Display 33 OSD Menu Quick Programming Guide 34 Main Menu 34 Display Setup 35 Privacy Zone Mask Setup 36 Camera Setup 38 Moti...

Страница 6: ...rolled by 0 05 sec Hence it is very easy to make the camera focus on desired target views at high zoom magnification Additionally it is easy to make the camera focus on desired positions with zoom proportional pan tilt movement Preset Pattern Swing Group Privacy Mask and More z MAX 127 Presets are programmable and each preset can have its own parameter values independently from the other presets F...

Страница 7: ... N C Normal Close sensors can be used and the signal range of the sensor input is from DC 5 0V to 12 0V for various applications z The camera can be set to move to a Preset position or to run functions such as Pattern Swing and Group when there are external sensor activations Also Post Alarm function is possible which is supposed to activate after user defined time period and sequentially in succe...

Страница 8: ... Calblock Screws TappingM4 16 TappingM4 25 MachineM3 6 MachineM3 8 zAccessoriesforTheModelswithAlarmIn Out Function I OCable zAccessoriesforTheIPAddressableModels CrossoverLANCable AudioCable CD Brackets Optional z Wall Mount Bracket Screws Machine M3 8 Hex Lag 14 50 z Ceiling Mount Bracket Screws Machine M3 8 Tapping M4 25 INTRODUCTION 1 1 ...

Страница 9: ...et zDefaultAccessories MainCable Wrench zAccessoriesforTheModelswithAlarmIn Out Function I OCable zAccessoriesforTheIPAddressableModels CrossoverLANCable AudioCable CD Brackets Optional zWallMountBracket Screws MachineM5 15 HexLag 14 50 zCeilingMountBracket Screws MachineM5 15 AnchorBolt 3 8 70 INTRODUCTION 1 ...

Страница 10: ...acket Insert the mounting hooks into the holes on the surface of the main body and turn the main body zMountingScrewHole Used to assemble the main body with a bracket with screws zMainConnector Used for the power wire the video cable and the RS 485 communication cable connection zSensorI OPort Used for the sensor in out connection The sensor I O function possible models only zLANPort Used for the ...

Страница 11: ...z The camera ID range is 1 255 Camera ID must not be 0 z The factory default of the camera ID is 1 z Match the camera ID with the Cam ID setting of your DVR or Controller to control the camera z If you are connecting a single camera to a controller terminate the camera When connecting more than one camera to a single controller terminate the last camera on the communication line The last camera me...

Страница 12: ... PELCO D 9600 bps OFF ON OFF PELCO P 4800 bps ON ON OFF PELCO P 9600 bps Others Reserved z Match the camera protocol with the camera protocol in the setting of your DVR or controller to control the camera z Adjust the DIP switch after turning off the camera If you changed the camera protocol by changing the DIP S W the change will be effective after you reboot the camera z The factory default prot...

Страница 13: ...gly the camera can be out of control In this case the terminal resistor of both sides i e the camera and the controller must be set to ON state z Case 2 In case that multiple cameras are connected to a controller Due to similar reasons with the case 1 the terminal resister of the controller and the last camera must be set to ON state The last camera means the camera farthest in cable length from t...

Страница 14: ...the ceiling tile to pass the wires and cables through to the upside of the ceiling mount bracket and attach the ceiling mount bracket on it Tapping M4 25 Pull the wires and cables for the system as below Turn the bracket adapter on its axis in CW Clockwise direction unitl it stops and screw the surface mount bracket Machine M3 8 INSTALLATION 2 Bracket Adapter Surface mount Bracket ...

Страница 15: ...ome cover Machine M3 6 ImportantNotice z Beforestartingtheinstallation makesurethattheCameraIDandProtocolaresetupproperly z When the pipe hole for wiring and cabling on side of the Surface Mount Bracket is not used make sure thattheholeisproperlysealedwiththesuppliedHolePlug z To adjust the installation height from the mounting surface the pipe and coupler should be needed between the surface moun...

Страница 16: ...Wire the cable s to the ports Insert the mounting hooks into the holes on the surface of the main body and turn the main body Assemble the main both with the camera mount adaptor with the 3 screws Machine M5 15 Screw the dome cover to the main body and remove the protection vinyl from the dome cover ImportantNotice z Beforestartingtheinstallation makesurethattheCameraIDandProtocolaresetupproperly ...

Страница 17: ...tem as below Attach the wall mount bracket to the mounting surface Hex Lag 14 50 Pull the wire s and cable s for the system as below Wire the cable s to the ports Insert the mounting hooks into the holes on the surface of the main body and turn the main body Assemble the main both with the camera mount adaptor with the 3 screws Machine M5 15 Screw the dome cover to the main body and remove the pro...

Страница 18: ...rtasshownintheabovecircuit IN1 IN2 IN3 Connect the outputs of sensors to each port as shown in the above circuit If you want to use Alarm Input the types of sensors must be selected in OSD menu The sensor types are divided into Normal Open and Normal Close If wrong sensor types are selected alarms should be activated reversely to sensor inputs NormalOpen Output Voltage is high state when sensor is...

Страница 19: ...ur controller manual if the camera can not be controlled properly The operation of this manual is based on the standard Pelco Controller Check Points for Preset and Pattern Function before Operation z Check fully how to operate preset function and pattern function with your controller or DVR in advance to operate the camera functions when using a controller or a DVR z Refer to the following table ...

Страница 20: ...onRelayOutput GoPreset 167 SettingZoomProportionalFunctiontoON SetPreset 167 SettingZoomProportionalFunctiontoOFF GoPreset 170 SettingCameraBLCModetoOFF GoPreset 171 SettingCameraBLCModetoON GoPreset 174 SettingCameraFocusModetoAUTO GoPreset 175 SettingCameraFocusModetoManual GoPreset 176 SettingCameraFocusModetoSEMI AUTO GoPreset 177 SettingDay NightModetoAUTO GoPreset 178 SettingDay NightModetoN...

Страница 21: ...etitively between two preset positions at programmed speeds When a swing function runs the camera moves from the preset assigned as the 1st point to the preset assigned as the 2nd point in CW Clockwise direction Then the camera moves from the preset assigned as the 2nd point to the preset assigned as the 1st point in CCW Counterclockwise direction In case that the preset assigned as the 1st point ...

Страница 22: ... Joystick and the preset movement can be memorized in a pattern After a pattern is programmed the remaining storage is displayed in progress bar on the screen To save the recording press NEAR key and to cancel press FAR key Method2 ProgramminginOSDMenu Seethesection HowtouseOSDMenu z Running Patterns Method1 RunPattern PatternNO Method2 GoPreset PatternNO 130 ex RunPattern2 RunPattern 2 ex RunPatt...

Страница 23: ...efines a specific activity Preset Pattern Swing and Group to be performed in the event that the power to the camera is cycled This function enables the user to resume after turning on power the last action being executed before turning off the power Most of actions such as Preset Pattern Swing and Group are available for this function but Jog actions are not available to resume z AutoFlip In case ...

Страница 24: ...mode Local mode The Global mode is that WB and or AE are is set up totally and simultaneously for all presets The Global parameter setup such as WB and AE can be done in ZOOM CAMERA SETUP menu The Local mode is that WB and or AE are is set up independently or separately for each preset The Local parameter setup for WB and AE can be done in each preset setup menu Each Local parameter such as WB and...

Страница 25: ...xx is memorized PRESETxxx When the camera reaches Preset xxx PATTERNx When Pattern x is in action SWG PRESETxxx When Swing x is in action Displays both of Swing number and Preset number z ActionTitle UNDEFINED When a undefined function is called to run z PresetLabel Displays preset labels when the camera arrives at presets z AlarmInformation Displays activated alarms This information shows current...

Страница 26: ...Down of the joystick in the controller z To save changes press NEAR key z To cancel changes press FAR key Main Menu SPEED DOME CAMERA SYSTEM INFORMATION DISPLAY SETUP DOME CAMERA SETUP SYSTEM INITIALIZE EXIT zSystem Information Displays the system information and configuration The system setting can not be changed using the OSD menu and the information is for reference only zDisplaySetup Enables t...

Страница 27: ...o degree vertical the amount of tilt from zero degree horizontal and current compass direction Also identifies the amount of the zoom magnification zActionTitle ON OFF AUTO Identfies Actions SET PRESET xxx PRESET xxx PATTERN x SWG PRESET xxx UNDEFINED zPresetLabel ON OFF AUTO Displays the preset labels when the camera arrives at presets zAlarmI O ON OFF AUTO Displays the activated alarms This info...

Страница 28: ... the system To protect privacy MAX 4 Privacy Masks can be created on the arbitrary position to hide objects such as windows shops or private house With the Spherical Coordinates system powerful Privacy Zone Mask function is possible A mask area will move with pan and tilt functions and automatically adjust in size as the lens zooms telephoto and wide z Mask NO 1 4 Selects a Mask number to program ...

Страница 29: ...etup EDIT MASK 1 ADJUST MASK WIDTH ADJUST MASK HEIGHT NEAR SAVE FAR CANCEL Move your camera to an area to mask Then a mask and the menu to adjust the mask size will be displayed Adjusts the mask size Use the joystick or the arrow buttons of your controller to adjust mask size z Left Right Adjusts the mask width z Up Down Adjusts the mask height OSD MENU 4 ...

Страница 30: ...t presets Focus data is memorized in each preset in advance and the camera calls focus data in correspondence with presets as soon as camera arrives at presets It should shorten time to get focuses Focus mode automatically changes to Auto Focus mode when jog operation starts z Digital Zoom ON OFF Sets the digital zoom functions to ON OFF If this is set to OFF the optical zoom function runs but the...

Страница 31: ...Mode AUTO MANUAL Retains color balance over a color temperature range In auto mode this feature automatically processes the viewed image In Manual mode Red and Blue level can be set up manually z Red Adjust 10 60 Adjusts the picture output in the red range z Blue Adjust 10 60 Adjusts the picture output in the blue range OSD MENU 4 ...

Страница 32: ...he object in the sensitive area is properly exposed z Day Night AUTO1 AUTO2 DAY NIGHT Sets Day Night mode You can increase sensitivity in low light conditions by switching to black white mode removing the IR cut filter or turning on DSS Color mode is preferred in normal lighting conditions The time to change a mode is 10 sec AUTO1 Mode The sensitivity to change a mode is fixed AUTO2 Mode The sensi...

Страница 33: ...he duration of the electronic shutter If Iris is set to Manual and Shutter Speed is set to ESC Shutter Speed has higher priority If Shutter Speed is set to A Flicker to remove Flicker Shutter Speed should be set to 1 100 sec for NTSC and 1 120 for PAL zAGC OFF NORMAL HIGH Sets AGC This setting enhances image brightness automatically in case that luminance level of image signal is too low zSSNR OFF...

Страница 34: ...ication goes up the pan tilt speed goes down zJog Direction INVERSE NORMAL Sets the Jog Direction If this is set to Inverse the view direction in the screen is same as the direction of joystick If this is set to Normal the view direction in the screen is the reverse dirction of joystick zFreeze inPreset ON OFF Sets Frame Freeze Function This feature freezes the scene on the monitor when going to a...

Страница 35: ...ssigned function automatically if there is no PTZ command during the programmed Wait Time z Wait Time 1 59 sec 1 180 min Wait Time can be programmed from 1 second to 180 minutes z Park Action HOME PRESET PATTERN SWING GROU P PREV ACTION This feature defines the activity when the camera parks If Park Action is set to HOME the camera moves to the home position which is memorized when the system boot...

Страница 36: ... SWING GROUP Selects an action to run when a sensor signal is input z Hold Time ENDLESS 1 59 SEC 1 180 MIN Sets the time period for the action which is run by external sensor activation After the time period passes the action pre defined in Post Action runs sequentially in succession to the action by external sensor activation If this option is set to ENDLESS Post Action does not activate z Post A...

Страница 37: ...ns MAX 10 alphanuberic characteristics are allowed zRelayOut Defines the relay output zCAMAdjust GLOBAL LOCAL WB White Balance and AE Auto Exposure can be set up independently for each preset There are 2 modes Global mode Local mode The Global mode is that WB and or AE are is set up totally and simultaneously for all presets The Global parameter setup such as WB and AE can be done in ZOOM CAMERA S...

Страница 38: ...tangular is the cursor As soon as finishing selecting an alphabet or a number the cursor moves to the next digit With Left Right Up Down of the joystick move to a desired Alphabet or a desired number in the Alphanumeric set To select a desired Alphabet or a desired number press the NEAR key If you want to use a blank select the double quotation mark If you want to delete an Alphabet or a number us...

Страница 39: ...t to the preset assigned as the 2nd point in CW Clockwise direction Then the camera moves from the preset assigned as the 2nd point to the preset assigned as the 1st point in CCW Counterclockwise direction In case that the preset assigned as the 1st point and the preset assigned as the 2nd point are same or only 1 Preset position is assigned the camera turns on its axis by 360 in CW direction and ...

Страница 40: ...n Runs the Pattern for the test purposes to check if it works properly z Edit Pattern Edits the selected pattern With the Joystick of your controller move the camera to the start position with an appropriate zoom magnafication To start the pattern recording press NEAR key To exit press FAR key Move camera with joystick of controller or run preset function to memorize the path mostly curve path in ...

Страница 41: ...R EDIT END zGroupNumber 1 8 Selects a Group number to edit If the selected Group number is not defined UNDEFINED will be displayed under the selected Group number zClearGroup CANCEL OK Deletes the data of the selected Group zRunGroup Runs the Group for the test purposes to check if it works properly zEditGroup Edit the selected Group Press Near key when the cursor is at NO to start editing the sel...

Страница 42: ... the cursor After finishing editing a Action press Near key to go to the previous upper level menu Step Move the cursor Up Down to select an Action number and repeat Step Step to keep editing the selected Group Define Action Dwell time and Option Note that the dark rectangular is the cursor Move the cursor Left Right to select an item and move cursor Up Down to change each parameter zAction NONE P...

Страница 43: ...Manual 51 57 EDIT GROUP 1 NO ACTION DWELL OPT 1 PRESET 1 00 03 360 2 NONE 3 NONE 4 NONE 5 NONE SAVE CANCEL After finishing setting up press FAR key to exit Then the cursor will move to SAVE Press Near key to save the data OSD MENU 4 ...

Страница 44: ...Shutter ESC z Motion Parameters AGC HIGH Motion Lock OFF SSNR MIDDLE Power Up Action ON SENS UP AUTO 4 Frame Auto Flip ON Jog Max Speed 120 sec z User Defined Data Jog Direction INVERSE Preset 1 128 Undefined Freeze In Preset OFF Swing 1 8 Undefined Park Action OFF Pattern 1 4 Undefined Alarm Action OFF Group 1 8 Undefined zClearAllData Deletes all configuration data and the system issettothefacto...

Страница 45: ...tical Zoom 10 Digital Zoom ForcalLength F1 8 f 3 8 38mm AngleofView H 51 2 Wide 5 58 Tele V 39 3 Wide 4 27 Tele ZoomSpeed 1 67 sec Wide to Tele 1 75 sec Wide to Tele MinimumIlluminance 0 7 Lux Color 0 02 Lux B W 50 IRE Day Night Auto Day Night ICR Focus Auto Manual SemiAuto Iris Auto Manual ShutterSpeed 128 1 120000 sec AGC Normal High Off WhiteBalance Auto Manual Red Blue Gain Adjustable 1800 K 1...

Страница 46: ...h The Combination of Preset Pattern and Swing Other Pan Tilt Functions Auto Flip Auto Parking Power Up Action and etc Communication RS 485 Protocol Pelco D Pelco P Selectable OSD English Menu PTZ information etc Sensor Input 3 Inputs Photo Coupler Type DC 5V 12V Alarm Outputs 1 Output Relay Output MAX Load DC24V 1A AC125V 0 5A Fan Always ON Heater Operation Start from Internal Temperature 10 C 0 C...

Отзывы: