background image

&KDSWHU&4XLFN6HWXS

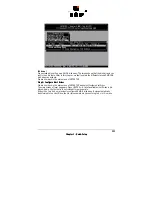
Press <ENTER>.

GDTSETUP offers two different Hot Fix types: A 

private

 Hot Fix drive is only available for one

specific disk array. A Hot Fix drive in a Hot Fix 

Pool

 can be made available to several disk

arrays (presuming that the capacity fits). In our example we choose the 

Private Hot Fix

 drive

and press <ENTER> .

Attention: 

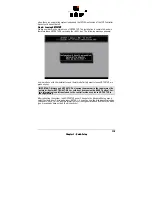
By turning a Logical Drive into a Hot Fix drive, all its data is irretrievably lost.

Содержание Chapter C

Страница 1: ... KDSWHU 4XLFN 6HWXS KDSWHU 4XLFN 6HWXS ...

Страница 2: ...ing of four identical SCSI hard disks and adding one Hot Fix SCSI hard disk Examples 3 and 4 are not applicable to ICP Controllers without the RAIDYNE firmware Even if you cannot practically carry out all the examples yourself we suggest reading them all the same because they will give you a better understanding of how the controllers of the GDT RP Series work The following table tells you which e...

Страница 3: ...hard disks or removable hard disks this version allows disk chaining several drives can be linked in order to form a single large drive and the configuration of Array Drives of the types data striping RAID 0 and disk mirroring or duplexing RAID 1 RAIDYNE Firmware installed on the GDT65xyRP controllers In addition to disk chaining RAID 0 and RAID 1 RAIDYNE allows you to install and control Array Dr...

Страница 4: ...data is lost 5 LVN 0LUURULQJ LVN XSOH LQJ All data is stored twice on two identical hard disks When one hard disk fails all data are immediately available on the other without any impact on the performance and data integrity We talk about Disk Mir roring when two hard disks are mirrored on one SCSI channel If each hard disk is connected with a separate SCSI channel this is called Disk Duplexing ad...

Страница 5: ... redundancy In situations with many small data blocks the parity hard disk becomes a throughput bottle neck With large data blocks RAID 4 shows significantly improved per formance 5 DWD 6WULSLQJ ZLWK 6WULSHG 3DULW Unlike RAID 4 the parity data in a RAID 5 disk array are striped in all hard disks The RAID 5 disk array delivers a balanced throughput Even with small data blocks which are very likely ...

Страница 6: ...ows you to set up single disks or complex disk arrays with simple and user friendly installation procedures Little previous knowledge is needed to be able to use GDTSETUP efficiently It is only necessary to understand the hierarchy levels in the ICP Con troller firmware which are the same for both firmware versions Standard and RAIDYNE For the user s convenience the GDTSETUP program is available i...

Страница 7: ...s EXPRESS Setup mode This mode does not require any previous knowledge If you choose this function GDTSETUP carries out the complete installation entirely on its own providing you for example with a fully operational RAID 5 Array Drive with optimized settings for in stance with all SCSI features of a given drive activated After selecting Configure Host Drives select Create new Host Drive ...

Страница 8: ...d disks i e drives which are not yet part of other Host Drives Use the SPACE bar to select the desired hard disks they are marked with an On the right side GDTSETUP offers highlighted the possible configurations with these drives Pressing ENTER ends the selection ...

Страница 9: ...r choosing a configuration type for an Array Drive GDTSETUP displays a security re quest After the confirmation the Host Drive is automatically built up and configured After leaving GDTSETUP the parity information is generated ...

Страница 10: ... IDs without loosing the data and the information on a specific disk array HYHO On this level of hierarchy the firmware forms the Array Drives Depending on the firmware installed this can be Single Disks one hard disk some vendors call it JBOD Just A Bunch Of Drives Chaining Sets concatenation of several hard disks RAID 0 Array Drives RAID 1 Array Drives RAID 1 Array Drives plus hot fix drive RAID...

Страница 11: ...d are either operated through the ASPI interface Advanced SCSI programming Interface MS DOS Windows Novell NetWare or OS 2 or are directly accessed from the operating system UNIX Windows NT For more information on how to use these devices please refer to the corresponding chapters of this manual Note hard disks and removable hard disks are called Direct Access Devices However there are some Not Di...

Страница 12: ...ind the version number You may now ask what are the differences between the two GDTSETUP variants They are small The GDTSETUP variant loadable from disk under MS DOS also additionally allows the partitioning of Host Drives which is not possible with GDTSETUP loaded from the Flash RAM Loading GDTSETUP from the Flash RAM is pretty easy since there is noth ing more required to configure the disk arra...

Страница 13: ...found to be connected to SCSI cables even though GDTSETUP only allows you to work on Direct Access Devices and therefore not on tape drives DATs CD ROMs etc The screen shows you the channel to which a SCSI device is connected which SCSI ID the drive has the entry SCSI I O Processor stands for the corresponding SCSI channel of the ICP Controller It has the default setting ID 7 as explained in chapt...

Страница 14: ... initialized before This is not relevant for our examples The Configure Disk menu appears which shows various options For our example we choose the Initialize Disk menu option and press ENTER The parameters within this menu can be changed by pressing ENTER and selecting the new setting ...

Страница 15: ...s turbance or obstruction A participant should therefore vacate the bus if he does not need it For reasons of performance it is particularly important to guarantee a high degree of overlapping of the actions on the SCSI bus This high degree of overlapping can be achieved if a SCSI device is allowed to disconnect thus leaving the bus to be used by other partici pants If there is only one SCSI devic...

Страница 16: ...l 1 and see that the initialization status of the SCSI device has changed 6WHS RQILJXUH RJLFDO ULYHV We now leave level 1 by pressing the ESC key and are back in the main menu Now with the cursor keys n and p select Configure Logical Drives and go to level 2 by pressing ENTER ...

Страница 17: ...SWHU 4XLFN 6HWXS The main screen of level 2 appears Move the selection bar to Create new Logical Drive and press ENTER Note The already existing Logical Drive in this list has no relevance for our example ...

Страница 18: ...y reasons you will be asked again if you want to use the selected disk to create a Logical Drive As we are sure of our choice we confirm with Yes GDTSETUP allows you to limit the hard disk size for this Logical Drive This becomes interesting when you configure disk ar rays For this example we use the full capacity and press ENTER ...

Страница 19: ...ox is closed and we are back in the main menu of level 2 As you can see we have already created a new Logical Drive of the type Disk The name of the Logical Drive is assigned automatically and contains the channel description and the ...

Страница 20: ...rives menu thus we go directly to the Configure Host Drives menu and have no Step 4 6WHS RQILJXUH RVW ULYHV We are now back in the main menu of GDTSETUP and select Configure Host Drive The main screen of level 4 appears Press ENTER A list of available Host Drives is dis played Again the first entry is not relevant for our example At position 1 we find our previously configured Logical Drive It was...

Страница 21: ... t believe we let you do redundant homework By the way if you have loaded GDTSETUP from the Flash RAM CTRL G the Partition Drive option will be missing in this menu The reason is that partitioning makes no sense when there is not an operating system loaded and the INT13H extension of the ICP Con troller has not yet been activated 6WHS HDYLQJ 76 783 We are now back in the main menu of GDTSETUP The ...

Страница 22: ...d GDTSETUP by leaving the program in the regular way do not warm boot with CTRL ALT DEL or cold boot by pressing the RESET button Cer tain information is only transferred to the controller when you leave GDTSETUP in the regular way The Host Drive we have configured in this example is now ready for the installation of the desired operating system ...

Страница 23: ...ve been properly installed Step 1 of the installation is the same as in the first example therefore we do not explain it again Step 2 regards the initialization of the second SCSI device Proceed as described in the first example 6WHS RQILJXUH RJLFDO ULYHV We now leave level 1 by pressing the ESC key and are back in the main menu Now with the cursor keys n and p select Configure Logical Drives and ...

Страница 24: ...he already existing Logical Drive in the first position of this list has no relevance for our example The second entry was created before Select the initialized hard disk with the SPACE bar it becomes marked with an and press ENTER ...

Страница 25: ...ogical Drive As we are sure of our choice we confirm with Yes GDTSETUP allows you to limit the hard disk size for this Logical Drive This becomes interesting when you configure disk ar rays For this example we use the full capacity and press ENTER The dialog box is closed and we are back in the main menu of level 2 ...

Страница 26: ...aturally you may change the name This concludes the installation on level 2 Now press the ESC key to leave this screen In the next step it is our objective to add the third Logical Drive in this list as a mirroring partner to the second Logical Drive of the list thus configuring a RAID 1 disk array 6WHS RQILJXUH UUD ULYHV We now leave level 2 by pressing the ESC key and are back in the main menu N...

Страница 27: ...he first entry in this list has no relevance for our example Move the selection bar to the second entry and press the SPACE bar The entry is marked with an M for Master This means that the data from this Logical Drive are copied to the second Logical Drive which we will select next ...

Страница 28: ... choice When the Logical Drive is selected confirm with ENTER GDTSETUP displays now a list of possible RAID levels available with the number of Logical Drives selected In our case it is RAID 0 data striping and RAID 1 Move the selection bar to RAID 1 and press ENTER Note RAID levels 4 5 and 10 are only available with ICP Controllers which are equipped with the RAIDYNE firmware ...

Страница 29: ...ve created a new Array Drive of the Type RAID 1 Its state is build When we leave GDTSETUP at the end of this example you will see that the ICP Controller automatically copies the data of the first Logical Drive our master to the second Logical Drive During this synchronization the RAID 1 array is fully operational ...

Страница 30: ...s with the RAIDYNE firmware The controller we use is the ICP Controller with three SCSI channels 0 0H HF FK KD DQ QL LF FD DO O 6 6W WU UX XF FW WX XU UH H O OH HF FW WU UL LF FD DO O R RQQ QQH HF FW WL LR RQ QV V Whether to install the SCSI hard disks into the computer case or into a separate disk sub system enclosure strongly depends on your individual hardware equipment therefore we shall not d...

Страница 31: ...ctors of the cable have been pressed matching the correct key especially when using home made cables We recommend terminating the SCSI cables at their ends opposite to the controller by means of so called external terminator packs These packs receive their terminator power directly from the cable In this case the termination is to be removed from or disabled on all hard disks In order to get the b...

Страница 32: ...nothing more required to configure the disk arrays User s who have for instance an NT installation without a DOS partition will highly appreciate this Flash RAM resident GDTSETUP For our example it is not relevant whether we load GDTSETUP from the Flash RAM or from disk Now load GDTSETUP The first menu asks you to select the desired ICP Controller In our example there is only one ICP Controller in...

Страница 33: ...state the SCSI names of the drives the Read Write state RW Read Write the gross capacity membership in a Logical Array or Host Drive Use the cursor keys n and p to select the drive you wish to initialize We start with the first drive of the list With this drive selected press ENTER Note On Channel B SCSI IDs 0 and 5 are devices which are not relevant for our example The Configure Disk menu appears...

Страница 34: ...onous transfer rate can be limited This limitation may become neces sary if a particular SCSI cabling does not allow the maximum rate the drive and the con troller could achieve In our example we leave the rate at 20 0 MB s for Wide SCSI at 20 0 MB s and Wide Ultra SCSI at 40 0 MB s Note In order to select a transfer rate above 10 0 MB s the Protocol has to be set to SCSI III 3 Disconnect Enable T...

Страница 35: ...u GDTSETUP displays a warning on the destruction of all data This implies two different evaluations according to the drive s current state and the options you have selected 1 First Initialization of the SCSI Device In this case the warning must be taken seriously If the drive was previously connected to a different controller e g NCR etc and still contains data this data will be lost now 2 The SCS...

Страница 36: ...elect the device with the cursor keys n and p and press the ENTER key Choose the settings shown above Carry out the initialization When the initialization of the last SCSI device has been completed the screen should look as follows a small i i initialized must follow the SCSI ID of each SCSI device ...

Страница 37: ...there are initialized 6WHS RQILJXUH RJLFDO ULYHV We now leave level 1 by pressing the ESC key and are back in the main menu Now with the cursor keys n and p select Configure Logical Drives and go to level 2 by pressing ENTER The main screen of level 2 appears Move the selection bar to Create new Logical Drives and press ENTER ...

Страница 38: ...rd disk with the SPACE bar it becomes marked with an and press ENTER For security reasons you will be asked again if you want to use the selected disk to create a Logical Drive As we are sure of our choice we confirm with Yes GDTSETUP allows you to limit the hard disk size for this Logical Drive This becomes interesting when you config ...

Страница 39: ...it It would be bad luck if the new drive only had 2067 MB GDTSETUP couldn t accept it To avoid this occuring you could limit the capacity of each drive to 2000 MB Any new 2 GB drive must have at least this capacity The 68 MB in our example would be lost For this example we use the full ca pacity and press ENTER The dialog box is closed and we are back in the main menu of level 2 ...

Страница 40: ...on method has a considerable impact on the disk array s performance because the data is written to the Logical Drives in stripes If the consecutive Logical Drive is controlled by another SCSI channel independent Logical Drive accesses become possi ble resulting in a high degree of overlapping After having completed these procedures for all five Logical Drives you will see the following screen This...

Страница 41: ...y Drive press ENTER Note The first entry in this list has no relevance for our example Move the selection bar to the second entry and press the SPACE bar The entry is marked with an M for Master This means that the disk array begins with this Logical Drive ...

Страница 42: ... bar again It is marked with an pressing the SPACE bar again undoes your choice Re peat this selection until all five Logical Drives are marked When the last Logical Drive is selected confirm with ENTER GDTSETUP now displays a list of possible RAID levels available with the number of Logical Drives selected ...

Страница 43: ...pure data striping without redundancy RAID 1 disk mirroring RAID 4 data striping with dedicated parity drive RAID 5 data striping with striped parity RAID 10 RAID 0 combined with RAID 1 In our case we take RAID 5 and press ENTER ...

Страница 44: ...press ENTER Note 32KB stripe size is suggested because in various performance tests it has proved to be the best value GDTSETUP displays a security request which we confirm with Y GDTSETUP allows you to limit the capacity of the disk array This may be of interest if your installation requires an exact size for a disk array Normally the full capacity is used In our example we press ENTER ...

Страница 45: ...k in the main menu of GDTSETUP 6WHS RQILJXUH RVW ULYHV We are now back in the main menu of GDTSETUP and select Configure Host Drives The main screen of level 4 appears Press ENTER A list of available Host Drives is dis played Again the first entry is not relevant for our example At position 1 we find our previously configured RAID 5 disk array It was automatically transformed into a Host Drive thu...

Страница 46: ...would have lead you to exactly the same menu as the Express Setup mode But this example is an exercise which should help you to gain a better understanding of how the ICP Controller and GDTSETUP work By the way if you have loaded GDTSETUP from the Flash RAM CTRL G the Partition Drive option will be missing in this menu The reason is that partitioning makes no sense ...

Страница 47: ...eave GDTSETUP we press any key IMPORTANT Always end GDTSETUP by leaving the program in the regular way do not warm boot with CTRL ALT DEL or cold boot by pressing the RESET button Cer tain information is only transferred to the controller when you leave GDTSETUP in the regular way After rebooting the system load GDTSETUP anew Change to the Advanced Setup menu select Configure Array Drives and pres...

Страница 48: ...r we can easily see that the 8 GB disk array is already built up 11 and that the estimated time for the build process is 31 minutes Note During the build process the disk array is fully operational but not yet redundant I e you could immediately start installing your desired operating system without having to wait until this process has finished ...

Страница 49: ...becomes ready fully redundant Now press ENTER and move the selection bar to the Parity Verify menu Press ENTER RAIDYNE now checks the correctness of the redundancy information i e calculates the redundancy information anew and compares it with the already existing information ...

Страница 50: ... FDISK To create disk activity write a small batch program which copies data from one directory of this partition to another While the copy process is going on we simulate a drive failure of drive DISK_B2 by removing the drive s DC power supply cable If you choose to let another drive fail please keep in mind the information on the SCSI bus termination given in Step 1 Now we can observe how RAIDYN...

Страница 51: ...n the physical drive which has actually failed Important Even if we reconnected the power supply to DISK_B2 before loading GDTSETUP DISK_B2 would not be included in the disk array again If you decide to use the failed hard disk again it is best if you reconnect the drive to the power supply and do a cold boot ...

Страница 52: ...nt menu Press ENTER GDTSETUP recognises the previously failed drive again it was not really defective and asks if it should be integrated into the disk array again Answer Yes and the disk array changes its state into rebuild After leaving GDTSETUP the controller begins the reconstruction of the data of the failed drive ...

Страница 53: ...efective drive is connected is temporarily halted that is for the time necessary for replacement thus enabling you to disconnect the defective drive from the SCSI bus without any risk After the replacement the SCSI channel halt is lifted again and RAIDYNE automatically begins to rebuild the new drive The halting and release of the GDT SCSI channel is controlled by GDTMON which is available for mos...

Страница 54: ...nd secondly because it does not imply any mechanical or electrical interventions on the disk array as the Hot Plug method does We shall explain GDTMON and the Hot Plug method more thoroughly later in this manual DPSOH 5 LVN UUD V LWK D RW L ULYH This example is applicable to ICP Controllers with the RAIDYNE firmware What we call Hot Fix drives is referred to as Host Spare drives in some literature...

Страница 55: ...now displays a list of possible RAID levels available with the number of Logical Drives selected RAID 0 pure data striping without redundancy RAID 1 disk mirroring RAID 4 data striping with dedicated parity drive RAID 5 data striping with striped parity RAID 10 RAID 0 combined with RAID 1 ...

Страница 56: ...s is the size of the stripes into which the data is di vided The default is 32KB which we leave for this example and therefore press ENTER Note 32KB stripe size is suggested because in various performance tests it has proved to be the best value GDTSETUP displays a security request which we confirm with Y ...

Страница 57: ...llation requires an exact size for a disk array Normally the full capacity is used In our example we press ENTER We succeeded in setting up a RAID 5 disk array The screen shows that the disk array is cur rently in an idle state Later in this chapter we shall explain the different states a RAIDYNE disk array can assume ...

Страница 58: ...s apt to serve as a Hot Fix drive one criterion for this suitability is the drive s capacity i e it has to be large enough So do not be surprised if you do not find all the drives you would have expected during later installations GDTSETUP knows which drives are suited to be used as Hot Fix drives In our example GDTSETUP offers the Logical Drive we have omit ted during the configuration of the Arr...

Страница 59: ...available for one specific disk array A Hot Fix drive in a Hot Fix Pool can be made available to several disk arrays presuming that the capacity fits In our example we choose the Private Hot Fix drive and press ENTER Attention By turning a Logical Drive into a Hot Fix drive all its data is irretrievably lost ...

Страница 60: ... to enable RAIDYNE to check the consistency of the setup RAIDYNE substitutes a failed hard disk with a Hot Fix drive only if the array was in a ready state before the failure Or in other words a Hot Fix drive can only be activated if the corresponding disk array was in a state of data redundancy at the moment of failure Important The following partial step can only be performed if the disk array i...

Страница 61: ...viously no other hard disk may fail until all data is entirely reconstructed on the Hot Fix drive because up to that moment the system operates without redundancy How is this situation reflected in GDTSETUP What has happened to the failed drive To answer these and other questions we load GDTSETUP and check We go directly to the menu Configure Array Drive menu As expected the disk array is in the r...

Страница 62: ... viously failed drive was connected to and to the DC power supply Before switching on the system again check that the SCSI termination of the new drive is identical to the old one After switching on the system again load GDTX000 and GDTSETUP and initialize the new drive In the next step we setup a new Logical Drive ...

Страница 63: ...ant to use as a new Hot Fix drive Change to the Configure Array Drives menu Select our Disk Array and press ENTER Select Add Hot Fix Drive and thereafter DISK_B3 Select Private Hot Fix and press ENTER Press F2 to get the configuration information on this disk array ...

Страница 64: ... 0D DQ Q D DU UG G L LV VN NV V 6 6K KR RX XO OG E G EH H Q QW WH HJ JU UD DW WH HG G Q QW WR R W WK KH H L LV VN N UU UUD D To answer this question let us have a look at the delimiting parameters that is the maxi mum and minimum number of drives The maximum number of physical drives in a disk array is determined by the number of physical drives the ICP Controller can control with a two channel IC...

Страница 65: ...ed drive RAID 4 or to all drives RAID 5 If one drive should fail the data of the defective drive can be reconstructed on the basis of the normal user data and the previously calcu lated parity data RAID levels 4 5 and 10 can tolerate the failure of one drive just as RAID 1 but in comparison to the latter RAID 4 RAID 5 or RAID 10 are less expensive As already mentioned before the entire disk array ...

Страница 66: ...and and Error G GO OH H 6 6W WD DW WH H This state is characterized by the fact that the redundant information of the disk array has never been entirely created The disk array is in this state after its first configuration and until you quit GDTSETUP If an error should occur while the array is in the build state the array returns to the idle state exception if during build mode the dedicated drive...

Страница 67: ...nd the transitions from one state to another Some of these states may become the addendum patch e g build patch ready patch This word indicates that the original Array Drive went through a significant procedure I e the parity information was recalculated anew Or the Array Drive has been patched from the error state into the fail state This may be come extremely helpful in a situation where two Log...

Страница 68: ... KDSWHU 7 8VHU V 0DQXDO 5HSODFHPHQW HLWKHU PDQXDOO RU WKURXJK KRW IL PHWKRG ...

Отзывы: