background image


Installing Windows Driver 


1.

  Launch the Windows 2000/XP/2003/2008/Vista/7 (32/64 bit) driver 

setup program. It is located at :


CD: \Napdos\multiport\windows\VxCard_W7_Vx.xx.xx.exe 

http://ftp.icpdas.com/pub/cd/iocard/pci/napdos/multiport/windows/


2.

 Click the 

“Next>”

 button to start the installation.


3.

 Click the 

“Next>”

 button to install the driver into the default folder.


4.

 Check the 

“Create a desktop icon”

 and click the

 “Next>”

 button.


5.

 Select the

 “NO, I will restart the computer later”

 and click the 

“Finish”

 button.


For installing driver on other systems, please refer to: 

http://ftp.icpdas.com/pub/cd/iocard/pci/napdos/multiport/man
ual/


Installing the Hardware 


Follow these steps: 

1.

  Shut down and power off your computer. 

2.

  Remove the cover from the computer. 

3.

  Select an unused PCI/PCI Express slot. 

4.

  Carefully insert your VXC/VEX card into the PCI/PCI Express slot. 

5.

  Replace the PC cover. 

6.

  Power on the computer. 

7.

  Follow the prompt message to finish the Plug&Play steps. 

8.

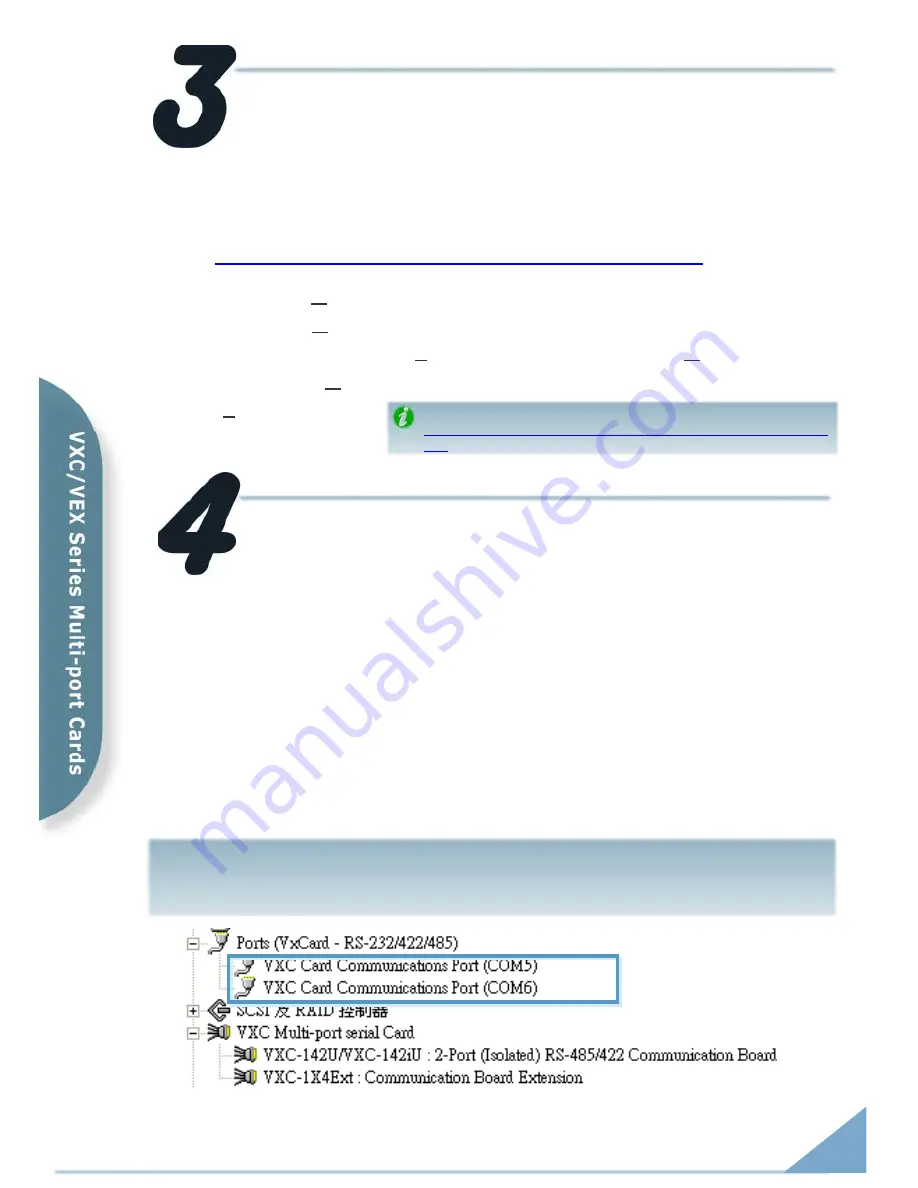
  Make sure the com ports installed are correct as follows: 


i.


Select 

“Start 

Æ

 Control Panel”


and then double click the


“system”


icon. 

ii.


Click the


“Hardware”

 tab and then click the 

“Device Manager”


button. 

iii.


Check the COM ports of VXC/VEX card which listed correctly or not. 


VXC-112(i)AU/142(i)AU/182iAU, VEX-112(i)/142(i) Quick Start Guide 

3

Содержание VEX-112

Страница 1: ...Selector to 0x05 1 and 3 NO others OFF The setting forces the VXC VEX card to use COM5 and COM6 English Mar 2011 Version 1 2 What s in the shipping package Software CD Quick Start Guide This Document...

Страница 2: ...0x14 COM 20 21 OFF OFF OFF ON OFF ON OFF OFF Board ID 0x1E COM 30 31 OFF OFF OFF ON ON ON ON OFF Board ID 0x28 COM 40 41 OFF OFF ON OFF ON OFF OFF OFF Board ID 0x32 COM 50 51 OFF OFF ON ON OFF OFF ON...

Страница 3: ...ase refer to http ftp icpdas com pub cd iocard pci napdos multiport man ual Installing the Hardware Follow these steps 1 Shut down and power off your computer 2 Remove the cover from the computer 3 Se...

Страница 4: ...RTS 9 CTS 7 RTS 8 CTS 8 CTS 7 RTS 9 CTS 6 RTS RS 485 Cable Wiring VXC 142 i AU VXC 182iAU and VEX 142 i CN1 VXC Card CN1 Device PIN Signal PIN Signal 1 DATA 1 The RS 485 bus is a differential balance...

Страница 5: ...System 2 RxD 2 3 TxD TxD 3 2 RxD GND 5 5 GND DTR 4 6 DSR 1 DCD DCD 1 DSR 6 4 DTR RTS 7 8 CTS CTS 8 7 RTS RI 9 9 Self Test 1 Use the DN 09 2 optional to connect the VXC 112 i AU 142 i AU 182iAU or VEX...

Страница 6: ...i AU VEX 142 i RS 422 485 Pin Assignment Pin No Pin No Pin Assignment CN2 TxD 3 2 CN1 RxD CN2 RxD 2 3 CN1 TxD Pin Assignment Pin No Pin No Pin Assignment CN2 DATA 1 1 CN1 DATA CN2 DATA 2 2 CN1 DATA 6...

Страница 7: ...RS 422 485 3 Execute the Test2COM exe program Get the file from CD Napdos multiport utility http ftp icpdas com pub cd iocard pci napdos multiport utility 7 VXC 112 i AU 142 i AU 182iAU VEX 112 i 142...

Страница 8: ...pdas com products Accessories cable cable_selection htm i 7520 product page optional http www icpdas com products Remote_IO i 7000 i 7520 htm Documentation CD Napdos multiport manual http ftp icpdas c...

Отзывы: