Installation
23
BURNER ASSEMBLY
For the activities listed below, concerning the burner:
–
installation and fastening to the Boiler
–
the connection to the fuel supply
–
the electrical connections
–
the adjustments to be made
–
maintenance
–
the necessary checks.
refer to the Manual supplied with the appliance.
m
IMPORTANT
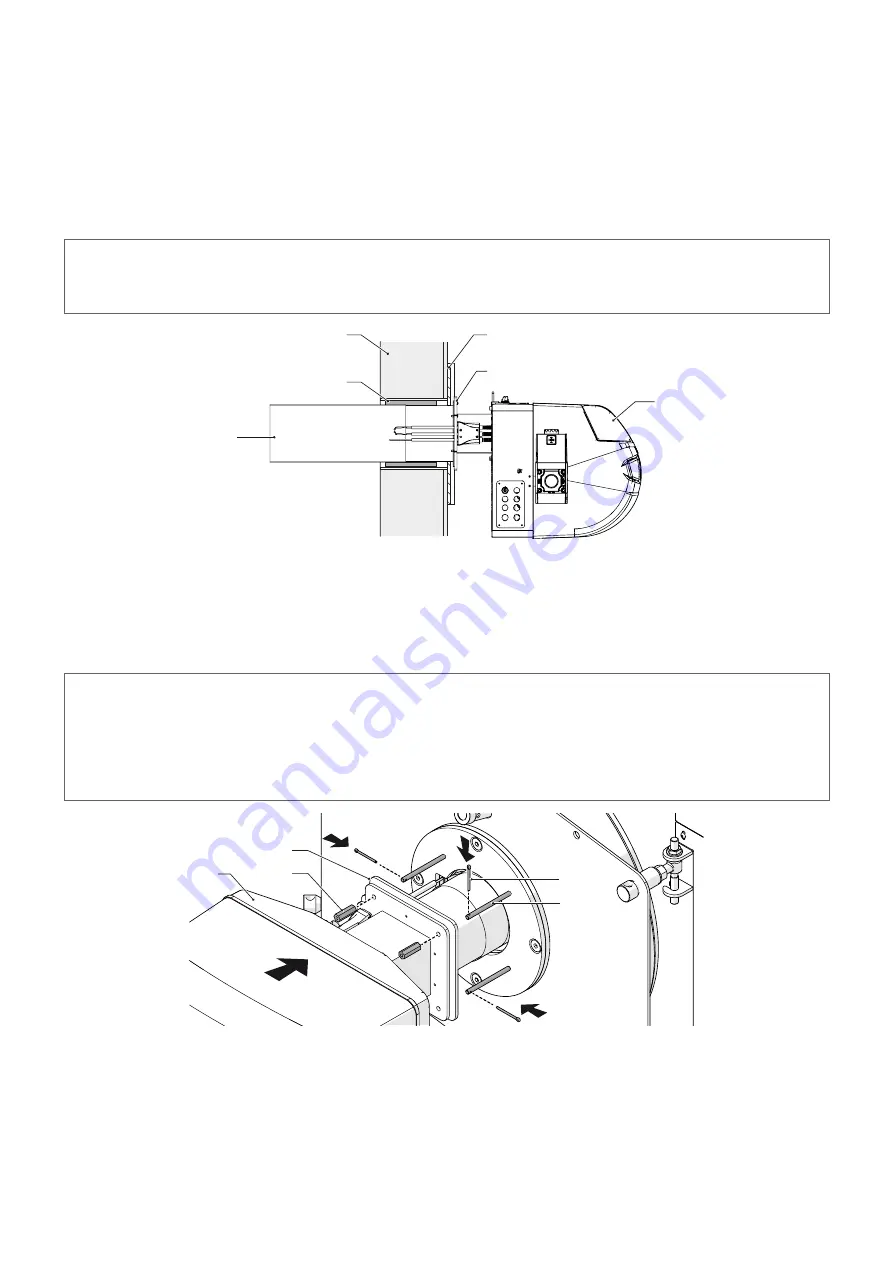
Insert the thermoceramic material strip, supplied with the insulating casing, into the gap between the burner
combustion head and the door. The strip must be wrapped around the combustion head for at least one entire
circumference, without having to fill the whole thickness of the gap.
1
4
5
3
2
6
1
Burner
2
Flange
3
Gasket
4
Door
5
Thermoceramic material
6
Combustion head
m
IMPORTANT
To assemble the burner of the
420
Boiler model proceed as follows:
–
insert the gasket and the flange (3) of the burner (1) in the four stud bolts (7) on the Boiler burner flange
–
screw the four hexagonal nuts (8) supplied
–
tighten the four hexagonal nuts (8) properly in order to lock the burner to the Boiler
–
insert the supplied cotter pin (9) into the hole in the stud bolts.
8
3
1
7
9


