background image

CD10022

CD20030

CD10522

CD20530

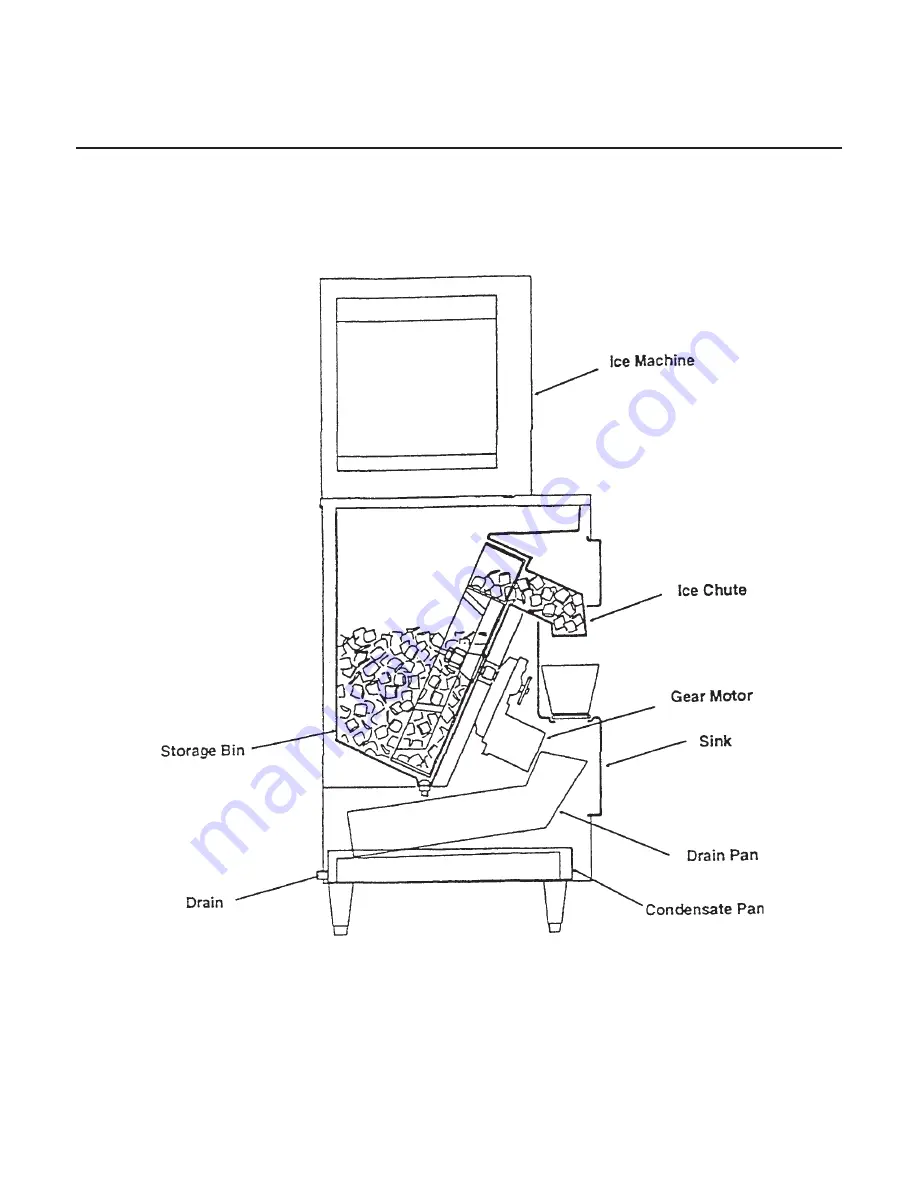
Operational Schematic

12

Содержание CD10022

Страница 1: ...TALLATION MANUAL HOTEL MOTEL DISPENSER Part Number 80701101 Print Date 6 00 GC Series Cuber Shown CD10022 CD10522 ICE Series Cuber Shown CD20030 CD20530 ICE O Matic 11100 East 45th Avenue Denver Colorado USA 80239 ...

Страница 2: ......

Страница 3: ... Ice from the cuber falls into the insulated hopper where it is stored until needed When a user pushes the dispense button a rotating wheel scoops the ice up and moves the ice to the top of the hopper where there is an outlet to the ice chute Table of Contents Specifications Limitaions Page 2 Installation Page 3 4 Kits Page 5 10 Final Check List Initial Start Up Electrical Sequence Page 11 Cleanin...

Страница 4: ...O Matics models GC 300 550 ECP 400 550 556 The CD20030 and CD20530 are compatible only with Ice O Matics models ICE 250 305 400 500 600 Must allow space for utility connections at the back Must have a drain 2 Model Dimensions with legs Basic Electrical Finish Ice Storage Capacity ARI MaxFuse Size Min Circuit Ampacity CD10022 CD10522 CD20030 CD20530 22 x30 x50 22 x30 x50 30 x30 x53 30 x30 x53 115 6...

Страница 5: ...at the bottom center of the back panel Connect 3 4 rigid tubing to this connection a vent is recommended for most installations Route the drain tubing to the building drain Follow all applicable plumbing codes Because the tubing will be very cold insulation is recommended Electrical There is an electrical junction box on the lower back panel Make the electrical connections there Follow all applica...

Страница 6: ...ace corner posts from the carton on top of the dispenser at the left and right corners Place the ice machine onto the dispenser The ice machine is heavy use of a mechanical hoist is recommended Carefully remove cardboard supports and allow ice machine to rest on dispenser gasket Follow all instructions for installation of the ice machine 4 ...

Страница 7: ...he timer and relay from the kit in the control box See typical layout of the parts in the following page 9 Remove wires 8 and 9 from the control box These wires will be re placed by different wires which will be identified as 8 and 9 10 Install the wires provided in the kit following the wiring diagram provided in the kit 11 Reconnect the electrical power supply to the machine 12 Place an ice cont...

Страница 8: ...CD10022 CD20030 CD10522 CD20530 Kits Coin Mechanism 15 Replace the control box cover front brace and decorative front cover The dispenser should now be restored to service 6 ...

Страница 9: ... the cylinder at the mark 4 Insert the brass fitting into the hole in the cover plate provided in the kit Place switch mounting bracket behind cover plate and over the brass fitting Next add the plastic washer over the brass fitting and behind the switch mounting bracket Using the locknut provided in the kit fasten the fitting in place with the flats in a vertical position Place thecylinder in the...

Страница 10: ...t is as follows When the key is inserted into the lock cylinder a portion of the key will extend beyond the brass fitting It is this part of the key that will actuate the kit micro switch Then when the dispense button swithch is depressed and held the machine will dispense ice 8 ...

Страница 11: ...then remove the cover plate which is located below the push button This cover plate is held in place 3 Now disconnect wire 8 and 9 from the normally open NO terminal of the dispense switch S2 and reconnect it to the normally open NO terminal of the room key microswitch Connect wire 6 supplied in the kit to the normally open NO terminal of the dispense switch S2 and to the common C of the room key ...

Страница 12: ...10522 CD20530 Key Card Kit Installation The Operation of this kit is as follows When the key card is inserted into the key card slot and the dispenser button switch is depressed and held the machine will dispense ice 10 ...

Страница 13: ...l dispense switch is released 6 Remove sink and check drain area for leaks If none replace sink 7 Fill out the warrenty registration form and place it in the mail 8 Give the operator the key s and instructions on the operation and maintenance of the product Check that the operator knows who to call for service and has the product service manuals for the machines Electrical Sequence Pushing the dis...

Страница 14: ...CD10022 CD20030 CD10522 CD20530 Operational Schematic 12 ...

Страница 15: ...o the drive shaft Remove the sweep arm by rotating it in the counter clockwise direction 6 Pull the wheel off the drive shaft and leave it in the dispenser 7 Mix a solution of 5 ounces of ice machine cleaner to 1 gallon of warm 95o F 115o F water Rubber gloves and eye protection to be worn Wash the entire bin area and the delivery area Use a clean brush or cloth 8 Rinse all areas washed with clean...

Страница 16: ...f household bleach to 2 gallons of 95o F 115o F water Wash all interior surfaces and the wheel withthe sanitizer solution Use a clean cloth 11 Allow the parts to air dry 12 Reassemble wheel and sweep arm onto drive shaft 13 Replace all panels 14 Reconnect power be sure ice machine is switched back on 14 ...

Страница 17: ...ne Check power supply Check replace vend switch No power Vend switch open Sink interlock switch open Ice door does not open Ice jams in chute Front panel not on all the way Gear motor open Relay does not operate Drive shaft broken Check replace sink interlock switch Machine is not level Reinstall panel Check replace gearmotor Check wiring Check power to relay Check timer Check wiring Check for bur...

Страница 18: ...ble Dispense Wheel 1 Remove all of the ice stored inside the dispenser bin and shut off the ice maker 2 Disconnect the electrical power 3 Remove ice machine from dispenser 4 Remove large dispenser top panel 5 Reach into opening locate the sweep arm which secures the wheel to the drive shaft Remove the sweep arm 6 Pull the wheel off the drive shaft and remove it from the dispenser 7 Revese steps to...

Страница 19: ...CD10022 CD20030 CD10522 CD20530 Standard With Room Key Kit or Card Kit Electrical Schematic 17 ...

Страница 20: ...CD10022 CD20030 CD10522 CD20530 Standard With Room Key Kit or Card Kit Electrical Schematic 18 ...

Страница 21: ...CD10022 CD20030 CD10522 CD20530 With Coin Mechanism Electrical Schematic 19 ...

Страница 22: ...________________ ____________________________ ____________________________ ____________________________ ____________________________ ____________________________ ____________________________ ____________________________ ____________________________ 11100 East 45th Avenue Denver Colorado USA 80239 Telephone 303 371 3737 Facsimile 303 371 6296 ...

Отзывы: