9
Precautions and preparations listed are for general knowledge and to define basic guidelines. Local codes and existing practices should be observed and preformed by a professional.
Due to Ice Air’s ongoing product development programs, the information in this document is subject to change without notice.
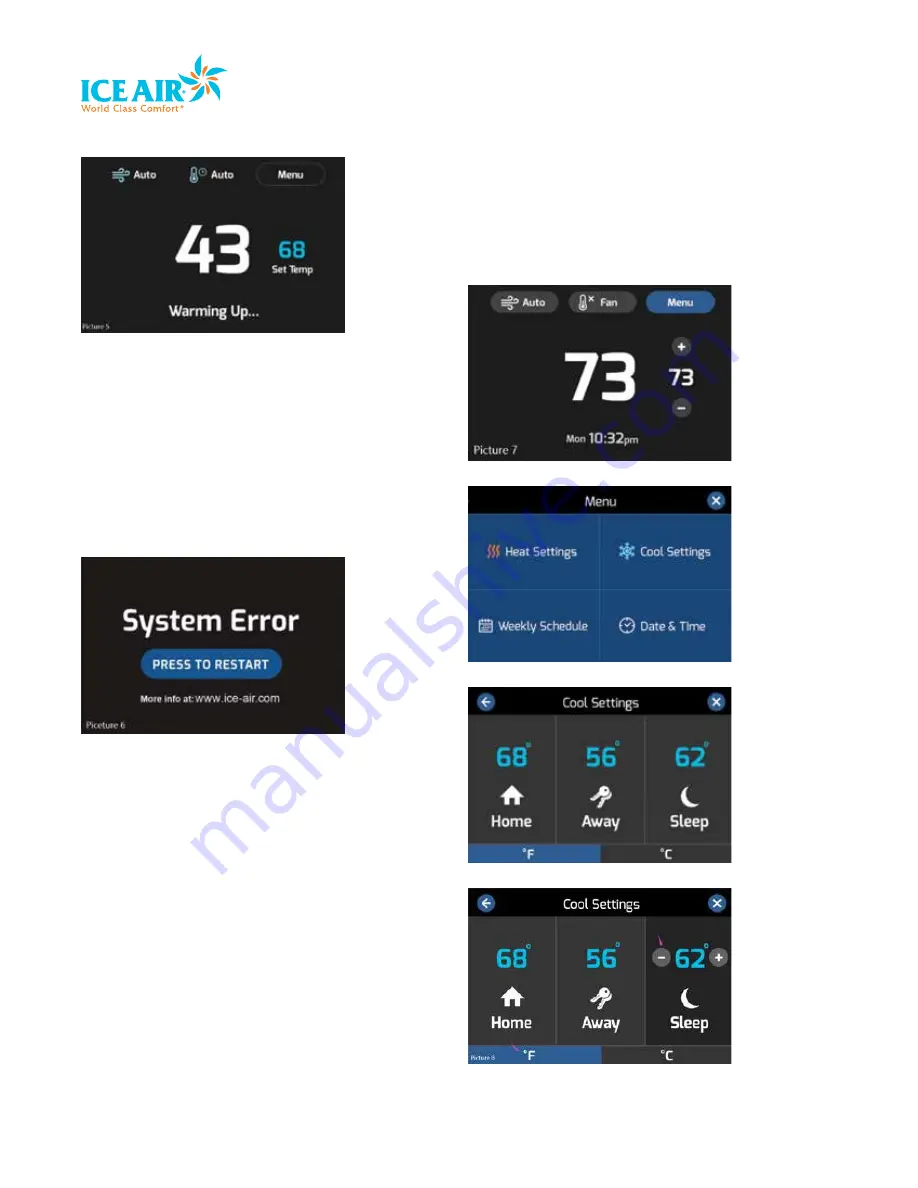
FIGURE 7
15. Alarm System
• When the unit has a fault occurred (for example, high pressure
protection triggered), if terminal “ALA” receives a signal for 10
seconds, then the unit will stop all output to the components, and
Figure 8 will be shown on the screen
• The user can try to restart the unit by touching the “PRESS TO
RESTART” icon on the screen
• If the system does not restart and operate normally, technical
support is available at www.ice-air.com
FIGURE 8
16. 7-Day Programmable Schedule
• Home, Away, and Sleep Temperature Settings
• Touch the
Menu
icon on the main screen, then enter the
sub-menu, and touch
Cool
Setting
to enter another sub-
screen for the cooling temperature setting (for example)
(see Figures 9, 10, 11)
• To set the expect temperature for various time periods, touch
the “+” or “-“ icons next to the temperature settings (see
Figures 12, 13)
• Users can switch from °F or °C by touching said icons
located at the bottom of the Settings page (see Figures 11,
12, 13)
• To exit and go back to the main screen, touch the X icon in
the upper right hand of the screen, or touch
to go back to
the previous screen (see Figures 11, 12, 13)
• The new setting are effective immediately for the week and will
display in the weekly schedule screen; User can see the new
settings when entering the weekly schedule screen
• Heat Settings function that same as the Cool Settings
• The default settings for the weekly temperature schedules is
noted in Table 3. New settings will overwrite previous settings
FIGURE 9
FIGURE 10
FIGURE 11
FIGURE 12


