iCatch US916Z Скачать руководство пользователя страница 12


9CH  DVR  Quick  Start  Guide  V1.0(N04)-  P.12 


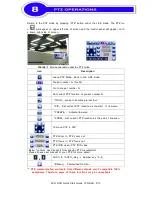
Switch  to  the  PTZ  mode  by  pressing  “PTZ”  button  under  the  LIVE  mode.  The  PTZ  ico

  will  appear  on  upper  left  side  of  screen  and  the  control  panel  will  appear  on  th

e  down  right  side  of  screen.   
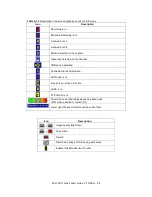
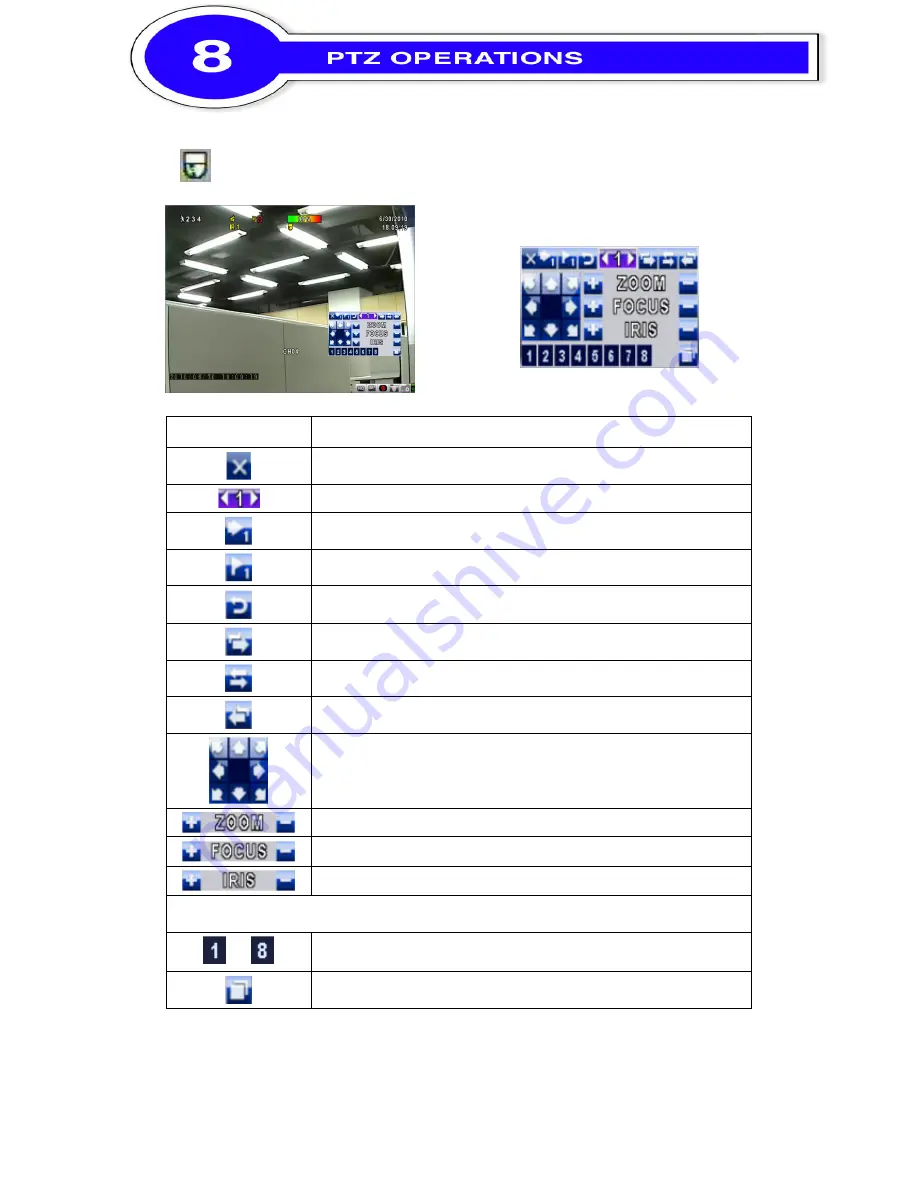


Table 8-1   

Mouse operation under the PTZ mode 

Icon 

Description 


Leave  PTZ  Mode

back  to  the  LIVE  mode 


Pre-set  number  N.  (0~255) 


Go  to  pre-set  number  N.   


Set  current  PTZ  location  at  pre-set  number  N.   


TOUR

」,

press  to  activate  pre-set  tour


PIP

」,

Set  current  PTZ  location  as  the  start    of  line-scan. 


FREEZE

」,

  Activate  line-scan.   


ZOOM

」,

Set  current  PTZ  location  as  the  end  of  line-scan.


To  move  PTZ  in  360

°


PTZ  zoom  in;  PTZ  zoom  out 


PTZ  focus  in;  PTZ  focus  out. 


PTZ  IRIS  open,  PTZ  IRIS  close. 

Below  functions  need  support  from  specific  PTZ  manufacturer. 
Please  check  user  manual  of  your  PTZ  for  more  detail.   

  to 


AUX 1~8,

AUTO

Key 

  Number  key

1~8


Backup

,  Customized  function


  PTZ  communication  protocols  from  different  brands  aren’t  compatible  100%       

        sometimes.  Therefore,  some  of  these  functions  may  be  unavailable.


Содержание US916Z

Страница 1: ...king P2 2 Hard Disk Installation P3 3 DVD RW Installation P4 3 Front Panel Controls P5 4 Rear Panel Connectors P6 I Phone Android IWatch DVR Default Username is Admin Default Admin Lock password is 123456 Note Please see CD included for complete User manual quick start guide CMS software and much more ...

Страница 2: ... Remote Control 4 Battery 5 CD 6 Hard Disk Mount 7 Screws 8 Power Adaptor and Cable 10 SATA Cord Note Standard shipping products do not include Hard Drive unless you had Ordered your DVR with Hard Drive All Hard Drives if ordered comes preinstalled and ready to use ...

Страница 3: ...ft side Right side Step 2 Place the HDD on the HDD plate and screw it as indicated Step 3 Connect the power and the SATA cables as indicated Note After installation please initialize Hard Disk before starting to record For more detailed information please check out User Manual System Tools for reference ...

Страница 4: ...ide V1 0 N04 P 4 Step 1 Remove the front cover from DVR Step 2 Put the DVD RW into the unit as indicated Step 3 Put DVR bottom up screw to fix the DVD RW as indicated Step 4 Connect the power and the flat cables as indicated ...

Страница 5: ...alue In PLAYBACK mode press to play forwards In SETUP mode press to reduce value In PLAYBACK mode press to play rewind 5 BACKUP ESC In LIVE mode press to display the BACKUP menu In SETUP mode press to return to previous page PIP In LIVE mode display with picture in picture format 7 ZOOM In LIVE or PLAYBACK mode enlarge the display of a channel 8 FREEZE In LIVE mode display can be FREEZE 9 T SRH Di...

Страница 6: ...O OUT RCA output port for audio sign 2 in total EXTERNAL I O EXTERNAL I O port Fan DC 12V 40mm X 40mm fan AUDIO IN RCA input port for audio signal 8 in total for 2 9CH VGA1 VGA port USB 2 0 port USB port Device USB Mouse LAN Network port IR JACK IR extension cable jack NTSC PAL Switch NTSC PAL Video ON OFF Power Switch DC 12V Socket for a DC 12V input e SATA External SATA hard disks port for expan...

Страница 7: ...the IR remote control mouse operation and on screen graphical icons under LIVE mode Table 6 1 1 Functions of remote control under LIVE mode Button Description REC Start Stop recording PLAY Start playing back the most recently recorded segment ENTER MODE Switch to full screen or multi split display MENU II Enable Disable setup Menu BK UP Enable Disable backup menu ESC Return last menu ...

Страница 8: ...ursor on this icon will bring up the following four menu icons Main menu Search menu Backup menu PTZ mode Turn on off recording Playback Resting the cursor on this icon will bring up the following five display icons FREEZE ZOOM double the screen size AUTO sequence LOCK activate the key lock Full screen display Quad display 5 display 9 display 9 display 9 display ...

Страница 9: ... channel Video loss detected on the channel USB device detected Connected to the LAN cable AUTO seq is on Freeze is on screen is frozen LOCK is on PTZ control is on Shows the current hard disk space has been used 99 mean used 99 remain 1 Lower right of each CH will show the current time Icon Description Image quality High Low Full screen Record Record and snap shot file saving path setup Enable Di...

Страница 10: ...Play back at normal speed SLOW Play back at slower speed The speed will be slowed to 1 2 1 4 1 8 by each pressing of the button till the slowest limitation of the normal speed Fast rewind Each press increases the speed to the next level There are six speeds 2x 4X 8X 16x 32X and 64X Fast forward Each press increases the speed to the next level There are six speeds 2x 4X 8X 16x 32X and 64X Stop play...

Страница 11: ...9CH DVR Quick Start Guide V1 0 N04 P 11 5 channel display Zoom in display If you want to monitor single channel please choose a channel and click left but ton of mouse two times ...

Страница 12: ...at pre set number N TOUR press to activate pre set tour PIP Set current PTZ location as the start of line scan FREEZE Activate line scan ZOOM Set current PTZ location as the end of line scan To move PTZ in 360 PTZ zoom in PTZ zoom out PTZ focus in PTZ focus out PTZ IRIS open PTZ IRIS close Below functions need support from specific PTZ manufacturer Please check user manual of your PTZ for more det...

Отзывы: