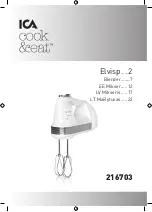
ICA cook&eat 216703 Скачать руководство пользователя страница 9

9

KeY TO MaIN cOMpONeNTs 
OF THe applIaNce

 1. Beaters
  2.  EJECT button
  3.  Speed selector
  4.  Power BURST button
 5. Handle
  6.  Power Cord Retractor  
   Button
  7.  Air vent
  8.  Retractable power cord
  9.  Non-tip heel rest
 10.  Liquid blending rod
11.   Dough hooks
 

Figure 1 Profile

Figure 2 Control 
panel

Figure 3 Mixing 
tools and storage 
box

cORD, plUG aND MaINs sOcKeT
• Check regularly that the cord and plug are 
not damaged and do not use the appliance if 
this is the case, or if the appliance has been 
dropped or damaged in any other way. If the 
appliance, cord or plug is damaged, the 
appliance must be inspected and, if necessary, 
repaired by an authorized repair engineer, 
otherwise there is a risk of electric shock.
• Never try to repair the appliance yourself.
• Check that it is not possible to pull or trip 
over the appliance cord or any extension cable.
• Avoid pulling the cord when removing the 
plug from the socket. Instead, hold the plug.
• Do not roll the cord up or wind it around the 
appliance.

pRIOR TO FIRsT Use
• Read the safety instructions through carefully.
• Before using the mixer, wash beaters, liquid 
blending rod, dough hooks and bowl in warm 
soapy water. Rinse thoroughly and dry.

INsTRUcTIONs FOR Use
TO aTTacH beaTeRs/DOUGH HOOKs/lIqUID
bleNDING ROD
1. 
Be sure cord is unplugged from electrical 
outlet.
WaRNING: Injury Hazard: Unplug mixer before 
touching beaters or other accessories. Failure 
to do so can result in broken bones, cuts or 
bruises.
2. Slide the Speed selector to OFF.
3. Insert one beater/dough hook/rod at a time, 
placing stem end of beaters into the opening 
at the bottom of the mixer. Press and twist 
lightly until it clicks into position.

TecHNIcal DaTa:

Model: 216703. Voltage: 220-240V~ 50Hz.

Power: 300W. Protection: Class II

7

5

1

2

3

4

9

6

8

Содержание cook&eat 216703

Страница 1: ...Elvisp 2 Blender 7 EE Mikser 12 LV Mikseris 17 LT Mai ytuvas 22 216703...

Страница 2: ...na riktlinjer f r vispning 5 Reng ring 6 Garantivillkor 6 INTRODUKTION Du f r ut mesta m jliga av din nya apparat om du l ser igenom dessa instruktioner innan du anv nder den L gg speciellt m rke till...

Страница 3: ...lutar fungera eller skadas kontaktar du en auktoriserad servicecentral f r reparation Om apparaten anv nds felaktigt eller p n got annat s tt n det som anges i dessa instruktioner f r handhavande p ta...

Страница 4: ...n degkrokarna och sk len i varmt vatten med diskmedel Sk lj noga och torka av ANV NDNING S tta i vispar degkrokar v tskeblandningsstav 1 Se till att sladden r urkopplad fr n eluttaget VARNING Risk f r...

Страница 5: ...jaren i l get OFF Av 3 Skrapa bort verbliven blandning med en slickepott 4 Grip tag om verktygens skaft med ena handen och tryck p EJECT knappen med andra handen Figur 4 S tta i degkrokarna OBS Tryck...

Страница 6: ...s ljaren distribut ren eller kommunen om du beh ver mer information om hur du hanterar elektriskt och elektroniskt avfall GARANTIVILLKOR Garantin g ller inte om instruktionerna ovan inte f ljs om appa...

Страница 7: ...ture reference so that you can remind yourself of the functions of the appliance Instruction Manual technical data Model 216703 Voltage 220 240V 50Hz Power 300W Protection Class II Safety measures 8 C...

Страница 8: ...please contact an authorized service centre for all repairs In case the appliance is misused or operated in any manner other than described in these instructions for use no liability will be undertak...

Страница 9: ...e to pull or trip over the appliance cord or any extension cable Avoid pulling the cord when removing the plug from the socket Instead hold the plug Do not roll the cord up or wind it around the appli...

Страница 10: ...ixer rest when the mixer is running TO REMOVE BEATERS DOUGH HOOKS ROD 1 Unplug the mixer 2 Set the speed control to OFF position Figure 4 Attach dough hooks 3 Scrape excess batter with a plastic spatu...

Страница 11: ...or further information on what you should do with electrical and electronic waste WARRANTY TERMS The warranty does not apply if the above instructions are not followed if the appliance has been repair...

Страница 12: ...V imsuse suurendamine 15 P stiasend 15 Labade taignakonksude pulga eemaldamiseks 15 ldjuhised mikseri kasutamiseks 15 Puhastamine 16 Garantiitingimused 16 Toote tutVustus Uue masina v imaluste v imal...

Страница 13: ...kokku kuumade pindadega nt elektripliidi kuumade plaatidega ega muude soojusallikatega rge lahutage masinat elektrikontaktist v rgujuhtmest t mmates J lgige et v rgujuhe ei kulgeks t pinna eest l bi M...

Страница 14: ...S vigastuse oht enne labade v i muude tarvikute puudutamist lahutage mikser elektrikontaktist Selle tegemataj tmine v ib p hjustada luumurde v i l ike v i muljumishaavu 2 L kake kiiruse valiku nupp as...

Страница 15: ...h lbustamiseks haarake he k ega riistade varrest ja vajutage teise k ega vabastamisnuppu EJECT M RKUS RGE vajutage vabastamisnuppu mikseri t tamise ajal LDJUHISED MIKSERI KASUTAMISEKS Pritsimise v lt...

Страница 16: ...e koostisainete kokkusegamiseks muffinite kiirsaiade valmistamiseks 2 V i ja suhkru kokkusegamiseks enamiku k psisetaignate puhul 3 KESKMINE enamiku koogipulbrite segamiseks 4 Glasuur ja kartulipuder...

Страница 17: ...p r ga mais anas pam c ba 20 T r ana 21 inform cija par produkta likvid anu un atk rtotu p rstr di 21 Garantijas noteikumi 21 IEVADS Lai visefekt v k pielietotu j su jauno ier ci l dzu izlasiet r p gi...

Страница 18: ...ektrot kla pievads nenok tu saskar ar karst m virsm m piem ram ar elektrisk s pl ts karstaj m virsm m vai jebk du citu karstuma avotu Neatvienojiet ier ci no galven s kontaktligzdas raujot aiz elektro...

Страница 19: ...l dz tas noklik sav viet Piez me P rliecinieties ka ieliekat miks anas stieni m klas i stieni ar gredzenveida apmali liel kaj atver kam r miks anas stieni m klas i stieni bez gredzenveida apmales maz...

Страница 20: ...no em anai satveriet r ku k tus ar vienu roku un piespiediet atbr vo anas pogu EJECT ar otru roku PIEZ ME NEKAD nespiediet atbr vo anas pogu kam r mikseris darbojas 4 att ls Pievienojiet m klas us VI...

Страница 21: ...oteiktos gad jumos varat atgriezt lietoto apr kojumu p rdev jam no kura j s to nopirk t ja j s p rkat jaunu apr kojumu Sazinieties ar savu izplat t ju d leri vai municip laj m varas iest d m s k kai i...

Страница 22: ...Bendrieji mai ymo patarimai 25 Valymas 26 Informacija apie io produkto i metim ir perdirbim 26 Garantijos s lygos 26 ANGA Tam kad gal tum te tinkamai ir efektyviai naudotis iuo prietaisu perskaitykite...

Страница 23: ...prietaisas tinkamai neveikt arba b t apgadintas susisiekite su kvalifikuot remonto dirbtuvi specialistais Jei prietaisu naudotum t s netinkamai ar jei atliktum te ka k kas neatitikt i naudojimo instru...

Страница 24: ...vietoje kad jo ar prailginimo laido nety ia neu kliudytum te Niekada netraukite u laido nor dami i traukti ki tuk i maitinimo lizdo Vietoje to suimkite u ki tuko Nevyniokite laido ir nesuvyniokite jo...

Страница 25: ...ert ind NIEKADA ne junkite mai ytuvo j paguld horizontaliai PLAKTUV TE LOS KABLI STRYPO I MIMAS 1 I junkite mai ytuv i lizdo 2 Nustatykite grei io reguliatori OFF i jungimo pad t Paveiksl lis 4 Pritvi...

Страница 26: ...r inti atitarnavusi elektros ir elektronikos rang prekybininkams i kuri toki rang pirkote pirkdami nauj rang Susisiekite su savo pardav ju gamintojo atstovu arba savivaldos institucijomis d l i samesn...

Отзывы: