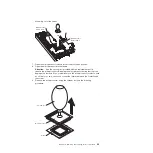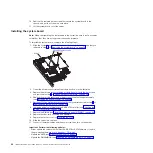
a.
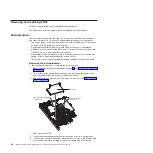
Squeeze
and
hold
the
bladder
of
the
tool;
then,
place
the
suction
cup
on
the
microprocessor
and
release
the
bladder.
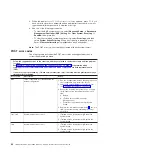
b.
Using
the
tool,
carefully
lift
the
microprocessor
straight
up
and
out
of
the
socket,
and
place
it
on
a
static-protective
surface.
c.
Squeeze
the
bladder
of
the
tool
to
release
the
microprocessor
from
the
suction
cup.
10.
If
you
are
instructed
to
return
the
microprocessor,
follow
all
packaging
instructions,
and
use
any
packaging
materials
for
shipping
that
are
supplied
to
you.
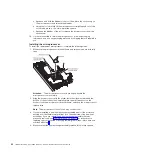
Installing
the
microprocessor
To
install
the
replacement
microprocessor,
complete
the
following
steps:
1.
Make
sure
the
microprocessor
bracket
frame
and
release
latch
are
both
fully
open.
Attention:
The
microprocessor
contacts
are
fragile;
handle
the
microprocessor
very
carefully.
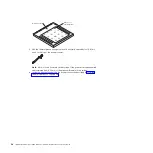
2.
Align
the
microprocessor
with
the
socket
(note
the
alignment
mark
and
the
position
of
the
notches);
then,
carefully
place
the
microprocessor
on
the
socket,
close
the
microprocessor
bracket
frame,
and
close
the
microprocessor
release
latch.
Note:
The
microprocessor
fits
only
one
way
on
the
socket.
3.
If
you
are
installing
a
new
heat
exchanger
assembly,
peel
off
the
protective
backing
from
the
thermal
material
that
is
on
the
underside
of
the
new
heat
exchanger.
If
you
are
reinstalling
a
heat
exchanger
assembly
that
was
previously
removed,
see
for
instructions
on
replacing
the
contaminated
or
missing
thermal
grease;
then,
return
here
and
continue
with
step
4.
Make
sure
that
the
heat-exchanger
assembly
release
latch
is
fully
opened.
56
IBM
xSeries
306m
Types
8849
and
8491:
Problem
Determination
and
Service
Guide
Содержание xSeries 206m
Страница 1: ...IBM xSeries 306m Types 8849 and 8491 Problem Determination and Service Guide...
Страница 2: ......
Страница 3: ...IBM xSeries 306m Types 8849 and 8491 Problem Determination and Service Guide...
Страница 8: ...vi IBM xSeries 306m Types 8849 and 8491 Problem Determination and Service Guide...
Страница 143: ......
Страница 144: ...Part Number 31R1183 Printed in USA 1P P N 31R1183...


