


Removing
the
CRUs
Attention:
This
section
describes
how
to
remove
the
CRUs
in
order
to
minimize
the
weight
of
the
EXP100
before
you
install
it
in
the
rack.
However,
if
you
have
three
or
more
people
available
to
lift
and
install
the
EXP100
in
a
rack,
you
might
not
find
it
necessary
to
remove
the
CRUs
before
you
install
the
EXP100.
If
this
is
the
case,
you
can
skip
the
CRU
removal
instructions
provided
in
this
section.
Instead,
continue
with
and
then
skip
the
CRU
replacement
instructions
provided
in
Use
the
following
procedures
to
remove
the
CRUs
from
the
EXP100
before
installation.
Use
these
instructions
after
you
have
completed
all
applicable
site,
rack,
and
EXP100
preparations
(as
discussed
in
and
installed
the
support
rails
(as
discussed
in
Alternately,
if
necessary,
you
can
use
these
instructions
to
lighten
the
EXP100
before
removing
it
from
the
shipping
box.
The
shipping
box
opens
to
provide
access
to
the
expansion
enclosure
CRUs.
The
EXP100
comes
with
a
rack-mounting
hardware
kit
for
installing
it
in
a
rack.
It
is
easier
to
lift
the
EXP100
and
install
it
in
a
rack
cabinet
if
you
remove
all
the
CRUs
first.
You
will
need
an
antistatic
wrist
strap
and
a
cart
or
level
surface
(to
hold
the
CRUs).
Observe
the
precautions
listed
in
the
following
procedure,
you
will
remove
the
following
CRUs
from
the
expansion
enclosure
before
you
install
it
in
the
rack:
v
ESMs
v
Power
supplies
v
Fans
v
Hot-swap
hard
disk
drives
You
do
not
need
to
remove
the
blank
trays.
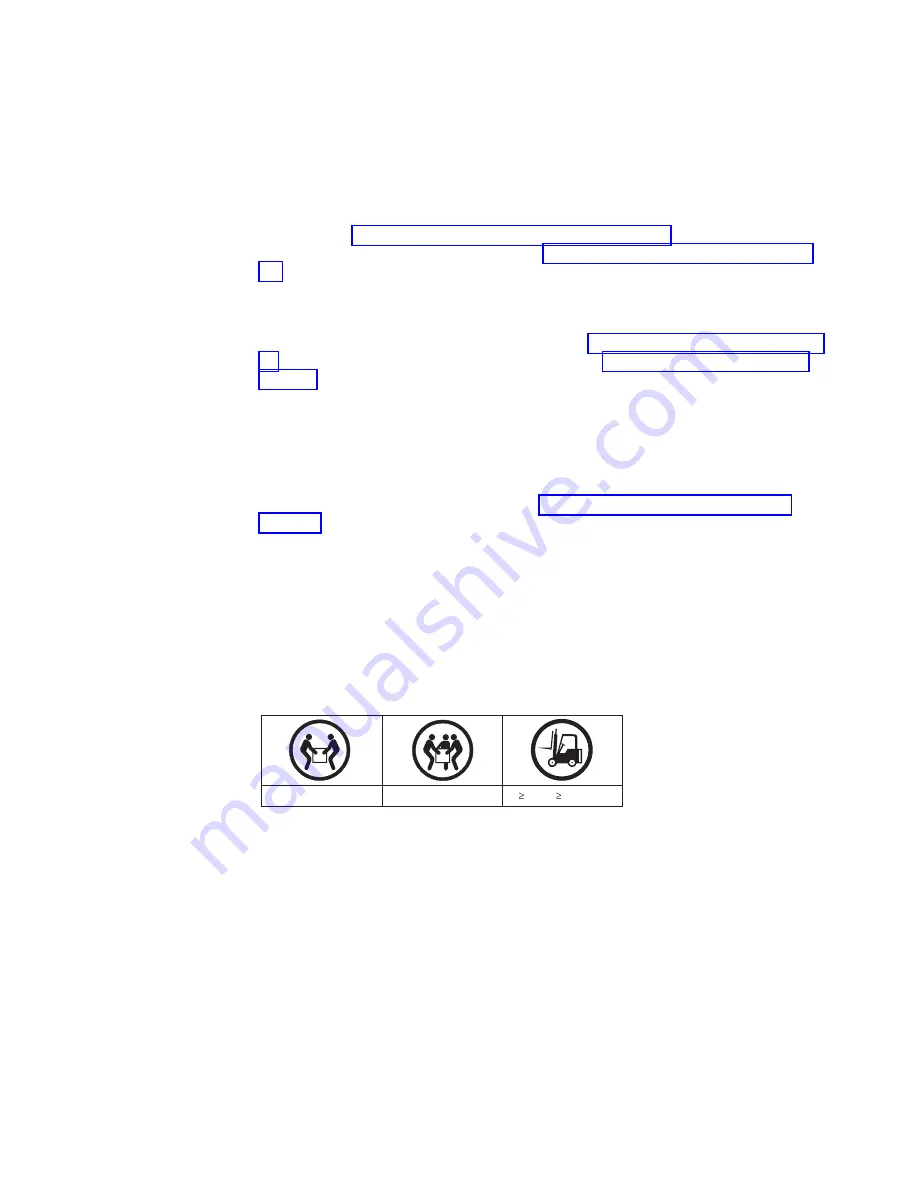
Statement
4:
svc00146
18-32 kg (39.7-70.5 lbs)
32-55 kg (70.5-121.2 lbs)
55 kg ( 121.2 lbs)
CAUTION:
Use
safe
practices
when
lifting.
Attention:
The
expansion
enclosure
comes
with
a
bezel
that
is
attached
to
the
front
of
the
unit.
The
bezel
protects
the
light
pipes
that
are
located
above
the
drive
trays.
Leave
the
protective
bezel
in
place
until
you
are
instructed
to
remove
it.
Removing
an
ESM
Complete
the
following
steps
to
remove
an
ESM:
Attention:
After
you
remove
an
ESM,
wait
70
seconds
before
reseating
or
replacing
the
ESM.
Failure
to
do
so
may
cause
undesired
events.
1.
Push
down
on
the
ESM
latch.
While
holding
down
the
ESM
latch,
grasp
the
pull
rings
and
pull
out
on
the
levers
to
disconnect
the
ESM
from
the
EXP100
midplane.
Chapter
2.
Installing
the
EXP100
37
Содержание TotalStorage EXP100
Страница 2: ......
Страница 10: ...viii IBM TotalStorage DS4000 EXP100 Storage Expansion Enclosure Installation User s and Maintenance Guide ...
Страница 12: ...x IBM TotalStorage DS4000 EXP100 Storage Expansion Enclosure Installation User s and Maintenance Guide ...
Страница 18: ...xvi IBM TotalStorage DS4000 EXP100 Storage Expansion Enclosure Installation User s and Maintenance Guide ...
Страница 132: ...106 IBM TotalStorage DS4000 EXP100 Storage Expansion Enclosure Installation User s and Maintenance Guide ...
Страница 148: ...122 IBM TotalStorage DS4000 EXP100 Storage Expansion Enclosure Installation User s and Maintenance Guide ...
Страница 160: ...134 IBM TotalStorage DS4000 EXP100 Storage Expansion Enclosure Installation User s and Maintenance Guide ...
Страница 162: ...136 IBM TotalStorage DS4000 EXP100 Storage Expansion Enclosure Installation User s and Maintenance Guide ...
Страница 164: ...138 IBM TotalStorage DS4000 EXP100 Storage Expansion Enclosure Installation User s and Maintenance Guide ...
Страница 180: ...154 IBM TotalStorage DS4000 EXP100 Storage Expansion Enclosure Installation User s and Maintenance Guide ...
Страница 187: ......
Страница 188: ... Part Number 39M5947 Printed in USA GC26 7694 01 1P P N 39M5947 ...


