


16
IBM Netfinity FAStT500 RAID Controller Enclosure Unit Installation Guide
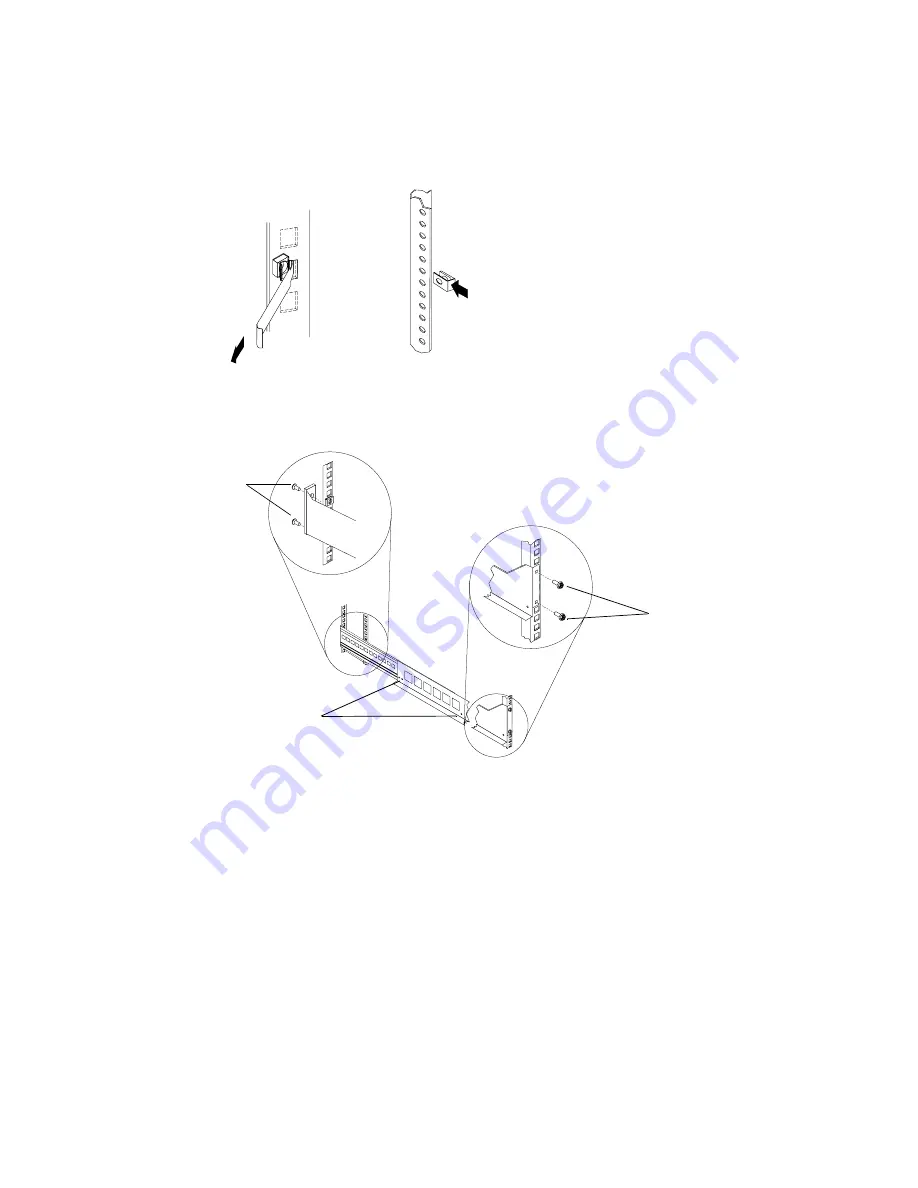
Note: Use clip nuts if your rack has round holes. If your rack has square holes, you can
use the cage nut insertion tool or a flat-blade screwdriver to install cage nuts.
3 On the rail marked “R”, loosen the two adjustment screws on the inside of the rail and
adjust the length of the rail to the depth of your rack.
4 Hold the rail against the outside of the right mounting flange on the rack and loosely
insert the two front black hex screws.
5 Extend the rail outside of the rear mounting flange on the rack; then, install and tighten
the two rear black hex screws.
6 Tighten the two front black hex screws; then, tighten the adjustment screws on each
rail.
7 Repeat
through
to install the rail marked “L” on the left side of the rack.
Cage
nut
Clip
nut
Front black hex
screws
Adjustment
screws
Rear black
hex screws
Содержание Netfinity FAStT500
Страница 1: ......
Страница 2: ......
Страница 3: ...Netfinity FAStT500 RAID Controller Enclosure Unit Installation Guide ...
Страница 7: ...v Index 63 ...
Страница 8: ...vi IBM Netfinity FAStT500 RAID Controller Enclosure Unit Installation Guide ...
Страница 38: ...22 IBM Netfinity FAStT500 RAID Controller Enclosure Unit Installation Guide ...
Страница 56: ...40 IBM Netfinity FAStT500 RAID Controller Enclosure Unit Installation Guide ...
Страница 83: ... Part Number 19K0788 Printed in U S A April 2000 19K0788 ...


