


Installing
a
drive
Depending
on
your
computer
model,
one
or
more
of
the
following
drives
might
be
installed
in
your
computer:
v
Diskette
drive
(optional)
v
Hard
disk
drive
v
CD-ROM,
CD-RW,
or
DVD/CD-RW
combo
drive
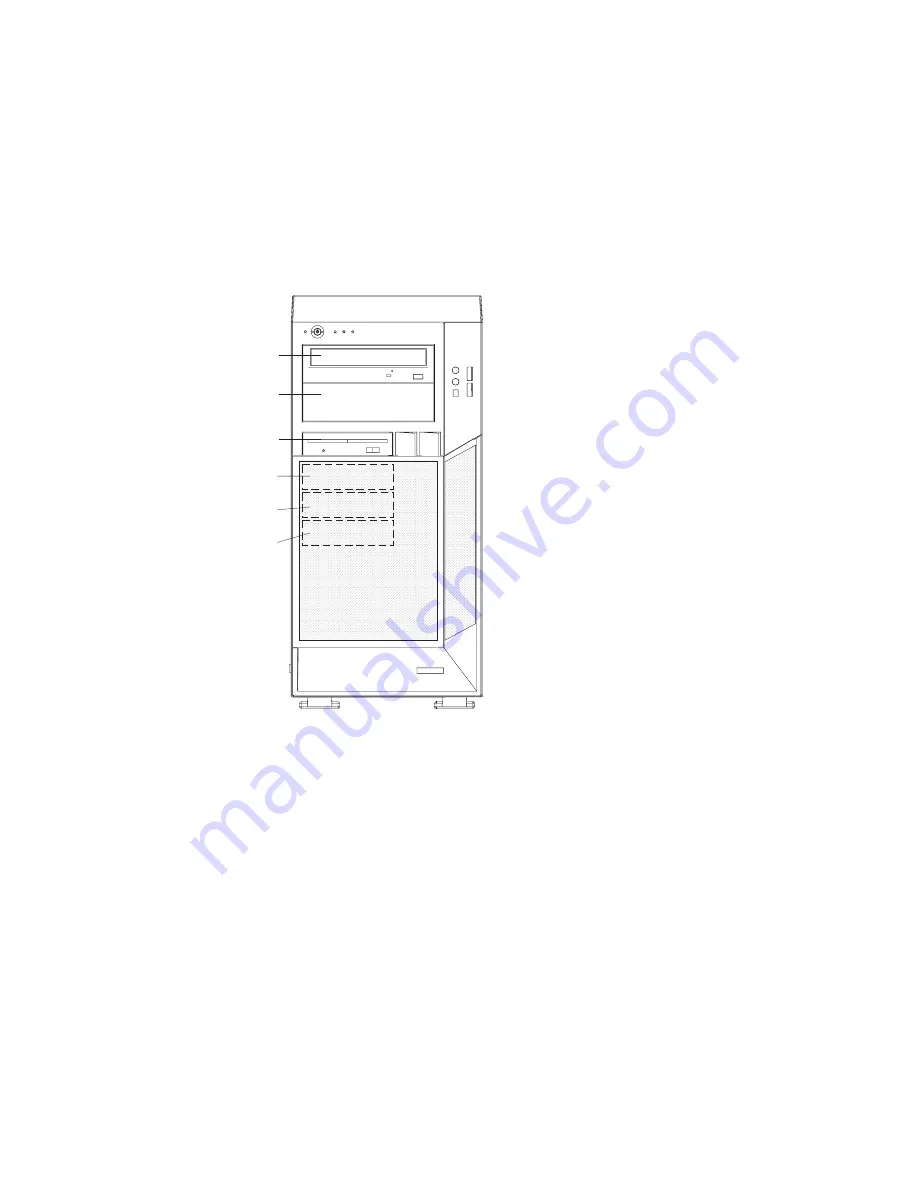
Your
Z
Pro
Type
6223
computer
comes
with
an
IDE
CD-ROM
drive
in
bay
1
and
a
hard
disk
drive
in
bay
6.
Bay 1
Bay 2
Bay 3
Bay 4
Bay 5
Bay 6
The
following
notes
describe
the
types
of
drives
that
your
computer
supports
and
other
information
that
you
must
consider
when
installing
drives:
v
Make
sure
that
you
have
all
the
cables
and
other
equipment
specified
in
the
documentation
that
comes
with
the
drive.
v
Select
the
bay
in
which
you
want
to
install
the
drive.
v
Check
the
instructions
that
come
with
the
drive
to
see
whether
you
need
to
set
any
switches
or
jumpers
on
the
drive.
If
you
are
installing
a
SCSI
device,
be
sure
to
set
the
SCSI
ID
for
that
device.
v
You
can
install
removable-media
drives
in
bays
1,
2,
and
3
only.
Tape
drives,
diskette
drives,
CD-ROM,
DVD/CD-RW,
and
DVD-ROM
drives
are
examples
of
removable-media
drives.
v
You
can
install
a
3.5-in.
slim-high
or
5.25-in.
half-high
removable-media
drive,
such
as
a
tape
backup
drive,
in
bay
2.
22
IntelliStation
Z
Pro
Type
6223:
Installation
Guide
Содержание IntelliStation Z Pro 6223
Страница 3: ...IntelliStation Z Pro Type 6223 Installation Guide...
Страница 58: ...46 IntelliStation Z Pro Type 6223 Installation Guide...
Страница 70: ...58 IntelliStation Z Pro Type 6223 Installation Guide...
Страница 78: ...66 IntelliStation Z Pro Type 6223 Installation Guide...
Страница 108: ...96 IntelliStation Z Pro Type 6223 Installation Guide...
Страница 109: ......
Страница 110: ...Part Number 88P8971 Printed in USA 1P P N 88P8971...


