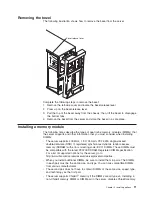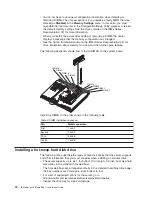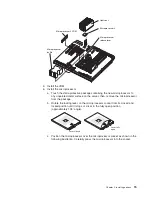
v
Make
sure
that
the
drive
is
correctly
installed
in
the
tray.
v
If
the
server
has
an
optional
RAID
adapter,
see
the
documentation
that
comes
with
the
adapter
for
instructions
for
installing
a
hard
disk
drive.
v
All
hot-swap
drives
in
the
server
should
have
the
same
throughput
speed
rating;
mixing
speed
ratings
might
cause
all
drives
to
operate
at
the
lower
throughput
speed.
v
To
minimize
the
possibility
of
damage
to
the
hard
disk
drives
when
you
are
installing
them
in
a
rack
configuration,
install
the
server
in
the
rack
before
installing
the
hard
disk
drives.
v
You
do
not
have
to
turn
off
the
server
to
install
hot-swap
drives
in
the
hot-swap
drive
bays.
However,
you
must
turn
off
the
server
when
performing
any
steps
that
involve
installing
or
removing
cables.
v
You
can
install
three
additional
hot-swap
hard
disk
drives
in
the
server
after
you
install
the
3-Pack
Ultra320
Hot-Swap
Expansion
Kit.
These
drives
are
in
the
optional
hard
disk
drive
cage.
Connect
the
cable
to
J58
SCSI
channel
A
on
the
system
board.
See
the
instructions
that
come
with
this
option
for
information.
v
Some
filler
panels
come
with
a
slim
filler.
v
The
SCSI
ID
for
each
hot-swap
hard
disk
drive
is
printed
on
the
bezel.
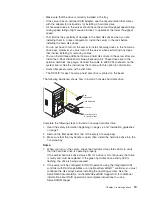
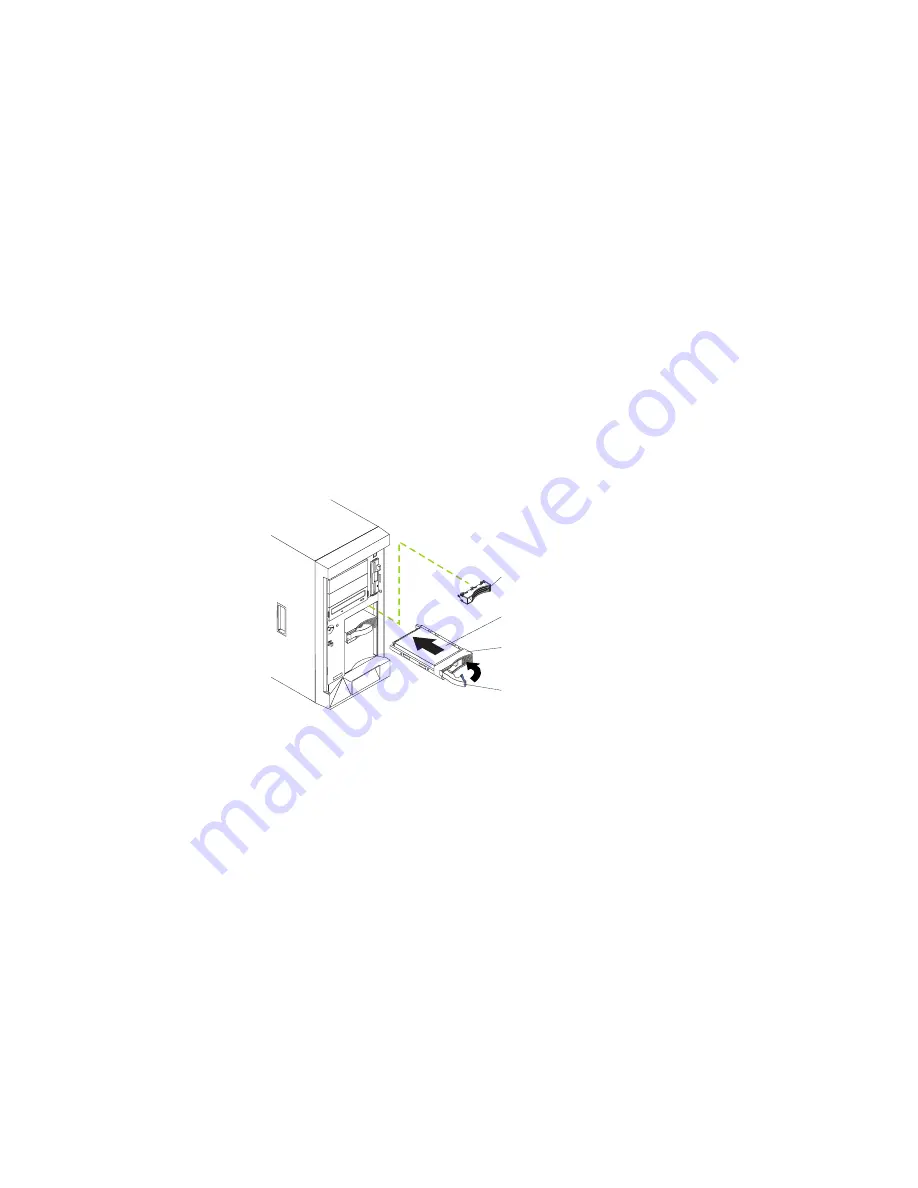
The
following
illustration
shows
how
to
install
a
hot-swap
hard
disk
drive.
Slim
filler panel
Hard disk drive
Drive tray
Drive tray handle
(in open position)
Complete
the
following
steps
to
install
a
hot-swap
hard
disk
drive:
1.
Read
the
safety
information
beginning
on
page
vii,
and
“Installation
guidelines”
on
page
7.
2.
Remove
the
filler
panel
from
one
of
the
empty
hot-swap
bays.
3.
Make
sure
that
the
tray
handle
is
open;
then,
install
the
hard
disk
drive
into
the
hot-swap
bay.
Notes:
1.
When
you
turn
on
the
server,
check
the
hard
disk
drive
status
LEDs
to
verify
that
the
hard
disk
drive
is
operating
properly.
If
the
amber
hard
disk
drive
status
LED
for
a
drive
is
lit
continuously,
that
drive
is
faulty
and
must
be
replaced.
If
the
green
hard
disk
drive
activity
LED
is
flashing,
the
drive
is
being
accessed.
2.
If
the
server
will
be
configured
for
RAID
operation
using
the
integrated
SCSI
controller
with
RAID
capabilities
or
an
optional
ServeRAID
™
controller,
you
must
configure
the
disk
arrays
before
installing
the
operating
system.
See
the
ServeRAID
documentation
on
the
IBM
ServeRAID
Support
CD
for
additional
information
about
RAID
operation
and
complete
instructions
for
using
ServeRAID
Manager.
Chapter
2.
Installing
options
13
Содержание 8841 - eServer xSeries 236
Страница 3: ...IBM xSeries 236 Type 8841 Installation Guide...
Страница 7: ...Japanese Voluntary Control Council for Interference VCCI statement 80 Index 81 Contents v...
Страница 8: ...vi IBM xSeries 236 Type 8841 Installation Guide...
Страница 56: ...42 IBM xSeries 236 Type 8841 Installation Guide...
Страница 98: ...84 IBM xSeries 236 Type 8841 Installation Guide...
Страница 99: ......
Страница 100: ...Part Number 31R1188 Printed in USA 1P P N 31R1188...


