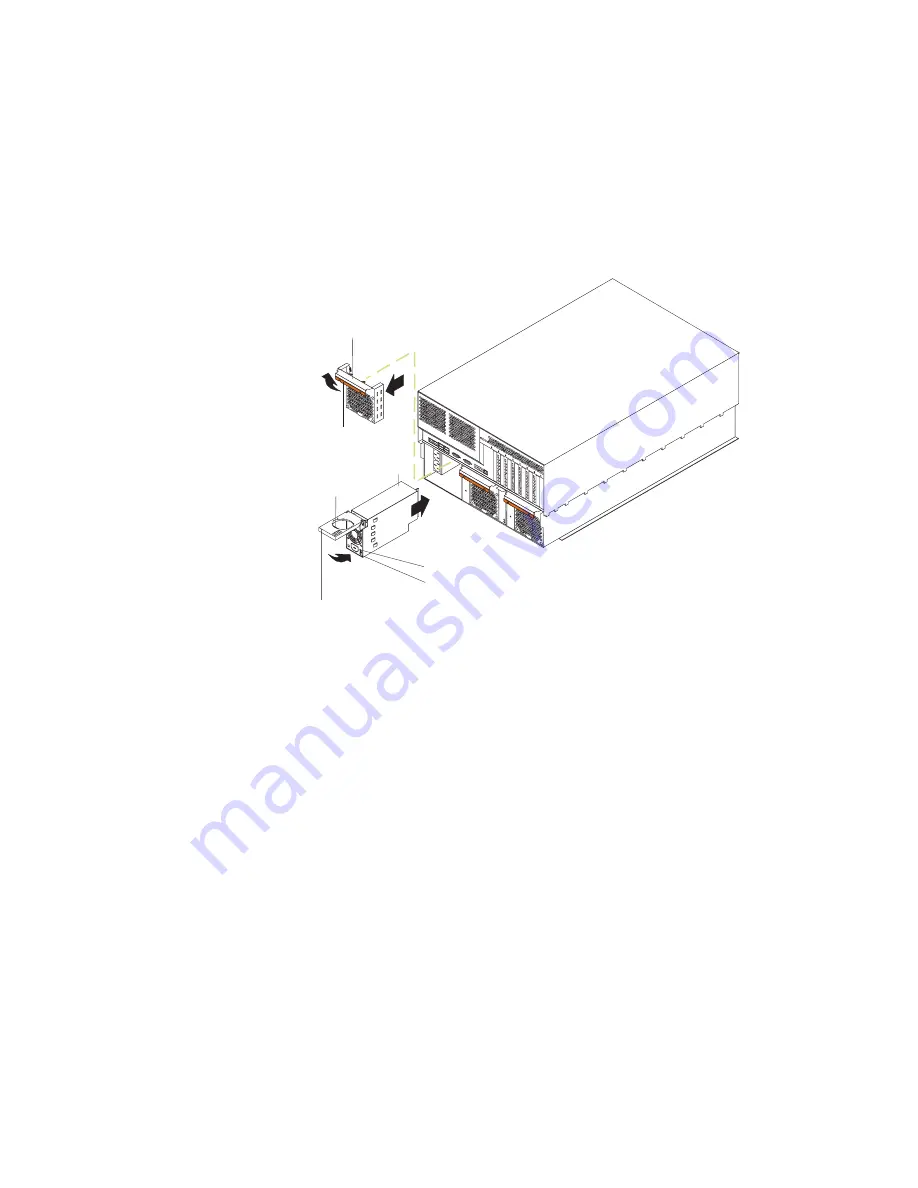
Complete the following steps to install an additional power supply:
1. Review the information beginning with “Safety” on page v through “Handling
static-sensitive devices” on page x.
2. Select the power-supply bay in which you want to install the power supply.
3. Press the release latch and remove the fan assembly from the power-supply
bay.
4. Move the handle on the power supply to the open position.
5. Slide the power supply into the chassis, and close the handle.
Handle
(open position)
AC power LED
DC power LED
Power supply
Release latch
Hot-swap fan
Release
latch
6. Depending on the number of power supplies installed in your server, plug one or
two power cords into the corresponding connectors on the back of the server;
then, plug the other end of the power cords into properly grounded electrical
outlets. Power supplies 1 and 2 (PS1 and PS2, respectively) are connected to
the top power-cord connector. Power supplies 3 and 4 (PS3 and PS4,
respectively) are connected to the bottom power-cord connector.
7. If the server is not on, turn on the server.
8. Verify that the dc power LED and the ac power LED on the power supply are lit,
indicating that the power supply is operating properly.
9. Reinstall the fan assembly in the power-supply bay.
22
IBM xSeries 255 Type 8685: Installation Guide
Содержание 8685 - eServer xSeries 255
Страница 3: ...IBM xSeries 255 Type 8685 Installation Guide SC88 P920 40...
Страница 36: ...24 IBM xSeries 255 Type 8685 Installation Guide...
Страница 46: ...34 IBM xSeries 255 Type 8685 Installation Guide...
Страница 71: ...Greece 30 210 688 1220 United Kingdom 01475 555 055 Ireland 353 1 815 4000 Appendix B Warranty information 59...
Страница 72: ...60 IBM xSeries 255 Type 8685 Installation Guide...
Страница 82: ...70 IBM xSeries 255 Type 8685 Installation Guide...
Страница 83: ......
Страница 84: ...Part Number 88P9204 Printed in U S A SC88 P920 40 1P P N 88P9204...


