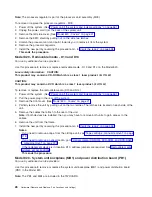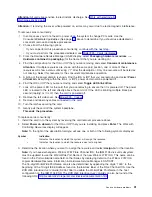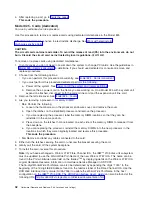
g.
Depress
the
push
button
for
3-4
seconds.
13.
After
exchanging
an
item,
go
to
This
ends
the
procedure.
Model
820
-
Covers
For
use
by
authorized
service
providers.
Use
this
procedure
to
remove
or
replace
covers
on
the
Model
820.
Attention:
If
removing
the
cover
while
powered
on,
errors
may
occur
due
to
Electromagnetic
Interference.
To
remove
the
left,
right,
or
top
cover:
1.
Remove
the
screws
that
fasten
the
cover
to
the
back
of
the
system
frame.
2.
Push
the
cover
toward
the
back
of
the
system
to
remove
it.
To
remove
the
front
cover:
Pull
the
top
of
the
cover
away
from
the
frame.
To
remove
the
back
cover:
Lift
the
cover
up
to
remove
it.
Model
820
-
Device
board
-
DB1
and
DB2
For
use
by
authorized
service
providers.
Use
this
procedure
to
remove
or
replace
the
device
board
-
DB1
and
DB2
in
the
Model
820.
To
remove
or
replace
a
device
board
(DB1
and
DB2):
1.
Power
off
the
system.
(See
2.
Unplug
the
power
cord
from
the
back
of
the
system
unit.
3.
Remove
the
front
and
right
side
covers.
(See
4.
Remove
the
EMC
shield
in
front
of
the
disk
units
by
pulling
out
on
the
side
two
latches.
5.
Remove
the
disk
units
from
the
disk
unit
cage.
Label
the
position
of
each
disk
unit.
6.
Remove
the
screws
holding
the
disk
unit
cage
to
the
frame.
The
screws
are
located
on
the
front
and
inside
rear
of
the
disk
unit
cage.
7.
Unplug
and
remove
the
cables
on
the
back
of
the
device
board.
8.
Pull
the
disk
unit
cage
out
of
the
frame.
9.
Remove
the
device
board
from
the
back
of
the
disk
unit
cage.
This
ends
the
procedure.
Model
820
-
Disk
unit
(concurrent)
For
use
by
authorized
service
providers.
Use
this
procedure
to
remove
or
replace
the
disk
unit
(concurrently)
in
the
Model
820.
Attention:
If
removing
the
cover
while
powered
on,
errors
may
occur
due
to
electromagnetic
interference.
Attention:
The
disk
unit
is
sensitive
to
electrostatic
discharge
(see
To
remove
or
replace
the
disk
unit
(concurrent):
1.
Determine
if
the
system
has
logical
partitions.
Go
to
before
continuing
with
this
procedure.
2.
Were
you
directed
here
from
the
Recovery
procedures
topic?
v
No
:
Go
to
Analyze
hardware
problems
21
Содержание 270
Страница 2: ......
Страница 12: ...x Hardware Remove and Replace Part Locations and Listings...
Страница 279: ...Figure 3 CCIN 2881 with pluggable DIMM Analyze hardware problems 267...
Страница 281: ...Figure 6 Models 830 SB2 with FC 9074 HSL and SPCN locations Analyze hardware problems 269...
Страница 283: ...Figure 1b Model 840 SB3 processor tower dual line cord Analyze hardware problems 271...
Страница 294: ...01 gif port and LED locations 282 Hardware Remove and Replace Part Locations and Listings...
Страница 295: ...s src rzaq4519 gif locations Analyze hardware problems 283...
Страница 318: ...Figure 2 FC 5088 FC 0588 Expansion I O Unit top view 306 Hardware Remove and Replace Part Locations and Listings...
Страница 415: ...Table 2 Final assembly rear Models 830 and SB2 with FC 9074 continued Analyze hardware problems 403...
Страница 422: ...Table 1 Cover assembly Models 840 and SB3 processor tower 410 Hardware Remove and Replace Part Locations and Listings...
Страница 483: ...Table 1 Cover assembly FC 5095 Expansion I O Tower Analyze hardware problems 471...
Страница 505: ...Table 15 Model 830 SB2 System Unit with FC 9074 Power cables single line cord Analyze hardware problems 493...
Страница 511: ...Table 19 Model 840 SB3 Processor Tower Power cables single line cord Analyze hardware problems 499...
Страница 513: ...Table 21 Model 840 and Model SB3 9079 Base I O Tower Power cables dual line cord Analyze hardware problems 501...
Страница 519: ...Figure 15 Models 870 and 890 Primary I O to CEC interconnection part 1 Analyze hardware problems 507...
Страница 614: ...602 Hardware Remove and Replace Part Locations and Listings...
Страница 618: ...606 Hardware Remove and Replace Part Locations and Listings...
Страница 621: ......
Страница 622: ...Printed in USA SY44 5917 02...


