background image

l’Union


européenne.


Conformément


à


la


directive,


ladite


étiquette


précise


que


le


produit


sur


lequel


elle


est


apposée


ne


doit


pas


être


jeté


mais


être


récupéré


en


fin


de


vie.


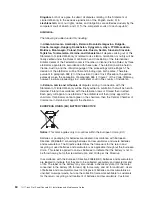
In


accordance


with


the


European


WEEE


Directive,


electrical


and


electronic


equipment


(EEE)


is


to


be


collected


separately


and


to


be


reused,


recycled,


or


recovered


at


end


of


life.


Users


of


EEE


with


the


WEEE


marking


per


Annex


IV


of


the


WEEE


Directive,


as


shown


above,


must


not


dispose


of


end


of


life


EEE


as


unsorted


municipal


waste,


but


use


the


collection


framework


available


to


customers


for


the


return,


recycling,


and


recovery


of


WEEE.


Customer


participation


is


important


to


minimize


any


potential


effects


of


EEE


on


the


environment


and


human


health


due


to


the


potential


presence


of


hazardous


substances


in


EEE.


For


proper


collection


and


treatment,


contact


your


local


IBM


representative.


Battery


return


program


This


product


may


contain


a


sealed


lead


acid,


nickel


cadmium,


nickel


metal


hydride,


lithium,


or


lithium


ion


battery.


Consult


your


user


manual


or


service


manual


for


specific


battery


information.


The


battery


must


be


recycled


or


disposed


of


properly.


Recycling


facilities


may


not


be


available


in


your


area.


For


information


on


disposal


of


batteries


outside


the


United


States,


go


to


http://www.ibm.com/ibm/environment/

products/index.shtml


or


contact


your


local


waste


disposal


facility.


In


the


United


States,


IBM


has


established


a


return


process


for


reuse,


recycling,


or


proper


disposal


of


used


IBM


sealed


lead


acid,


nickel


cadmium,


nickel


metal


hydride,


and


battery


packs


from


IBM


equipment.


For


information


on


proper


disposal


of


these


batteries,


contact


IBM


at


1-800-426-4333.


Have


the


IBM


part


number


listed


on


the


battery


available


prior


to


your


call.


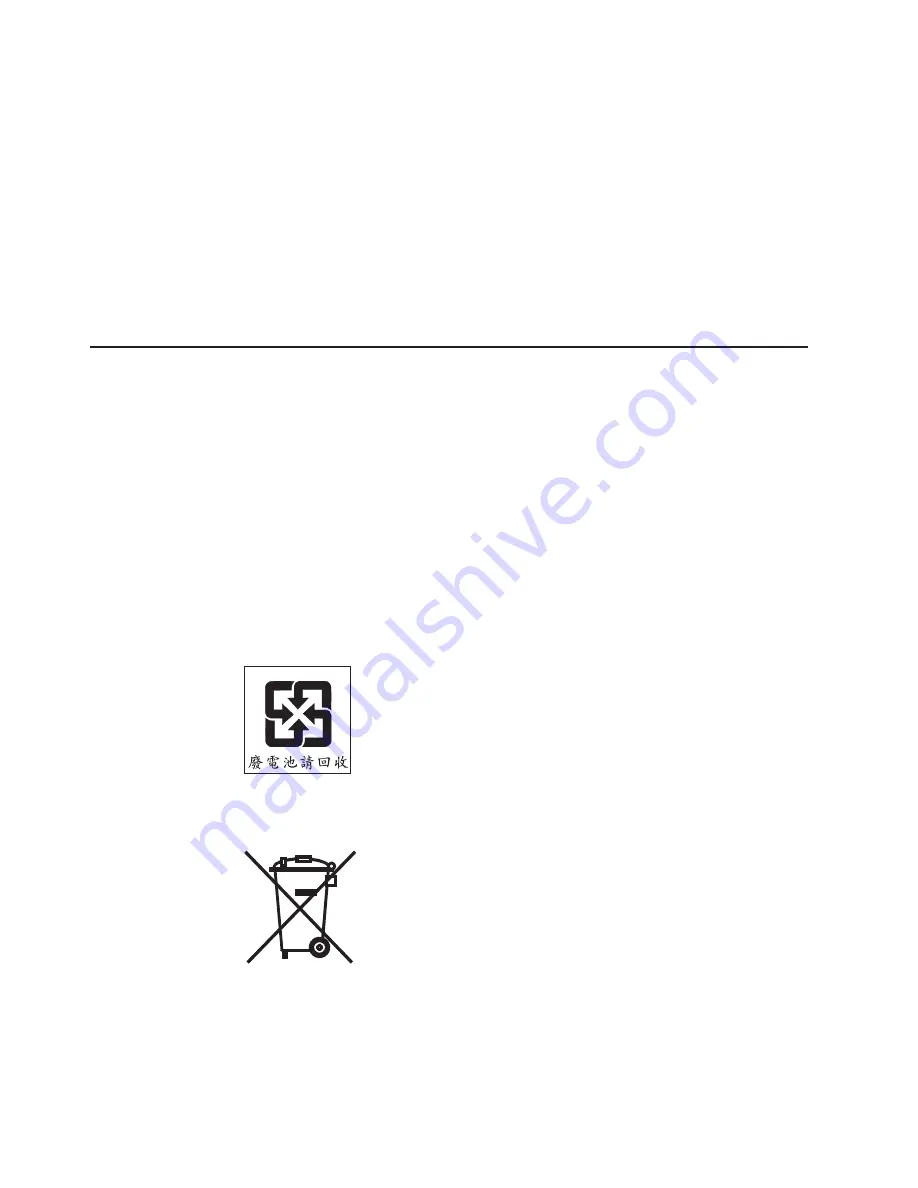
For


Taiwan:


Please


recycle


batteries.


For


the


European


Union:


Notice:


This


mark


applies


only


to


countries


within


the


European


Union


(EU).


Batteries


or


packaging


for


batteries


are


labeled


in


accordance


with


European


Directive


2006/66/EC


concerning


batteries


and


accumulators


and


waste


batteries


and


accumulators.


The


Directive


determines


the


framework


for


the


return


and


recycling


of


used


batteries


and


accumulators


as


applicable


throughout


the


European


74


1U


17-inch


Flat


Panel


Console


Kit:


Installation


and


Maintenance


Guide

Содержание 1U

Страница 1: ...1U 17 inch Flat Panel Console Kit Installation and Maintenance Guide...

Страница 2: ......

Страница 3: ...1U 17 inch Flat Panel Console Kit Installation and Maintenance Guide...

Страница 4: ...of Limited Warranty Z125 4753 10 08 2008 on page 53 and the general information in Appendix C Notices on page 71 First Edition March 2009 Copyright International Business Machines Corporation 2009 US...

Страница 5: ...cing the slide rail assemblies 35 Replacing the console unit in the rack 39 Removing the existing console unit 39 Moving the keyboard 41 Removing and replacing the outer slide rails 46 Installing the...

Страница 6: ...d Kingdom telecommunications safety requirement 76 European Union EMC Directive conformance statement 77 Taiwanese Class A warning statement 77 Chinese Class A warning statement 77 Japanese Voluntary...

Страница 7: ...alleert eerst de veiligheidsvoorschriften Ennen kuin asennat t m n tuotteen lue turvaohjeet kohdasta Safety Information Avant d installer ce produit lisez les consignes de s curit Vor der Installation...

Страница 8: ...ersions of the caution or danger statement in the Safety Information document For example if a caution statement is labeled Statement 1 translations for that caution statement are in the Safety Inform...

Страница 9: ...quipment when there is evidence of fire water or structural damage v Disconnect the attached power cords telecommunications systems networks and modems before you open the device covers unless instruc...

Страница 10: ...vels are present inside any component that has this label attached There are no serviceable parts inside these components If you suspect a problem with one of these parts contact a service technician...

Страница 11: ...rd Inventory checklist Note The illustrations in this documentation might differ slightly from your hardware The console kit contains the following items v One console unit with built in flat panel di...

Страница 12: ...following tools to install the console unit v One number 1 Phillips screwdriver v One number 2 Phillips screwdriver v One cage nut insertion tool or flat blade screwdriver for installing cage nuts in...

Страница 13: ...f the following procedures If you are using a Windows operating system insert the CD into the CD or DVD drive and click Start Run In the Open field type e win32 bat where e is the drive letter of the...

Страница 14: ...avoid inconvenient or problem situations v Attention These notices indicate potential damage to programs devices or data An attention notice is placed just before the instruction or situation in which...

Страница 15: ...all power cords to a properly wired and grounded electrical outlet v Connect to properly wired outlets any equipment that will be attached to this product v When possible use one hand only to connect...

Страница 16: ...that you are installing comes with two rubber pads on the underside of the keyboard remove and discard them The rubber pads have an adhesive backing and can be peeled from the surface If you leave th...

Страница 17: ...splay 8 Turn over the console unit a Grasp the cable management arm and the loose cables in one hand b On the opposite end of the console unit grasp the flat panel display and the console unit frame t...

Страница 18: ...ation Note In the following illustration the console unit is turned over and is placed on a table or other flat surface b Gently squeeze the bushing and push it toward the rear of the console unit to...

Страница 19: ...able from hanging below the bottom of the console unit c Place the clamp on the screw on the console unit frame and hand tighten the nut on top of the clamp 11 Turn over the console unit a Grasp the c...

Страница 20: ...ice out of the rack cabinet at the same time v Connect all power cords to properly wired and grounded electrical outlets v Do not overload the power outlet when you install multiple devices in the rac...

Страница 21: ...the console unit make sure that you install a cage nut or clip nut in the center rear position that is shown shaded in the following illustration U U U U U U U U U U U U Front Rear Optional console s...

Страница 22: ...ws in the middle holes in the slide rail bracket These holes are for the thumbscrews on the front of the console unit 5 Loosely attach the back of the slide rail brackets to the rack cabinet using fou...

Страница 23: ...Tighten the front four screws and remove the spacer Note Do not tighten the four rear slide rail bracket screws at this time Rail alignment spacer 8 Extend the inner part of the outer rails and slide...

Страница 24: ...ole unit in the rails Do this a few times until the console unit moves smoothly in the rails Release latch 10 Push the console unit into the rack and then tighten the four rear slide rail bracket scre...

Страница 25: ...te the cables within the rack cabinet and secure them with cable straps along the way Important To minimize the electrical interference from the video cable arrange the cable in figure eight loops as...

Страница 26: ...sole switch is available separately Depending on the depth of the console switch and the depth of the rack you can mount the console switch behind the console unit in the same 1U space To mount the co...

Страница 27: ...mounting bracket to the right side of the console switch Note The mounting bracket that you attach to the left side of the console switch has a channel through which you can route the power video and...

Страница 28: ...sole switch and then connect the video keyboard and mouse connectors to the console switch 4 See the documentation that comes with the console switch for information about connecting the flat panel di...

Страница 29: ...trols on the front of the LCD display function as detailed in the following list AUTO EXIT MENU v AUTO button Press this button to automatically adjust the display settings v EXIT button Press this bu...

Страница 30: ...oblem with one of these parts contact a service technician Before you perform any maintenance on the display turn off the power Observe the following guidelines when you clean the display v Gently wip...

Страница 31: ...z Input signal Sync HN separate TTL positive or negative HN composite TTL positive or negative Sync on green 0 3 Vp p negative Video signal 0 700 Vp p at 75 ohm positive Power supply ac 100 240 V 60 H...

Страница 32: ...22 1U 17 inch Flat Panel Console Kit Installation and Maintenance Guide...

Страница 33: ...F V G B H N J M K L E n te r S h if t S h if t C a p s L o c k E s c F 1 F 2 F 3 F 4 F 5 F 6 F 7 F 8 F 9 F 1 0 F 1 1 F 1 2 D e le te In s e rt P rt S c E n d H o m e S c rL k P g D n P g U p P a u s e...

Страница 34: ...r Used in these countries and regions 39M5206 China 39M5102 Australia Fiji Kiribati Nauru New Zealand Papua New Guinea 39M5123 Afghanistan Albania Algeria Andorra Angola Armenia Austria Azerbaijan Bel...

Страница 35: ...lize Bermuda Bolivia Brazil Caicos Islands Canada Cayman Islands Colombia Costa Rica Cuba Dominican Republic Ecuador El Salvador Guam Guatemala Haiti Honduras Jamaica Japan Mexico Micronesia Federal S...

Страница 36: ...ouse connectors from the server or console switch 2 Unscrew the thumbscrews and then fully extend the console unit from the rack Thumbscrew 3 Carefully unfasten the cable straps and then remove the ke...

Страница 37: ...screw the nut and remove the clamp Note The following illustration shows the underside of a fully extended console unit that is installed in a rack b Remove the keyboard and mouse cable from the clamp...

Страница 38: ...t Note The following illustration shows the underside of a fully extended console unit that is installed in a rack b Remove the keyboard and mouse cable from the bushing c Save the bushing for use lat...

Страница 39: ...on the keyboard they will extend into the 1U space below Remove rubber pads two places Keyboard foot Attention Do not extend the keyboard feet The flat panel display screen might be damaged if the fee...

Страница 40: ...h of the cable through the opening 11 Place the keyboard in the tray and press the hook and loop fasteners together Attention When you route the keyboard and mouse cable make sure that the cable does...

Страница 41: ...r three slots See the following illustration Note The following illustration shows the underside of a fully extended console unit that is installed in a rack b Push the keyboard and mouse cable throug...

Страница 42: ...nded console unit that is installed in a rack b Place the clamp on the screw on the console unit frame and hand tighten the nut on top of the clamp 14 Route the keyboard and mouse cable and the other...

Страница 43: ...n off the display and disconnect the power from the display 2 Disconnect the keyboard mouse and video connectors from the server or console switch 3 Remove the screw that attaches the cable management...

Страница 44: ...rm 6 Align the new cable management arm and attach it to the console unit using the nut that you removed in step 5 7 Route the video power and keyboard and mouse cables along the new cable management...

Страница 45: ...ail assemblies Note To make sure that the slide rail assemblies fit correctly replace both the outer and inner slide rails at the same time To replace the outer and inner slide rails for the console u...

Страница 46: ...console unit from the front of the rack cabinet push in the release latch on each side and slide the console unit out of the rack Release latch 6 Remove the eight screws that attach the outer slide r...

Страница 47: ...s 8 Adjust the outer slide rail brackets to fit the depth of the rack cabinet and then attach the front of the slide rail brackets to the rack cabinet using four screws Make sure that the slide rail b...

Страница 48: ...on each of the outer rails if you loosened them in step 7 on page 37 11 Loosen the front four slide rail bracket screws and then insert the rail alignment spacer into the middle holes in the slide rai...

Страница 49: ...o be sure that the slide rail assemblies fit correctly replace the existing outer slide rails with the new rails that come with the replacement console unit 4 Installing the replacement console unit i...

Страница 50: ...4 on page 49 4 Press the release latches and carefully slide the console unit out of the ball bearing assemblies in the rails Release latch 5 Turn over the console unit so that the underside is facing...

Страница 51: ...nfasten the keyboard and mouse cable from the nut and clamp a Unscrew the nut and remove the clamp Note In the following illustration the console unit is turned over and is placed on a table or other...

Страница 52: ...table or other flat surface b Remove the keyboard and mouse cable from the bushing c Save the bushing for use later in this procedure 3 Turn over the console unit a Grasp the cable management arm and...

Страница 53: ...the surface This will help you route the keyboard and mouse cable more easily See the illustration in step 7 7 Carefully route the keyboard and mouse cable down through the keyboard tray opening on t...

Страница 54: ...es in the rack space below the console unit 11 Route the keyboard and mouse cable a Route the cable through the slot on the left side of the cable routing area on the underside of the keyboard Do not...

Страница 55: ...is turned over and is placed on a table or other flat surface b Place the clamp on the screw on the console unit frame and hand tighten the nut on top of the clamp 13 Turn over the console unit a Gras...

Страница 56: ...crews on each of the outer slide rails and extend the rails to their maximum outward adjustment Rail adjustment screws 3 Adjust the outer slide rail brackets to fit the depth of the rack cabinet and t...

Страница 57: ...tment screws on each of the outer rails if you loosened them in step 2 on page 46 6 Loosen the front four slide rail bracket screws and then insert the rail alignment spacer into the middle holes in t...

Страница 58: ...l bearing assemblies in the rails 2 Press the release latches and then push the console unit completely into the rack There will be resistance initially as the ball bearing assemblies align between th...

Страница 59: ...ct the video keyboard and mouse connectors to either a server or a console switch in the rack cabinet Connect the power cord to the short jumper cord on the cable management arm and then connect the p...

Страница 60: ...ong the way Important To minimize the electrical interference from the video cable arrange the cable in figure eight loops as shown in the following illustration Secure the cable in the middle with a...

Страница 61: ...agnostic tests that you can perform Most systems operating systems and programs come with documentation that contains troubleshooting procedures and explanations of error messages and error codes If y...

Страница 62: ...e U S and Canada call 1 800 IBM SERV 1 800 426 7378 Hardware service and support You can receive hardware service through your IBM reseller or IBM Services To locate a reseller authorized by IBM to pr...

Страница 63: ...ions Specifications is information specific to a Machine in a document entitled Official Published Specifications which is available upon request During the warranty period IBM provides repair and exc...

Страница 64: ...apacity or capability other than that authorized by IBM in writing The warranty is voided by removal or alteration of identification labels on the Machine or its parts IBM does not warrant uninterrupt...

Страница 65: ...arranted or 2 replace it with one that is at least functionally equivalent If IBM or its subcontractor or the reseller is unable to do either you may return the Machine to your place of purchase and y...

Страница 66: ...BM may ship all or part of the Machine or its software to other IBM or third party locations around the world and you authorize IBM to do so Limitation of Liability Circumstances may arise where becau...

Страница 67: ...s of Justice of Santiago 5 in Colombia the Judges of the Republic of Colombia 6 in Equador the civil judges of Quito for executory or summary proceedings as applicable 7 in Mexico the courts located i...

Страница 68: ...Peruvian Civil Code the limitations and exclusions specified in this section will not apply to damages caused by IBM s willful misconduct dolo or gross negligence culpa inexcusable UNITED STATES Gover...

Страница 69: ...he findings of fact and the conclusions of law The number of arbitrators shall be three with each side to the dispute being entitled to appoint one arbitrator The two arbitrators appointed by the part...

Страница 70: ...the parties shall appoint a third arbitrator who shall act as chairman of the proceedings Vacancies in the post of chairman shall be filled by the president of the Bar Council of India Other vacancies...

Страница 71: ...of America except when local law requires otherwise PHILIPPINES Limitation of Liability Item 3 in the last paragraph is replaced by the following SPECIAL INCLUDING NOMINAL AND EXEMPLARY DAMAGES MORAL...

Страница 72: ...therlands Norway Poland Portugal Romania San Marino Slovakia Slovenia Spain Sweden Switzerland United Kingdom Vatican State and any country subsequently added to the European Union as from the date of...

Страница 73: ...ne Somalia Tanzania Uganda United Arab Emirates United Kingdom West Bank Gaza Yemen Zambia and Zimbabwe all disputes arising out of this Statement of Limited Warranty or related to its execution inclu...

Страница 74: ...rising in connection with this Statement of Limited Warranty will be finally settled in arbitration that will be held in Helsinki Finland in accordance with the arbitration laws of Finland then in eff...

Страница 75: ...or due to any other cause related to this Statement of Limited Warranty is limited to the compensation of only those damages and losses proved and actually arising as an immediate and direct consequen...

Страница 76: ...THEIR POSSIBILITY 1 LOSS OF OR DAMAGE TO DATA 2 INCIDENTAL OR INDIRECT DAMAGES OR FOR ANY ECONOMIC CONSEQUENTIAL DAMAGES 3 LOST PROFITS EVEN IF THEY ARISE AS AN IMMEDIATE CONSEQUENCE OF THE EVENT THA...

Страница 77: ...o the subject matter of this Statement of Limited Warranty in respect of which IBM is legally liable to you whether in contract or tort A number of Defaults which together result in or contribute to s...

Страница 78: ...y liable to you whether in contract or tort A number of Defaults which together result in or contribute to substantially the same loss or damage will be treated as one Default Circumstances may arise...

Страница 79: ...cement CRUs to you for you to install CRU information and replacement instructions are shipped with your Machine and are available from IBM at any time on your request CRUs are designated as being eit...

Страница 80: ...replacement Machine You are responsible for its installation and verification of operation Service Levels Service levels specified below are response time objectives only and are not guarantees The sp...

Страница 81: ...s or implied warranties in certain transactions therefore this statement may not apply to you This information could include technical inaccuracies or typographical errors Changes are periodically mad...

Страница 82: ...DVD drive speed is the variable read rate Actual speeds vary and are often less than the possible maximum When referring to processor storage real and virtual storage or channel volume KB stands for...

Страница 83: ...ie de programas y servicios de devoluci n de productos en varios pa ses a fin de ayudar a los propietarios de equipos a reciclar sus productos de TI Se puede encontrar informaci n sobre las ofertas de...

Страница 84: ...ce manual for specific battery information The battery must be recycled or disposed of properly Recycling facilities may not be available in your area For information on disposal of batteries outside...

Страница 85: ...ustomers for the return recycling and treatment of batteries and accumulators Customer participation is important to minimize any potential effects of batteries and accumulators on the environment and...

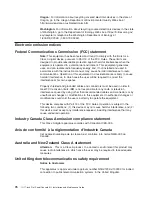
Страница 86: ...hielded and grounded cables and connectors must be used in order to meet FCC emission limits IBM is not responsible for any radio or television interference caused by using other than recommended cabl...

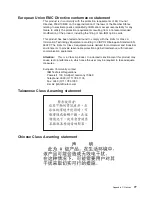
Страница 87: ...for Class A Information Technology Equipment according to CISPR 22 European Standard EN 55022 The limits for Class A equipment were derived for commercial and industrial environments to provide reason...

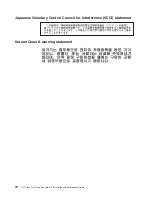
Страница 88: ...Japanese Voluntary Control Council for Interference VCCI statement Korean Class A warning statement 78 1U 17 inch Flat Panel Console Kit Installation and Maintenance Guide...

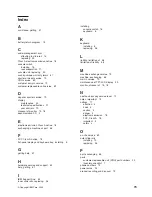
Страница 89: ...and keyboard tray installing 5 G getting help 51 H hardware service and support 52 help getting 51 I IBM Support Line 52 inner slide rails replacing 35 installing console switch 16 keyboard 6 K keyboa...

Страница 90: ...ware service and support 52 specifications display 21 support web site 51 T technical specifications display 21 telephone numbers 52 TFT LCD display maintenance 20 technical specifications 21 user con...

Страница 91: ......

Страница 92: ...Part Number 46M1369 Printed in USA 1P P N 46M1369...

Отзывы: