background image

701344-003

3-39

Setup Menus, Controls, and Indicators

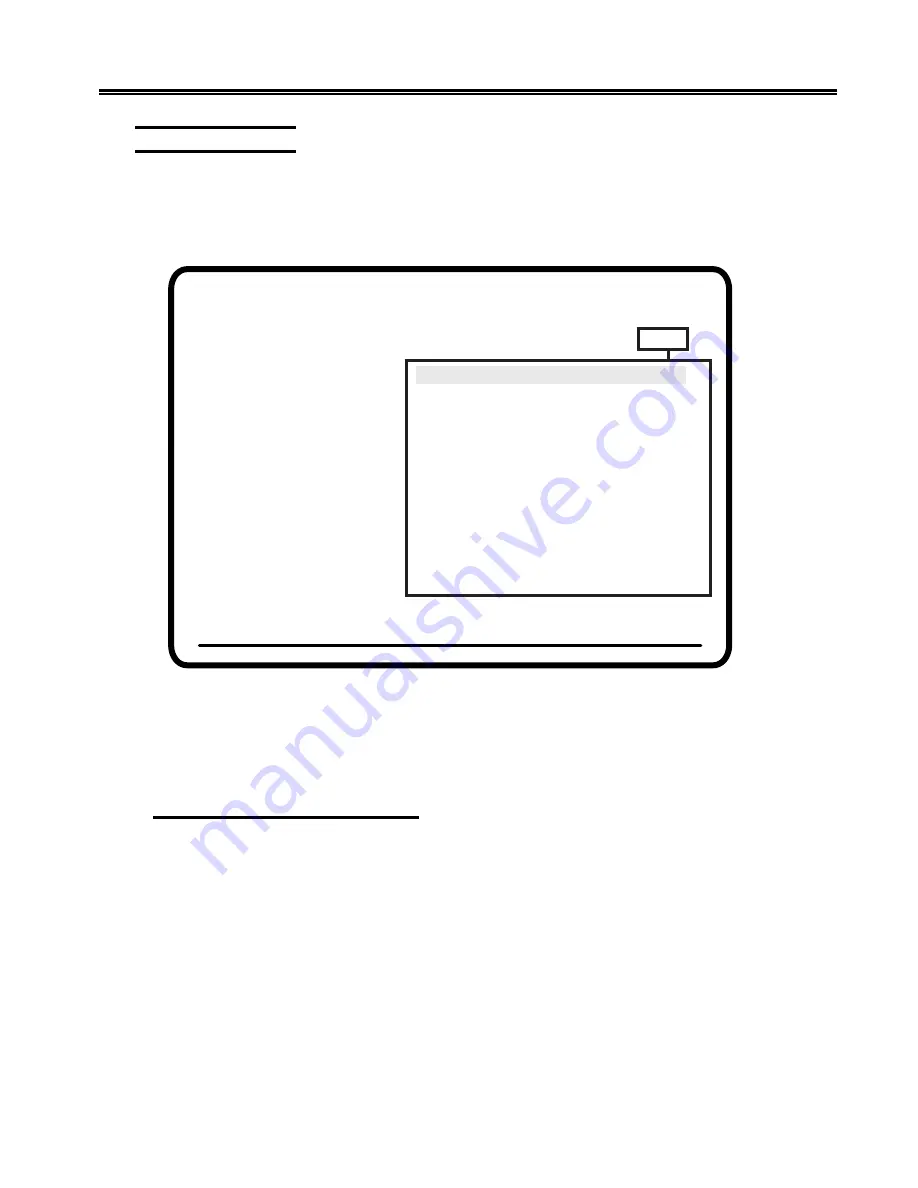
Online Color Menu

The Color option and Color menu are displayed only if a color monitor is attached
to the 1483. To display the Online Color menu, use the Left and Right Arrow keys to
highlight Color and press the Enter key. The Online Color menu is displayed (Figure
3-16, below).

Figure 3-16.  Online Color Menu

All the options on the Online Color menu are available on the Offline Color menu. See
“Offline Color Menu” on Page 3-24 for more information about these options.

Leaving the Online Color Menu

To leave the Online Color menu, use the Left and Right Arrow keys to display another
online setup menu, or press the Reset key to exit from Online Setup mode.

Online Menu Screen

Use Arrow Keys to choose item

Use ENTER Key to change item

RESET Key Exits

Color

4 Color

Unprotected Normal

C4

Unprotected Highlighted

C2

Protected Normal

C1

Protected Highlighted

C7

Background Color

C0

C1

Blue

31

C2

Red

11

C3

Pink

40

C4

Green

21

C5

Turquoise

26

C6

Yellow

16

C7

White

63

Background Color

C0

Reset to Default Colors

Screen

Cursor

Keyboard

Printer

Miscellaneous

Color

Содержание 1483

Страница 1: ...1483 1483DSV Display Station Operator s Manual P N 701344 003...

Страница 2: ...9 1 0 9 0 e s a e l e R X T M 1 0 7 3 0 0 4 4 3 8 9 7 0 7 0 IBM is a registered trademark of International Business Machines Corporation NetView is a registered trademark of International Business Mac...

Страница 3: ...ested and found to comply with the limits for a Class A computing device pursuant to Subpart J of Part 15 of FCC Rules which are designed to provide reasonable protection against such interference whe...

Страница 4: ...s 3 1 Emulation Mode 3 1 Native Mode 3 2 Keyboard Definition Mode 3 2 Keyboard Controls 3 3 Offline Setup Mode 3 4 Offline Test Menu 3 5 User Menus 3 6 Offline Screen Menu 3 6 Offline Cursor Menu 3 10...

Страница 5: ...k 4 18 Chapter 5 Entry Assist 5 1 Entry Assist Functions 5 2 Entering Document Mode 5 2 Format Controls 5 2 Cursor Movement and Editing Functions 5 5 Chapter 6 Calculator Operation 6 1 Calculator Mode...

Страница 6: ...on Requirements 9 1 Controllers 9 1 Display Requirements 9 1 Other Requirements 9 1 Operation 9 2 Entering Dual Screen Mode 9 2 Active and Suspended Screens 9 2 KeyAssignments 9 3 Dual Screen Mode Enh...

Страница 7: ...Page viii 701344 003...

Страница 8: ...atted Screen 4 4 Figure 4 2 Online Print Menu 4 11 Figure 4 3 Paper Control Options Menu 4 12 Figure 4 4 Session Control Options Menu 4 13 Figure 4 5 Extended Select Overlay 104 Key and 122 Key Keyboa...

Страница 9: ...rocessor unit CPU via the attaching controller You enter or change information on a keyboard that resembles a typewriter Entered data is simultaneously displayed as alphanumeric characters and symbols...

Страница 10: ...green and white 4 color green white blue and red 4 color programmable Reverse Video The Reverse Video feature is supported on 15 inch monochrome monitors only Intensity Control With the 1483 s 15 inch...

Страница 11: ...When the controller supports this function you can use the cursor positioning keys to scroll vertically through a presentation space designated by the host Auto Screen Cutoff Automatically blanks the...

Страница 12: ...ximum of 7000 keystrokes can be stored in nonvolatile memory and can be played back at any time During playback a pause feature allows you to perform normal operations before resuming playback Calcula...

Страница 13: ...s gathering by NetView The control unit to which the display station is attached must support this function Extended Vital Product Data From the Offline Test menu you can review a 15 character Label f...

Страница 14: ...d by a 125V 15A grounding type attachment connector It is terminated at the other end by a 125V 15A parallel blade grounding type attachment plug t n e m e r u s a e M t n e m e l E c i g o L t h g i...

Страница 15: ...and carpeting that does not have antistatic properties by avoiding the use of plastic seats and covers and by avoiding low humidity levels The unit should be located away from areas that generate ele...

Страница 16: ...that comes with your monitor for instructions on how to attach the monitor cable Warning If the power rating on the Logic element is not equal to or greater than the power rating on the Display eleme...

Страница 17: ...into the 4 pin receptacle on the rear of the Logic element Check to ensure that the connector is firmly seated Figure 2 1 on Page 2 3 shows the location of the light pen connector on the back of the L...

Страница 18: ...the Power On Off switch to On F1 Sets the monitor to color SVGA mode F2 Sets the monitor to color VGA mode default F7 For multifrequency monitors that can operate up to 42 KHz sets the vertical refres...

Страница 19: ...etup menus to change the modes Obtain the settings designated for the display station from the system operator The controller to which the display station attaches must be configured to support the se...

Страница 20: ...n modes Emulation mode or Native mode The default setting is to emulate an IBM 3278 88 key keyboard You can change the keyboard operation mode by changing the keyboard type on the Offline Keyboard men...

Страница 21: ...l Unit at configuration support D microcode release level 63 0 or higher To use Native mode with a 102 103 key keyboard you must be connected to one of the following controllers MTX MTC 1174 Network C...

Страница 22: ...n in Insert mode or to terminate a printer identification sequence before all characters have been entered Change Screen Press the Change Screen key to toggle between sessions The Change Screen key do...

Страница 23: ...ee Page 3 31 can be operated by entering Setup mode any time after the display is powered on whether online or offline The following special adjustments are made from Offline Setup mode only Screen Si...

Страница 24: ...w keys to highlight User Menus on the Offline Test menu and press the Enter key The Offline Screen menu is displayed Figure 3 3 on Page 3 7 Offline Test Menu Selections 1 The User Menus selection disp...

Страница 25: ...ht Arrow key to highlight Screen Cursor Keyboard Printer Miscellaneous or Color the Color option is displayed only if you have a color monitor to display other offline user setup menus Note You can pr...

Страница 26: ...n be entered To activate the Mark Unprotected Field indicator highlight Mark Unprotected and press the Enter key to select Yes or No the default Mark Unprotected Field Character MUP To select a Mark U...

Страница 27: ...he display screen highlight Screen Size on the Offline Screen menu and press Enter to cycle through the four possible screen size settings 24 X 80 Mod 2 default 32 X 80 Mod 3 43 X 80 Mod 4 27 X 132 Mo...

Страница 28: ...and press the Enter key to cycle through the choices Normal the default Data Only and Highlight Figure 3 4 Intensity Control Options Leaving the Offline Screen Menu To leave the Offline Screen menu us...

Страница 29: ...rsor Size and press the Enter key to toggle between Block the default and Underline Cursor Blink You can select a blinking cursor or a nonblinking cursor by highlighting Cursor Blink and pressing the...

Страница 30: ...online press the Rule key Rule Color Note To use the rule cursor when you are online press the Rule key For color monitors The rule can be set to any of the selectable colors To change the rule color...

Страница 31: ...en if the last character position is unprotected or when the host system signals the display station to sound the alarm Refer to the system user s guide for additional information about alarm signals...

Страница 32: ...lt Medium and Fast Repeat Delay You can change the time interval of starting the continuous display of characters on autorepeat keys by changing the autorepeat delay speed control To adjust the speed...

Страница 33: ...eyboard Definition Utility required To change the keyboard selection highlight Keyboard Type on the Offline Keyboard menu and press Enter until the required selection is displayed Numeric Lock Note Ch...

Страница 34: ...play the Offline Test menu Offline Printer Menu To display the options on the Offline Printer menu use the Left and RightArrow keys to highlight Printer on any offline setup menu and press the Enter k...

Страница 35: ...Series II ThinkJet HP ThinkJet DeskJet HP DeskJet 500 FX1050 Epson LQ1050 Epson 4207 IBM Proprinter X24E 4208 IBM Proprinter XL24E 5202 IBM Quietwriter III 5204 IBM Quickwriter 4019 IBM LaserPrinter P...

Страница 36: ...style specified by the power on sequence For example if you set the power on sequence for Courier 10 point bold italic everything the printer prints is in Courier 10 point bold italic To set the power...

Страница 37: ...LU1 SCS commands If host addressable print is enabled the Adjusting Line Feed and Adjusting Form Feed options are displayed Printer Format Control The printer format control feature enables the user t...

Страница 38: ...the beginning of the line without a line feed The next printed characters will overwrite the current line of printed characters If you select No the default for this option when the printer reaches t...

Страница 39: ...position on the new page FF at end of print If you select Yes for this option the printer ejects the last printed page and subsequent printing begins on the new page If you select No the default for t...

Страница 40: ...RPQ number 4 press the F4 or PF4 key Leaving the Offline Printer Menu To leave the Offline Printer menu use the Left and Right Arrow keys to display another offline setup menu or press the Reset key t...

Страница 41: ...to be displayed in that language until changed again Dim Timer The Dim Timer controls when the Auto Screen Cutoff function takes effect When this function is set the screen blanks in a specified numbe...

Страница 42: ...fter the screen is blanked by the Auto Screen Cutoff function Dim Timer option The default setting is 30 minutes For example if the Dim Timer is set for 10 minutes and the Power Down timer is set for...

Страница 43: ...isplayed only if a color monitor is attached to the 1483 To display the options on the Offline Color menu use the Left and Right Arrow keys to highlight Color on any offline setup menu and press the E...

Страница 44: ...ted Highlighted is C7 white and Background Color is C0 black You can change the factory set default colors assigned to C1 C2 C4 and C7 by changing the colors assigned to the fields as described in Cha...

Страница 45: ...olor C0 Black C1 Blue C2 Red C3 Pink C4 Green C5 Turquoise C6 Yellow C7 White C0 is the default background color You can change the shade of background colors C1 through C7 by following the directions...

Страница 46: ...er offline user setup menus 4 As each menu name is selected a full screen menu with selectable functions to set or change is displayed Use the Up and Down Arrow keys to highlight the item to change an...

Страница 47: ...screen The options available to you depend on whether you are using a color or monochrome monitor Figure 3 11 Online Screen Menu All the options on the Online Screen menu are available on the Offline...

Страница 48: ...ochrome monitor Figure 3 12 Online Cursor Menu All the options on the Online Cursor menu are available on the Offline Cursor menu See Offline Cursor Menu on Page 3 10 for more information about these...

Страница 49: ...ard menu are available on the Offline Keyboard menu See Offline Keyboard Menu on Page 3 12 for more information about these options Leaving the Online Keyboard Menu To leave the Online Keyboard menu u...

Страница 50: ...Offline Printer menu Figure 3 7 on Page 3 15 The table on Page 3 32 shows which printer options are available for each supported printer Online Menu Screen Use Arrow Keys to choose item Use ENTER Key...

Страница 51: ...er highlight Chars Inch on the Online Printer menu and press Enter until the required setting is displayed This option is not available if you selected Plain as the attached Printer Type on the Offlin...

Страница 52: ...lines per page To select the lines per page highlight Lines Page on the Online Printer menu and press the Enter key The current selection for the lines per page is displayed Enter the number of lines...

Страница 53: ...lines to be advanced highlight Auto Skip and press the Enter key The selection area for the auto skip function is highlighted Use numeric keys to enter a new value Allowable values are 000 199 The num...

Страница 54: ...LE DELIMITER String NDS field must be filled in with one or two characters APM data characters must be 0 9 orA F any others will cause the program to terminate any APM functions being performed on tha...

Страница 55: ...etween the delimiters will be converted to bytes to send to the attached local printer The following occurs when the APM is selected OFF Data string sent to terminal to be printed is not scanned for d...

Страница 56: ...nt unchanged Data In 1B47426F6C641B48 Data Out esc GBold esc H 8 characters out Result esc G puts printer into enhanced mode Bold is printed enhanced Bold and esc H takes printer out of enhanced mode...

Страница 57: ...ts If the display station is actively online with an application data may be lost To go to Offline Test highlight Go Offline on the Online Miscellaneous menu and press the Enter key The following mess...

Страница 58: ...olor Menu on Page 3 24 for more information about these options Leaving the Online Color Menu To leave the Online Color menu use the Left and Right Arrow keys to display another online setup menu or p...

Страница 59: ...orex Telex 1374 Control Unit an IBM 3274 Control Unit or an IBM 3174 Control Unit Figure 3 17 System Operator Status Row Fields System Symbols The following types of operator status row symbols are ge...

Страница 60: ...s i n o i t a t s y a l p s i d e h T m a r g o r p d e n w o n U e h t o t t o n t u b m e t s y s t s o h e h t o t d e t c e n n o c s i n o i t a t s y a l p s i d e h T m a r g o r p l o r t n o...

Страница 61: ...t f o r e d n i a m e r e h t s l e c n a c r o d e t r a t s t o n t i u Q e h t g n i s s e r P d r a o b y e k e h t s k c o l n u d n a s e s a r e s i h t s e c a l p e r m e t s y s t s o h e h...

Страница 62: ...a h c y e k d a e d X 3 X S X X l o b m y S e m a N g n i n a e M r e d n i m e R s n o i t a c i n u m m o C g n i c u d o r p s i k n i l s n o i t a c i n u m m o c m e t s y s t s o h t i n u l o...

Страница 63: ...7 s t r o p x a o c o t d e h c a t t a s r e t n i r p f o g n i t n i r P r e t n i r P x a o C b o j r u o y g n i t n i r p s i r e t n i r p x a o c d e t c e l e s e h T e r u l i a F r e t n i...

Страница 64: ...n a c s a w t n e m e r u s a e m e m i T e s n o p s e R t n e r r u c e h T t s s s s m m l o b m y S e m a N g n i n a e M f e c n e u q e S d i l a v n I d e n g i s s a e b t o n n a c s e k o r...

Страница 65: ...d r o c e r e u n i t n o c P y a l P o t y e k F P r o F e h t s s e r P e d o m y a l P n i s i n o i t a t s y a l p s i d e h T k c a b y a l p o t t n a w u o y s e k o r t s y e k e h t d e n g...

Страница 66: ...upper left corner of the screen and the operator status row displays one of the following Ready symbols 6 If attached to a Telex 276 Control Unit Display Terminal or IBM 3276 Control Unit Display Stat...

Страница 67: ...On F1 Sets a color monitor to 60 Hz vertical refresh rate F2 Sets a color monitor to 72 Hz vertical refresh rate F7 For multifrequency monitors that can operate up to 42 KHz sets vertical refresh rate...

Страница 68: ...ically If an invalid ID number is entered for a Host printer the What symbol X appears on the operator status row If this occurs press the Reset key and try another number Data Entry Function The data...

Страница 69: ...gin to enter data characters the display station must access the CPU and its application program Access is usually achieved by using theAttention Program Access PA Function F Clear or Enter key or thr...

Страница 70: ...moves beyond the edge of the screen it wraps or reappears at the first character position of the next line Press the New Line key to move the cursor to the first entry position on the next line When t...

Страница 71: ...t key to unlock For Data Entry keyboards press the Shift Lock key again to exit Shift mode For 102 103 key keyboards use the Caps Lock key in place of the Shift Lock key In Shift Lock mode for 122 key...

Страница 72: ...e space and the Record key indicator are displayed on the operator status row 2 Press an F or PF key The selected key number is displayed on the operator status row along with the number of keystrokes...

Страница 73: ...atus row after playback completes 4 After you press the Pause key in Record mode the replaying temporarily stops and the symbol P is displayed on the operator status row You can temporarily resume nor...

Страница 74: ...mark after the field has been deselected For some programs after you have finished selecting fields press the Enter key to send the fields to the host application program for additional processing Th...

Страница 75: ...osition on the screen the audible alarm sounds to remind you that the cursor is near the end of the screen If you continue to enter new data the cursor wraps and reappears in the first available chara...

Страница 76: ...e options Select one of the following COAX default The display contents are printed on the printer attached to the control unit SCREEN The display contents are printed on the local printer attached to...

Страница 77: ...rners field of the Online Printer menu as described on Page 3 34 You can select a location on the printed page for the trim area output by specifying a Print Position option on the Online Printer menu...

Страница 78: ...t key To select a Session Control option move the highlight to the option you want to execute and press the Enter key Press the Reset key to exit from the Printer Control Options menu or the Session C...

Страница 79: ...backward vertically up to the beginning of the data in the presentation space press and hold the Alt and Back keys This action pushes the data down the viewport Extended Select Function To perform th...

Страница 80: ...ly configured control unit Memorex Telex 1274 or IBM 3274 and the host CPU with which they are attached The RTM is accessed and exited by pressing the ExSel key followed by the F19 key 122 key or 104...

Страница 81: ...ess the wrong function key while in ID Set mode you must leave ID Set mode enter ID Set mode again this resets all the switches to Off and press the correct function key s g n i t t e S h c t i w S d...

Страница 82: ...to the next available screen character position Using the Light Pen to Select Data You can use the optional light pen to select data from fields that are defined for light pen operations Ask your sup...

Страница 83: ...umber If the password does not match the 3 redisplays on the status line When the password matches the display is unlocked and the control unit removes the symbol Powering off the display while locked...

Страница 84: ...only if the 1483 is attached to a controller that supports Entry Assist capability The Entry Assist keys shown in the table are not valid if the 122 key keyboard is set to emulate an 88 key keyboard...

Страница 85: ...controls cursor movement and editing functions are described here for display stations with 102 103 key 104 key and 122 key keyboards attached Entering Document Mode To enter Document mode press the...

Страница 86: ...n the display returns to Document mode The following format parameters shown with their corresponding format symbols can be changed on the format scale Left margin Right margin Tab stops _ End of line...

Страница 87: ...n Type The standard right margin remains in effect during Document mode whether the Word Wrap function described on Page 5 6 is active or not However some typing situations call for a margin release i...

Страница 88: ...n press the Asterisk key An asterisk is displayed in the selected position The end of line signal function is then enabled and remains in effect during Document mode until the asterisk is removed To d...

Страница 89: ...tion one character left of the right margin the cursor is moved to the left margin of the next line without word wrapping If the cursor is one space left of the right margin and the Dup key is pressed...

Страница 90: ...Previous Word Autorepeat Press and hold the Alt key then press the Cursor Left key to move the cursor to the beginning of the current word or if already at the beginning of a word to the beginning of...

Страница 91: ...are not changed to spaces when a backtab operation is performed The cursor will not wrap from the upper left corner of the screen to the lower right corner Backspacing with Deletion Pressing the Back...

Страница 92: ...splayed whenever Calculator mode is entered until changed by selection of another calculator Calculator Mode To enter or exit Calculator mode depending on the attached keyboard press and hold the Alt...

Страница 93: ...mulation Press the key on the calculator simulation or on the main keypad to display the result of your computation in the calculator s Results field Setting the Decimal Place You can set from 0 throu...

Страница 94: ...places press the N key Figure 6 1 Simulated Decimal Calculator Calculating Percentages To calculate a percentage of a number with the Decimal calculator 1 Enter the number 2 Press the key indicated o...

Страница 95: ...saved with the Decimal calculator and recalled with the Binary calculator 100000002 is displayed in the Results field Press the X M key to store the currently displayed value in memory Press this key...

Страница 96: ...iplication or for division X or XOR for logical XOR or for logical OR for logical AND If you want to enter a negative number enter the number and then press the key indicated on the calculator simulat...

Страница 97: ...ed with the Decimal calculator and recalled with the Binary calculator 100000002 is displayed in the Results field Press the X M key to store the currently displayed value in memory Press this key wit...

Страница 98: ...th calculations Other Calculator Functions Press the C E key once to clear the current entry Press the C E key again to clear the current total You can also use the Clear key on the main keyboard Pres...

Страница 99: ...enters Offline Test mode each time it is powered on The display station s own series of BasicAssuranceTests BATs are run each time the display station is powered on If an error is detected the alarm s...

Страница 100: ...s The BasicAssuranceTests selection starts a series of tests running on the display station The tests run in a continuous loop until you stop them by pressing the Reset key To start the tests highligh...

Страница 101: ...sample keyboard test screen The test screen displayed depends on the keyboard attached to the display station Each key on the keyboard can be tested by pressing the key If the key is operating correct...

Страница 102: ...or Down Arrow key to highlight Screen Centering and press the Enter key The Centering screen is displayed Figure 7 4 on Page 7 5 Use the Up Down Left and Right Arrow keys to move the Centering screen...

Страница 103: ...ugh the security level choices Each time you press the Enter key the warning message is displayed Press the Enter key again to display the next security level choice Press Reset to return to the Syste...

Страница 104: ...the displayed serial number is highlighted and the numbers 0 9 and the alphabet are displayed on the screen above the status row line Next follow these steps 1 Move the underline cursor using the Left...

Страница 105: ...this menu selection from the default setting of Full Functions The system manager uses the Play Record option to set security options for Play Record functions that once set cannot be changed from thi...

Страница 106: ...t r a P n O y l n o r o t i n o m e m o r h c o n o m o e d i V e s r e v e R n O y l n o r o t i n o m e m o r h c o n o m l o r t n o C y t i s n e t n I l a m r o N e z i S r o s r u C k c o l B k...

Страница 107: ...k S o t u A 0 0 0 e d o M p i k S o t u A n e e r c S s r e n r o C t n i r P d e m m i r T 0 8 4 2 1 1 s r e d r o B m i r T s r o t i n o m r o l o C 1 C s r o t i n o m e m o r h c o n o M l a m r...

Страница 108: ...n a p a J n a m r e G n a i g e w r o N h s i l g n E S U e s e u g u t r o P h s i n a p S h s i n a p S w e N h s i n a p S g n i k a e p S h s i n a p S h s i n a p S h s i d e w S h s i n n i F h...

Страница 109: ...and data combinations for this display station Product ID Display product information by entering Offline Setup mode To enter Offline Setup mode hold down any key while you turn the display station on...

Страница 110: ...o d r a b l l i t s n e e r c s e h t f I s l o r t n o c s s e n t h g i r B r o d n a t s a r t n o C e h t t s u j d A m e l b o r p e h t f I t n e m e l e c i g o L y a l p s i D e h t e c a l p...

Страница 111: ...does not sound when the Enter key is pressed the Display Logic element is failing Error Code Operator Status Row Recommended Action 1 Be sure the appropriate Keyboard Type has been selected in Offlin...

Страница 112: ...ears replace the Keyboard element NK 1 Set the Power switch to Off O 2 Ensure that the keyboard cable is tightly connected 3 Set the Power switch to On 4 After ten seconds if NK reappears replace the...

Страница 113: ...information Controllers To support Split Screen mode the controller must be configured for two or more logical sessions on the display terminal s port In addition PC File Transfer mode must be set fo...

Страница 114: ...ermits a standard 1483 single imaging device to simultaneously display two host sessions Because two or more sessions must be managed one session is selected as the active session and the other as the...

Страница 115: ...nts The following commands and features are available in Split Screen mode Zoom Press the Zoom key to alternate the display between unzoomed top and bottom format and zoomed normal format The zoomed f...

Страница 116: ...the bottom is now the active session and receives immediate screen updates The session on the top is frozen which means it does not display new screen updates until it becomes the active session The...

Страница 117: ...on the bottom see Figure 8 3 below If you press the Select Bottom key Session 3 is still displayed on the top and Session 1 is still displayed on the bottom but now Session 1 has the cursor Figure 8 3...

Страница 118: ...the current source or target field is the bottom field on the screen the topmost field on the next line becomes the new source or target field If the current source or target field is the last field...

Страница 119: ...the target field Paste Field The paste field is the field that receives the data from the mark field and it cannot be in the same session as the mark field The field that receives the pasted data must...

Страница 120: ...ite corner of the box Jump Bottom Makes the bottom session active Zoom Zooms in or out of the active session Alt PF11 Exits the Block Copy feature After locating and sizing the trim box Jump to the bo...

Страница 121: ...m key sequence The cursor is displayed on the bottom of the screen The session on the bottom is now the active session 3 Press the Select Top key sequence The cursor is displayed on the top of the scr...

Страница 122: ...ch you want to print The print session must be an active session Follow these steps to perform a screen print 1 Select the session to be printed using the Select Top or Select Bottom key 2 Press the Z...

Страница 123: ...nstallation information Controllers To support Dual Screen mode the controller must be configured for two or more logical sessions on the display terminal s port In addition PC File Transfer mode must...

Страница 124: ...y The display station can enter Dual Screen mode only if it has been set up as a Mod 2 3 or 4 Active and Suspended Screens Dual Screen mode permits a standard 1483 single imaging device to simultaneou...

Страница 125: ...ween unzoomed side by side format and zoomed normal format The zoomed format is identical to the standard Mod 2 3 or 4 format There is only one unzoomed format for all three model types The zoomed ses...

Страница 126: ...ght key has no effect if the right side session is already active See Reverse Keys below for additional information about the Select Right key Reverse Keys In some environments you must use the Alt F1...

Страница 127: ...press the Select Right key Session 3 is still displayed on the left and Session 1 is still displayed on the right but now Session 1 has the cursor Figure 9 3 Example of Step Active Session Swap Sessio...

Страница 128: ...If the current source or target field is the rightmost field on the screen the leftmost field on the next line becomes the new source or target field If the current source or target field is the last...

Страница 129: ...t field Paste Field The paste field is the field that receives the data from the mark field and it cannot be in the same session as the mark field The field that receives the pasted data must be an un...

Страница 130: ...ists of a standard one session format 6 Press the Select Right key The session from the right side of the display becomes the active session The screen is still zoomed and the right session is the onl...

Страница 131: ...wlett Packard ThinkJet Roman 8 All unsupported characters are printed as hyphens Hewlett Packard DeskJet ECMA 94 All unsupported characters are printed as hyphens Epson FX1050 Extended Graphic Charact...

Страница 132: ...ff ECMA 94 Latin 1 character set A 4 Up on ECMA 94 Latin 1 character set A 5 Any 1483 overrides form length A 6 Any 1483 overrides form length A 7 Down off CR does CR only A 8 Up on No perforation ski...

Страница 133: ...e default character set is ROM 1 2 Down off Zero is not slashed 1 3 Up on The graphics table is used 1 4 Up on IBM emulation mode 1 5 Any Short Tear off mode 1 6 Up on USA Character set 1 7 Up on USA...

Страница 134: ...printers Refer to the documentation that came with your printer for instructions on how to set the datastream mode DIP Switch Setting Description 1 1 Up on USA Character set 1 2 Up on USA Character s...

Страница 135: ...e Description of 6 1 Entering 6 1 Toggling in out 6 2 Centering screen 7 4 Change Format key 5 2 Character Case 3 7 Sets printers A 1 Characters Per Inch option 3 32 Click Enable option 3 12 3 13 Clic...

Страница 136: ...ments 2 1 Operating temperature 2 1 Physical characteristics of 2 1 Power consumption 2 1 Setting up 2 3 Weight 2 1 Do not enter symbols 3 41 Document mode Autorepeat 5 7 Backspacing 5 8 Backtabbing 5...

Страница 137: ...mmand Language A 4 Hexadecimal calculator Clearing value 6 7 Entering values 6 7 Example of 6 6 Hexadecimal calculator continued Exporting values 6 7 Full calculator displaying 6 7 Functions supported...

Страница 138: ...option 3 23 Lines Per Inch option 3 33 Lines Per Page option 3 33 Local Error indicators 3 45 LQ1050 DIP switches A 4 M Margins 5 3 5 4 Mark Unprotected Field Character MUP option 3 7 Mark Unprotecte...

Страница 139: ...nt Symbols 3 46 Do not enter symbols 3 41 EntryAssist symbols 3 44 Operator status row indicators continued Input Inhibited symbols 3 41 Local Error symbols 3 45 Local list of 3 45 Locations of 3 40 M...

Страница 140: ...uirements 8 1 Operating 8 1 Other requirements 8 1 Printer continued Operator status row symbols 3 44 Options 3 15 Paper width 3 33 Power on Sequences 3 17 Print position 3 35 Print quality 3 32 Print...

Страница 141: ...ession 8 5 Swap session 8 5 Zoom 8 3 Stationary Rule option 3 11 Suppress Null Lines option 3 34 System connection symbols 3 41 System Manager menu 7 2 T Tab key 4 5 Tab stops 5 4 Test Menu offline 3...

Отзывы: