3.
Loosely thread two retaining screws into the back EIA strips where the nut clips were previously
installed.
4.
Repeat steps 1 through 3 for the right rail.
5.
Tighten all screws.
Installing the expandable rails and extension bracket into the rack
You might need to install rails into the rack. Use the procedure in this section to perform this task. In
addition to related safety information, this section also includes illustrations of the related hardware
components and shows how these components relate to each other.
Attention:
Installing the rails in the rack is a complex procedure. To install the rails correctly, you must
perform each task in the following order. Failure to do so might cause rail failure and potential danger to
yourself and the system unit.
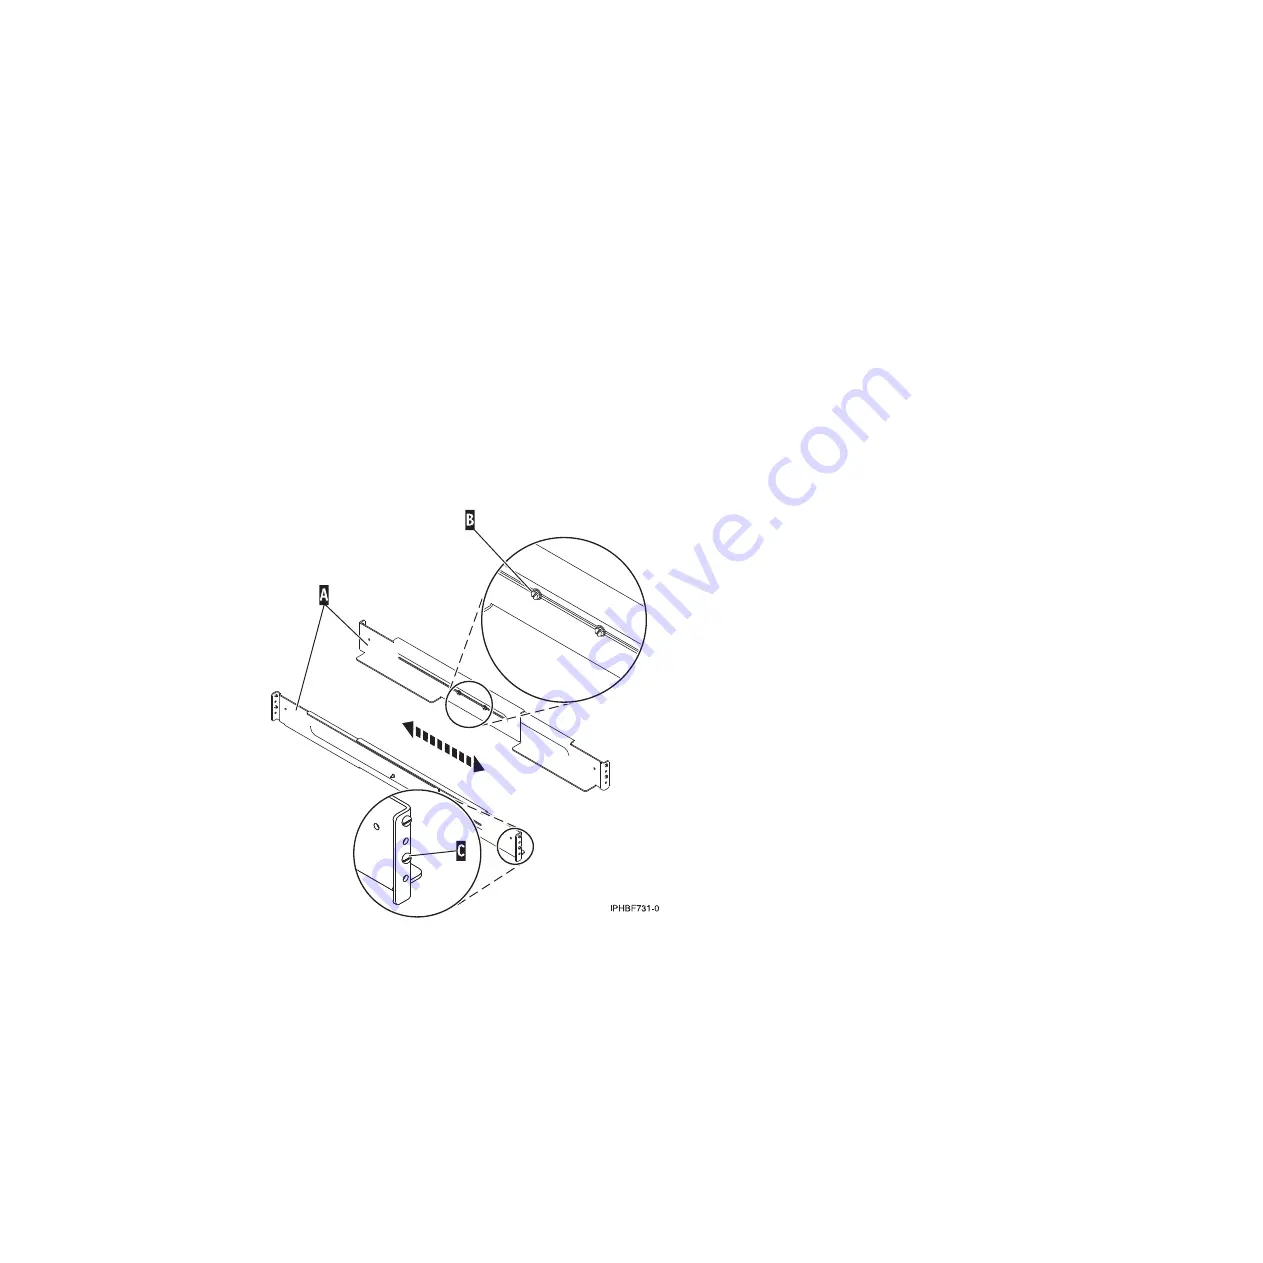
To install the expandable rails into the rack, complete the following steps:
1.
Loosen the two screws
(B)
in the middle of both rails
(A)
to allow each rail to extend.
2.
Starting at the back of the rack, extend the left rail and insert the rail pins
(C)
into the marked
locations the rack so that it is facing upward (L shape).
Tip:
Although the rail installation can be completed by one person, for ease of installation, one
person can be positioned at the front of the rack and one person at the back of the rack.
3.
From the back of the rack, extend the right rail and insert the rail pins
(C)
into the marked locations.
4.
Move to the front of the rack, extend the left rail and insert the rail pins
(C)
into the marked
locations.
5.
Extend the right rail and insert the rail pins
(C)
into the marked locations.
6.
Using one M5 screw
(D)
, secure the left rail to the front of rack into the lower location
(E)
.
Figure 84. Extending the system rails
Chapter 3. Installing a system or expansion unit into a rack
83
Содержание 0551
Страница 1: ...Power Systems Rack rack features and installing systems or expansion units into a rack ...
Страница 2: ......
Страница 3: ...Power Systems Rack rack features and installing systems or expansion units into a rack ...
Страница 8: ...vi Installing into a rack ...
Страница 12: ...2 Installing into a rack ...
Страница 34: ...24 Installing into a rack ...
Страница 118: ...108 Installing into a rack ...
Страница 126: ...116 Installing into a rack ...
Страница 130: ...120 Installing into a rack ...
Страница 136: ...4 Remove the latch bracket from the system unit Figure 124 Removing the retaining screws 126 Installing into a rack ...
Страница 148: ...138 Installing into a rack ...
Страница 164: ...154 Installing into a rack ...
Страница 174: ...3 Close the front rack door 164 Installing into a rack ...
Страница 181: ......
Страница 182: ... Printed in USA ...


