background image


©Copyright LOTRONIC 2014 

LP300 


1–  Start/stop buttons Tonearm lift 


Press this button to start or stop the platter. 

2–  Platter 

The platter is equipped with a slip mat. This makes it easier to manipulate the record for scratch performances. 

3–  33 rpm Speed select buttons 

Press the “33” button to select the 33rpm speed. 

4–  45 rpm Speed select buttons 

Press the “45” button to select the 45rpm speed. 

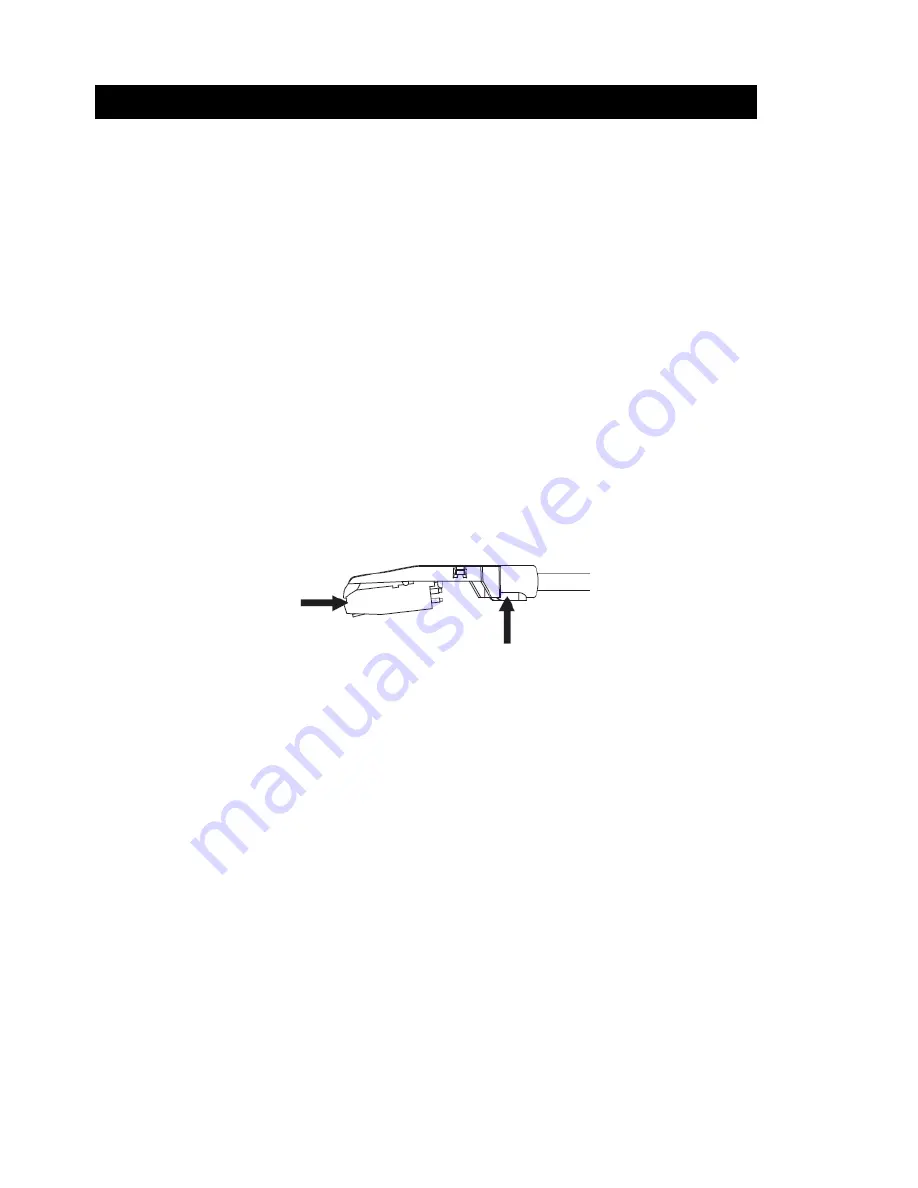
5–  Headshell 

Install cartridge here. When installing a cartridge, refer to the installation instructions supplied by the manufacture of 

that cartridge. During installation, attach the stylus protector to guard the stylus tip from damage.    Attach wires as 

follows: 


White (L+)   

Left c 


Blue (L -) 

Left channel – 


Red (R+)                            Right  


Green (R-) 

Right channel – 

6–  Headshell locking nut 

Attach the head shell by inserting it into the front end of the tone arm and then turn the locking nut clockwise. 


7–  Tone arm 

     This is a fully manual  tone arm. To start playback, gently place the stylus on the record using head shell finger 

support OR use the tone arm lifter (see 9). 

8–  Tone arm stand with lock   

This aluminum nut is used to secure the head shell and cartridge assembly to the tone arm tube. 

9–  Tonearm lift 


Controls the up and down action of the tone arm. 

10–  Counterweight 

Adjustment creates the proper downward pressure of the stylus to the record. We have installed the counterweight at 

our factory and it should be perfectly adjusted. If this is not the case, twist it lightly until the tone arm is perfectly 

balanced. 

11–  Output L & R 

This is the standard analog output (RCA jacks) which can be connected either to phone or line input on any DJ mixer, 

depending on the setting of the phone/line selector. 

12–  USB SOCKET 

Plug USB device. The USB lead length is limited to 3m. 

13–  AUX TO PC 

Audio input for connection of an iPod, MP2 player, etc. to a PC. 

14–  Ground 

Ground lug for turntable connection. Always use this connection when using turntables (your turntable cable should have 

a grounding wire). 

15–  Power cable 

This power cable should be plugged into a wall receptacle AFTER all audio connections have been made. 

Description 


Содержание LP200

Страница 1: ...s sn na aa ar ra aa an nd dr ri ij jv vi in ng g P Pr ra at to o B Be el lt t D Dr ri iv ve e c co om m U US SB B G Gi ir ra ad di is sc co os s U US SB B p po or r t tr ra ac cc ci i n n c co or rr r...

Страница 2: ...Copyright LOTRONIC 2014 LP300 2...

Страница 3: ...or pinched particularly at plug convenience receptacles and point where they exit from the apparatus Only use attachments accessories specified by the manufacturer Use only with a cart stand tripod b...

Страница 4: ...ce the stylus on the record using head shell finger support OR use the tone arm lifter see 9 8 Tone arm stand with lock This aluminum nut is used to secure the head shell and cartridge assembly to the...

Страница 5: ...hole grip the rubber drive belt and install it over the motor spindle Be careful not to twist the rubber drive belt during this step Check to make sure the platter rotates uniformly If the drive belt...

Страница 6: ...io to directory called projefcftname data which is located right where you saved the project file itself Thus select Save project as from your Audacity File tab and choose a location and filename for...

Страница 7: ...d LAME MP3 Codec from the internet F can not record A first the player has to be connected with the computer then AUDACITY may be started F can only record MONO A mostly this occurs with VISTA please...

Страница 8: ...er votre prise obsol te Ne pas marcher sur ni craser le cordon secteur notamment proximit d une prise d une multiprise ou du point de sortie de l appareil Utilisez uniquement des fixations accessoires...

Страница 9: ...t te de lecture en l ins rant dans la partie avant du bras de lecture et tournez l crou de fixation vers la droite 7 Bras de lecture Le bras de lecture est enti rement manuel Pour commencer la lectur...

Страница 10: ...teau Toutefois retournez la platine et v rifiez que la courroie est bien attach e et non tordue Si la courroie s est d tach e pendant le transport placez la atour du cercle int rieur du plateau comme...

Страница 11: ...amme Audacity 5 Selectionnez Preference dans l onglet Edit dans le menu d Audacity Enregistrement d un album avec Audacity 1 Sauvegarder un projet Audacity crit tous les enregistrements dans un r pert...

Страница 12: ...z sur la touche bleue Pause pour suspendre l enregistrement Appuyez nouveau pour le reprendre Cliquez sur la touche jaune d arr t C est tout Vous pouvez maintenant vous amuser avec votre enregistremen...

Страница 13: ...mono ou microphone Lecteur F Le son comporte des craquements A V rifiez que le lecteur est branch sur une entr e haut niveau de votre amplificateur Des entr es haut niveau sont CD AUX TAPE L entr e P...

Страница 14: ...sondere Vorsicht ist am Stecker an der Steckdose und am Ger teaustritt geboten Nur vom Hersteller empfohlene Befestigungen Zubeh rteile benutzen Nur mit einem Wagen Stand Dreifuss Halter oder Tisch be...

Страница 15: ...ER den Hebel benutzen s 9 8 Tonarmst tze mit Verriegelung Blockiert den Tonarm so dass er nicht wegrutschen kann 9 Tonarmhebel Steuert die Auf und Abw rtsbewegung des Tonarms 10 Gegengewicht Erzeugt d...

Страница 16: ...en Kreis auf dem Boden des Plattentellers wie in Abb 1 oben angegeben ist 2 Setzen Sie den Plattenteller auf die mittlere Achse und dr cken Sie ihn fest herunter Drehen Sie den Plattenteller bis die M...

Страница 17: ...ieren 4 Das Audacity Programm ffnen 5 W hlen Sie Preference im Edit Tab im Audacity Men Aufnahme von Alben mit Audacity 1 Speichern eines Projekts Audacity schreibt alle ge nderten und aufgezeichneten...

Страница 18: ...nahmen herumexperimentieren und alle M glichkeiten der Software aussch pfen Solange das Projekt offen ist k nnen Sie praktisch unbegrenzt die L schfunktion benutzen Hinweis CD S k nnen nicht direkt vo...

Страница 19: ...eleing nge sind CD AUX TAPE Der PHONE Eingang ist ungeeignet denn der Spieler besitzt schon einen Vorverst rker Tonkopf und Schallplatte reinigen Einstellung des Gegengewichts pr fen Anti Skating Eins...

Страница 20: ...gd Indien u de zekering vervangt gebruik alleen een identieke zekering Maximale ruimte temperatuur Ta is 104 F 40 C Het toestel niet bij hogere temperaturen gebruiken In geval van een ernst storing sc...

Страница 21: ...bruik het hendel s 9 8 Toonarmhouder Houd de toonarm op de houder 9 Toonarmhendel Bestuurt de beweging naar boven of beneden van de toonarm 10 Tegengewicht Geeft de juiste druk van de pickup op de sch...

Страница 22: ...een van de gaten zichtbaar is 3 Stek uw vinger door de gat om de snaar te grijpen en voorzichtig om het motoras te voeren Niet de snaar draaien Controleer of de schijf regelmatig draait Indien de snaa...

Страница 23: ...een directory met de naam projefcftname data Dit directory is daar waar U de projectbestand hebt opgeslaan Kies Save project as in de File menu en kies een plaats en een naam voor uw project Indien U...

Страница 24: ...n opname A Sluit eerste de speler op een computer aan en start daarna de AUDACITY software F Opname is altijd in MONO A Dit gebeurt vaak met VISTA In Windows Config recording source kies stereo niet m...

Страница 25: ...elas ou apertos especialmente nas fichas recept culos de conveni ncia e no ponto onde o cabo sai do aparelho Use apenas acess rios especificados pelo fabricante Use apenas com uma estrutura trip supor...

Страница 26: ...lmente manual Para come ar a reprodu o coloque delicadamente a agulha no disco utilizando o suporte para dedos ou usar o elevador do bra o Ver 12 8 Suporte de bra o reprodutor com bloqueio Esta pe a d...

Страница 27: ...miss o de borracha e instale sobre o eixo do motor Tenha cuidado para n o torcer a correia de transmiss o de borracha durante esta etapa Verifique se o prato gira de maneira uniforme Se a correia de t...

Страница 28: ...amado projefcftname que est localizado exactamente onde salvou o arquivo de projecto pr prio Seleccione o projecto a Salvar como do seu guia de Arquivo Audacity e escolha uma localiza o e nome do arqu...

Страница 29: ...P3 da internet F N o consegue gravar A o leitor tem de estar ligado ao computador assim o AUDACITY pode ser iniciado F S consegue gravar MONO A normalmente isto sucede se no VISTA Seleccione no Window...

Страница 30: ...s poder enchufar el equipo con su enchufe original No pise el cable de corriente en especial cerca del enchufe o de una toma multi enchufe Utilice nicamente las fijaciones especificadas por el fabrica...

Страница 31: ...enzar la lectura usted debe colocar suavemente la aguja en el punto deseado del disco o bien utilizar la palanca elevadora del brazo Ver 9 8 Soporte del brazo de lectura Sujeta el brazo de lectura cua...

Страница 32: ...de los orificios del plato 3 Pase con cuidado los dedos y conecte suavemente la correa fijada en el plato al eje del motor Haga girar el plato para asegurarse que gira uniformemente tanto el plato co...

Страница 33: ...es en un repertorio llamado projefcftname data Que es donde se ha guardado el proyecto Por ejemplo seleccione Guardar proyecto como en la pesta a Archivo y seleccione una ubicaci n y nombre de archivo...

Страница 34: ...ue LAME MP3 Codec de Internet P No puedo grabar R Usted debe conectar primero el reproductor al ordenador y despu s inicie Audacity P Nada m s puedo grabar en MONO R Esto sucede especialmente con VIST...

Страница 35: ...i ali da ne bo stisnjen zlasti na vtika u Uporabljajte samo priklju ke pripomo ke ki jih dolo i proizvajalec Uporabljajte le z stojalom pultom ali mizo ki jo dolo i proizvajalec ali skupaj z aparatom...

Страница 36: ...stom ali uporabite divgalo tonske ro ke glej 9 8 Klju avnica tonske ro ke Ta aluminijska matica se uporablja za zavarovanje glave in vlo ka za cev tonske ro ke 9 Dvigalo tonske ro ke Nadzoruje delovan...

Страница 37: ...idni da pri tem ne zvijete gumijasti pogonski jermen Prepri ajte se ali kro nik vrti enakomerno e je pogonski jermen pravilno name en ne sme biti rahlo napet kar prina a da se kro nik ne ustavi ko se...

Страница 38: ...ject as pri zavihku Audacity Datoteka in izberite mesto in ime datoteke za va projekt c Prosimo upo tevajte da je samo pri zagonu sve e Audacity Save As mo nost menija na voljo b Kako posneti skladbo...

Страница 39: ...lahko za enete V Lahko snemam samo kot MONO O Predvsem se to zgodi z Visto Prosim izberite Windows nastavitve snemanje vira kot stereo ne mono ali mikrofon Predvajalnik V Zvok poka O Prepri ajte se da...

Страница 40: ...l in timpul furtunilor sau cand nu este utilizat perioade mai lungi de timp Consultati personalul calificat in privinta intretinerii aparatului Efectuarea intretinerii este necesara atunci cand aparat...

Страница 41: ...este un brat actionat manual Pentru a incepe redarea aplicati delicat doza pe disc folosind suportul de deget al dozei SAU folositi dispozitivul de ridicare al bratului acustic vezi 9 8 Suport brat c...

Страница 42: ...se clatina excesiv 3 Treceti degetele prin gaura prindeti cureaua din cauciuc si instalati pe axul motorului Aveti grija sa nu rasuciti cureaua de cauciuc in timpul acestei etape Verificati pentru a...

Страница 43: ...iunea Salvare proiect ca din Fisierul Audacity si alegeti o locatie si o denumire pentru proiectul dumneavoastra Va rugam sa retineti ca atunci cand porniti din nou soft ul Audacity doar optiunea din...

Страница 44: ...rnit F doar inregistrare MONO R acest lucru se intampla mai ales in cazul sistemului de operare VISTA Va rugam sa selectati in configurarea sistemului Windows sursa de inregistrare ca stereo nu mono s...

Отзывы: