IAdea XDS-151 Скачать руководство пользователя страница 5


USB keyboard configuration menus 

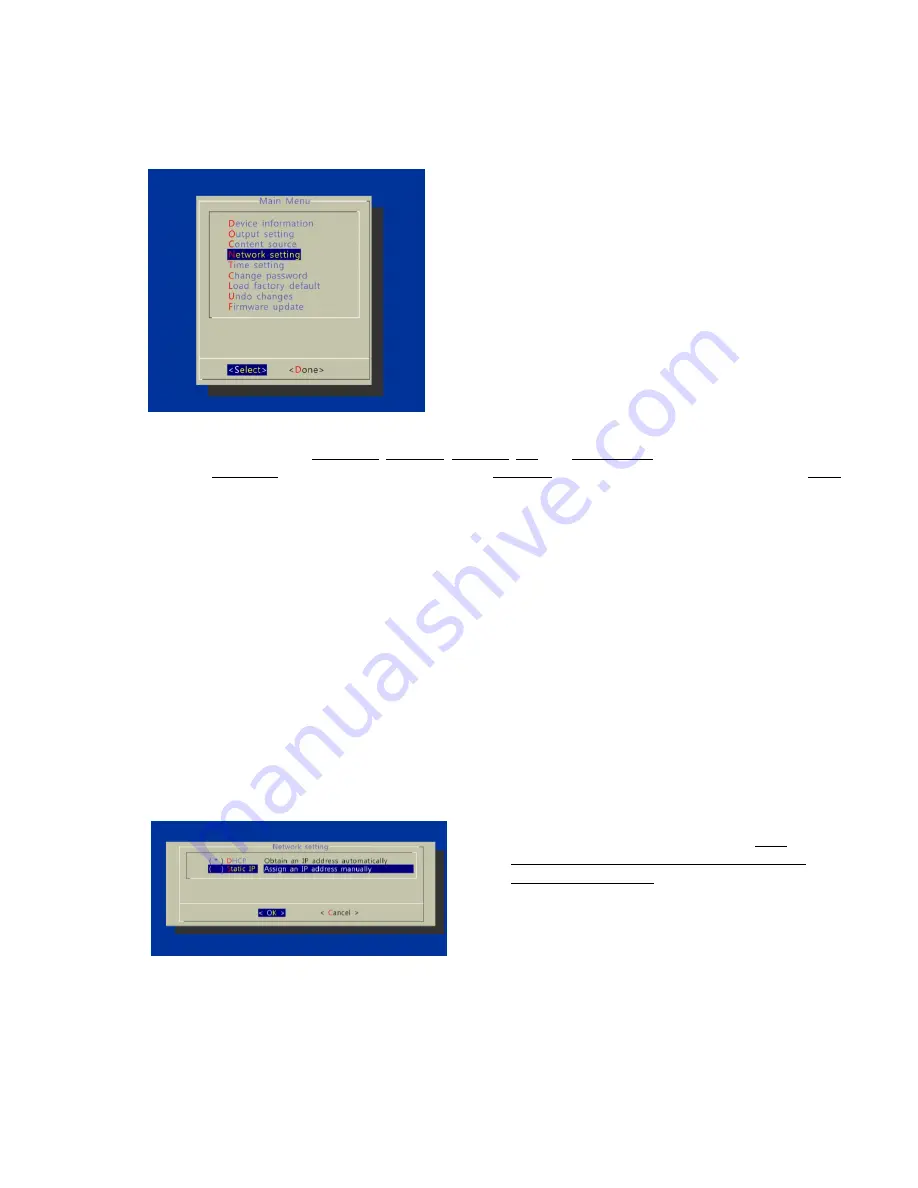
You must attach a USB keyboard to the XDS-151 to configure settings. With the player booted up and ready, it takes 
approximately 30 seconds after you plug in the keyboard for the following menu to be displayed: 

Navigating the menus  

Navigate the menus using arrow keys, space bar, enter key, ESC, and numeral keys on your USB keyboard. Use the 
keyboard arrow keys to highlight menu items, press the space bar to move the star (cursor), and then press enter to 
confirm (<OK>) or reject (<Cancel>) any changes. 

Connect the XDS-151 to your network 

Determine a connection type 

To connect to wireless networks, the player will scan for wireless signals nearby during boot up. If the network 
requires authentication, you will be asked to provide the password via USB keyboard for access. 

To connect via wired networks, attach an Ethernet cable and wireless connection will be disabled. 

Player IP address 

You will also need an IP address for the player on your network. This could be set automatically (DHCP) or manually 
(static IP):  

1) DHCP – automatically assign network IP address 

DHCP is enabled by default. You do not need to change the settings unless setting a static IP. 

2) Static – manually assign network IP address 

Move the highlight to “Static IP” below, press 
“Space bar” on the keyboard to fill in the star (*) 
at the Static IP brackets, and press “Enter” on 
the keyboard to select <OK>. 


Содержание XDS-151

Страница 1: ...XDS 151 User s Manual...

Страница 2: ...up 2 USB keyboard configuration menus 3 Navigating the menus 3 Connect the XDS 151 to your network 3 Clock and calendar settings 4 Audio volume settings 5 Setting a password 5 Factory reset 5 Applying...

Страница 3: ...speakers Built in wireless b g n 2 4GHz only network and optional USB Ethernet adapter Supports advanced device programming via the W3C SMIL open API Box Contents NOT INCLUDED A USB keyboard required...

Страница 4: ...setup 1 Attach the AC power adapter to power on the unit The following progress bar will be displayed on your monitor 2 Player boot process takes approximately 90 seconds to complete After boot up th...

Страница 5: ...To connect to wireless networks the player will scan for wireless signals nearby during boot up If the network requires authentication you will be asked to provide the password via USB keyboard for ac...

Страница 6: ...Daylight Saving DST rules can be configured when you enter the Set time zone submenu Proceed to configure an available static IP address Please ask your network administrator for assistance if necessa...

Страница 7: ...screenshot below When it appears press the Delete key on your keyboard If you missed the reset window unplug power and try again 3 You should see a menu with a reset confirmation dialogue box SELECT...

Страница 8: ...6 3 Content Management Please see the software set up instructions for your management system...

Страница 9: ...ons the media player understands the language spoken by professional tools from companies such as Adobe Apple Microsoft and Real Networks What this means is quicker easier and better integration of yo...

Страница 10: ...vity and I O Ports Ethernet RJ45 Port Wi Fi IEEE 802 11 b g n USB host Type A 3 5mm stereo audio out jack Digital Signage Features Power auto on upon power cord attach Automatic error recovery built i...

Страница 11: ...le video file The maximum video file size for the XDS 151 is 2GB We recommend reserving a safety margin to avoid exceeding the limit i e limiting files to 1850MB How do I manage the playback of conten...

Страница 12: ...MP series players support dynamic content delivery to push individual files quickly over the network using the SOAP API This method is a compromise between live streaming with its high bandwidth deman...

Отзывы: