Network Vandal-Proof Mini Dome
Q u i c k S t a r t G u i d e
• Connecting the camera to a network
Internet Explorer version 6.0 or higher is necessary to use this
camera.
1. This camera is designed to be used on an Ethernet network. It is
set to use the default IP address 192.0.0.16 If your network sup-
ports DHCP, you will need to enable this feature from the camera
network settings.
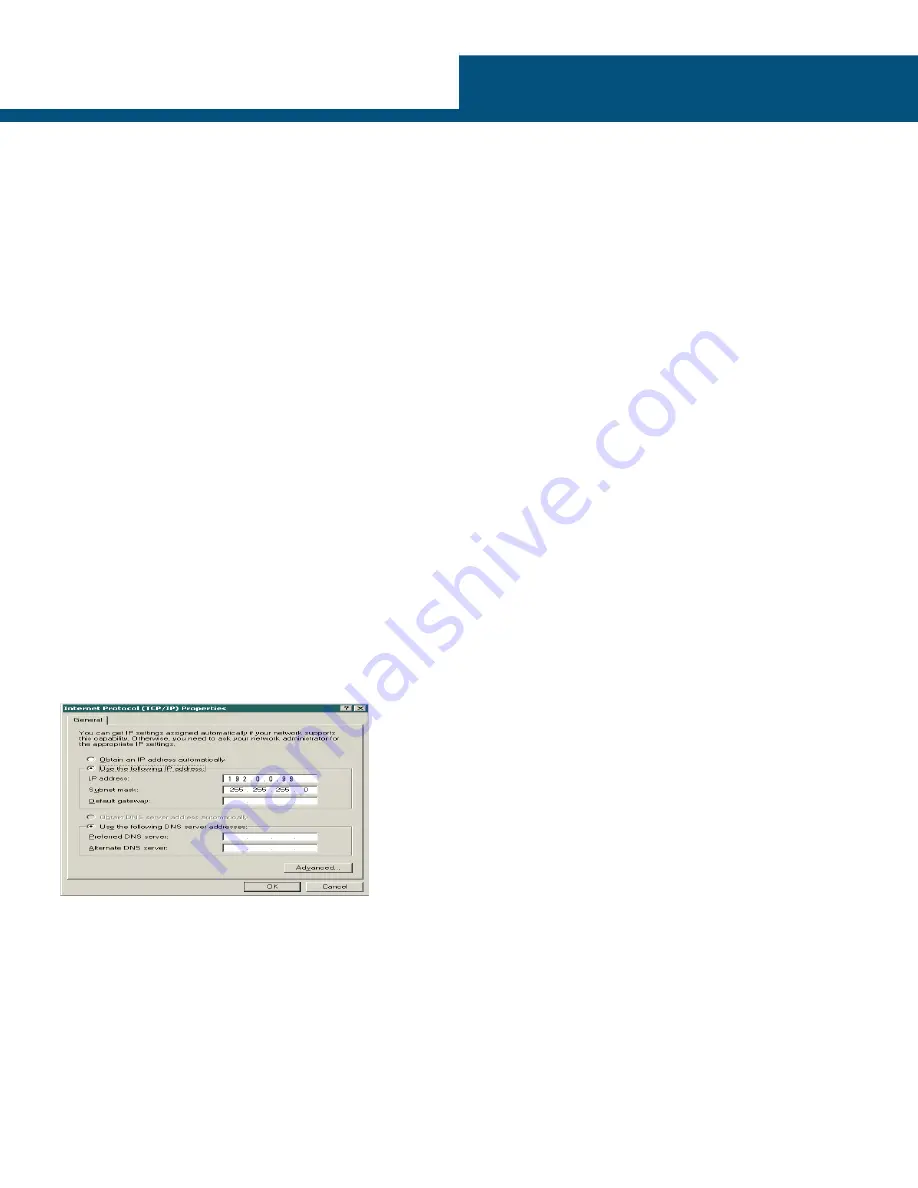
2. In order to connect, your PC must be set to the same IP address
range as the camera. This means the two addresses must
match, except for the final set of digits which must be different.
For example, with a camera address of 192.0.0.16, the PC ad-
dress could be 192.0.0.99
a) To change your computer’s IP address, follow these steps:
- in the control panel, go to ‘Network Connections’.
- double-click on ‘Local Area Connection’.
- a new window appears; click on ‘Properties’.
- another window appears; scroll down to ‘Internet Protocol (TCP/
IP)’; make sure it is selected with a check mark, then double
click on it.
- in the window that appears, click ‘Use the following IP address’.
- enter an appropriate address in the IP address field.
- enter 255.255.255.0 into the subnet address field.
- click ‘OK’.
To verify a functioning connection between the camera and PC,
“ping” the camera’s IP address. To do so, under the ‘Start’ menu,
click ‘Run’. In the ‘Open’ field, type cmd. A black command win-
dow appears. Type ping 192.0.0.16 and hit enter. If the mes-
sage ‘Reply from 192.0.0.16’ appears, it means the camera and
computer are connected. Note: Window command should appear.
Reply from 192.0.0.16: bytes=32 time <1ms TTL=64
3. Open Internet Explorer and enter 192.0.0.16 into the address
bar. A pop-up window will require you to login. Enter the default
username: admin and password: 1234 to login.
4. Install the Active X viewer. It is required to monitor H.264, MPEG4
and M-JPEG video modes.
5. Before viewing, you may need to adjust your browser’s security
settings. To do so:
- From the ‘Tool’ menu, click ‘Internet Options’.
- Click on the ‘Security’ tab.
- If the camera is using the intranet, click the ‘Local intranet’ icon. If
the camera is using the internet, click the ‘Internet’ icon.
- Click on ‘Custom level’. Under ‘ActiveX controls and plug-ins’, enable
the following three functions:
‘Download signed ActiveX controls’
‘Run ActiveX control and plug-ins’
‘Script ActiveX controls marked safe for scripting*’
e. Click OK.


