
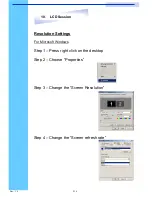

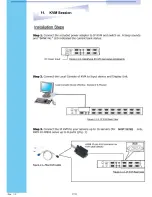


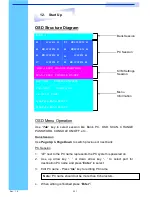


Rev. : 1.0
P.27
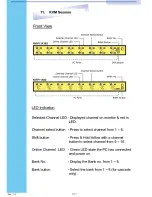
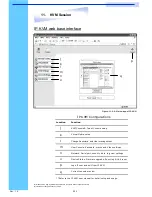
BANK : 1
01
SYSTEM
01
02
®
SYSTEM
02 E
03
®
SYSTEM 03
®
SYSTEM
04
05
®
SYSTEM 05
06
SYSTEM 06
07
SYSTEM
07
08
®
SYSTEM
08
OSD : 1 0 SEC. CHANGE PASSWORD
SCAN: 1 0 SEC. CONSOLE
ON/OFF
ESC : QUIT
ENTER :COMPLETE
TAB : NEXT
INSERT :EDIT
á
/
â
: SELECT PORT
PgDn/PgUp: BANK SELECT
04
BANK : 1
01
SYSTEM
01
02
®
SYSTEM
02
03
®
SYSTEM 03
®
SYSTEM
04
05
®
SYSTEM 05
06
SYSTEM 06
07
SYSTEM
07
08
®
SYSTEM
08
OSD : 1 0 SEC. CHANGE PASSWORD
SCAN: 1 0 SEC. CONSOLE
ON/OFF
ESC : QUIT
ENTER :COMPLETE
TAB : NEXT
INSERT :EDIT
á
/
â
: SELECT PORT
PgDn/PgUp: BANK SELECT
04
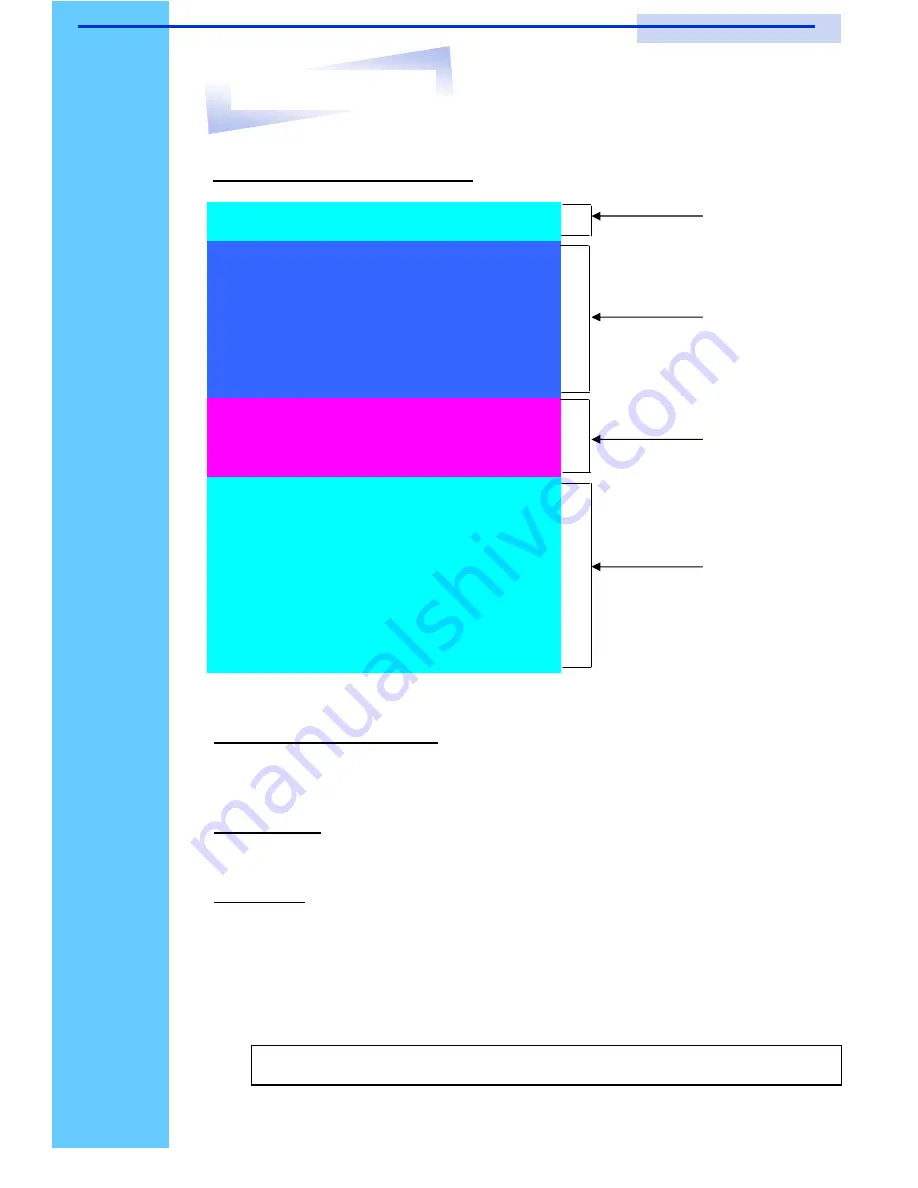
OSD Structure Diagram
Bank Session
PC Session
KVM Settings
Session
Menu
Information
OSD Menu Operation
Use
“
Tab
”
key to select session like Bank, PC, OSD, SCAN, CHANGE
PASSWORD, CONSOLE ON/OFF, etc
…
Bank Session
Use
Page Up
&
Page Down
to switch previous or next bank
PC Session
1.
“
®
”
next to the PC name represents the PC system is powered on
2. Use up arrow key
“
á
”
or down arrow key
“
â
”
to select port for
destination PC name and press
“
Enter
”
to select
3. Edit PC name - Press
“
Ins
”
key for editing PC name
4.
When editing is finished press
“
Enter
”
.
Note:
PC name should not be more than 8 characters.
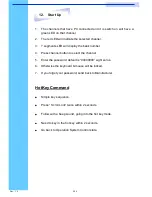
12. Start Up
RKP115 / RKP117 / RKP119
User Manual
Содержание NVIP117 Series
Страница 1: ......
Страница 2: ......
Страница 3: ......
Страница 4: ......
Страница 9: ......
Страница 10: ......
Страница 11: ......
Страница 12: ...Rev 1 0 P 10 LCD Session...
Страница 18: ...Rev 1 0 P 16 KVM Session...
Страница 19: ......
Страница 21: ......
Страница 32: ......
Страница 33: ......


