background image

21

5.  If there are no other changes to be made in any of the menu items, select the

Download Changes

 item from the 

File

 menu to send the settings to the

Access Point.

6.4.2  Privacy Option

Use this option to setup the WEP security keys.  Make sure that the key used
and values entered into the keys are exactly the same for all wireless devices in
the wireless network.

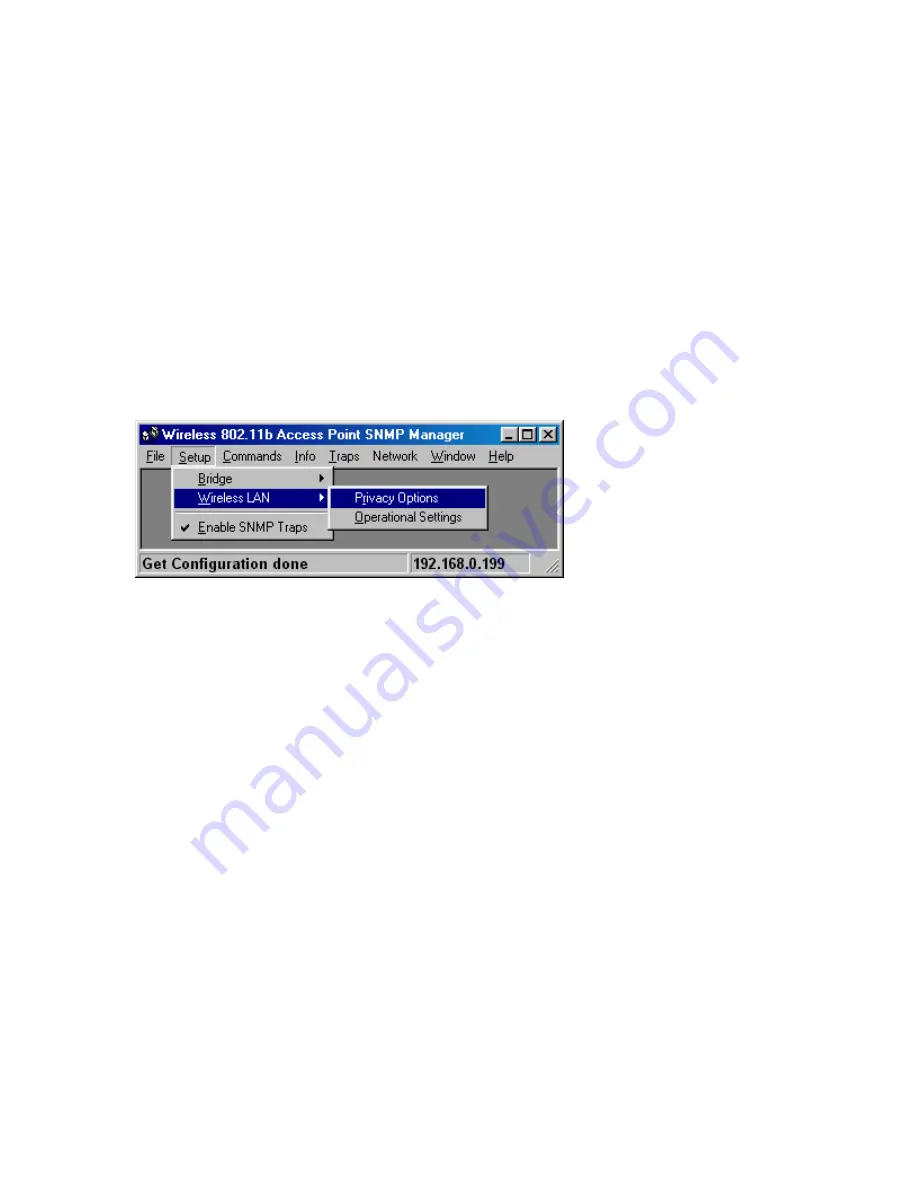
1. From the 

Setup 

tab, select the 

Wireless LAN 

item.

2. Click the 

Privacy Options 

item.

3.  Windows will bring you to the 

Privacy Options 

screen.

4.  The 64-bit WEP keys can be set for four different keys: 

Key 1, Key 2, Key 3,

and Key 4 

. Each key is a combination of five sets of two digits.  Each key

should be unique. Make sure that the keys are exactly the same for all
wireless devices in the wireless network.

5. The 

Default Key

 drop down box selects which of the four keys are to be

used. Make sure that this key number is the same for all wireless devices in
the wireless network.

6. Checking the 

WEP Enable

 box enables the WEP security feature.

Содержание AWS-110

Страница 1: ...Access Point User s Guide Model AWS 110 Version 1 1...

Страница 2: ...5 Version Information 15 5 6 Exit the Utility 15 6 SNMP MANAGER CONFIGURATION UTILITY 16 6 1 Access the SNMP Manager Configuration Utility 16 6 2 Setting the IP Address 17 6 3 File 17 6 3 1 Find Acces...

Страница 3: ...ss clients can freely roam from one access point domain to another and still maintain seamless connection to the network Features Complies with the IEEE 802 11b Direct Sequence Spread specification Co...

Страница 4: ...sing the default values generally meets the needs of most installations There are two ways to configure the Access Point Locally using the USB interface This method connects a PC directly to the Acces...

Страница 5: ...a new USB Device Click the Next button to proceed 5 Select Search for the best driver for your device Click Next 6 Select Specify a location Enter the driver location as d Driver d is your CD ROM driv...

Страница 6: ...f the driver installation was successful 9 Proceed to the Install the Configuration Utilities section to install the USB Configuration Utility and then configure the Access Point using the utility 3 3...

Страница 7: ...7 11 Proceed to the Install the Configuration Utilities section to install the USB Configuration Utility and then configure the Access Point using the utility...

Страница 8: ...ld Wizard screen Click Next 3 At this point Windows will ask for the destination folder Either accept the default or enter a folder of your choice Click Next 4 Windows will ask for the program folder...

Страница 9: ...rom within the Wireless 802 11b Access Point Utility program group or group where you installed the configuration tools 3 Windows will bring you to the Access Point Configuration Firmware Upgrade Util...

Страница 10: ...lity screen click the Configure button then click the Get button 2 In the left column click on the Eth_IP_Address identifier Then click the Modify button 3 Enter the IP Address click OK 4 Set up the v...

Страница 11: ...g the USB Configuration Utility 1 From within the Access Point Configuration Firmware Upgrade Utility screen click the Configure button The Configuration Utility screen appears 2 Select whether you wa...

Страница 12: ...eless Access Point the transfer rate will automatically fall back to the optimum rate The Wirel_Channel value specifies the channel used in wireless communication between the wireless clients and the...

Страница 13: ...his Access Point The OperationalRateSet is a hexadecimal representation of the communication speed setting For IEEE 802 11b wireless networks select the 1 2 5 5 11 Mbps setting The 1 2 setting is for...

Страница 14: ...e and transmit Right tells the Access Point to use the right antenna connection if the Access Point has removable antennas and a high gain antenna has been installed on the Access Point s right connec...

Страница 15: ...Information field shows the release information for the USB Configuration Utility 5 6 Exit the Utility To exit the USB Configuration Utility click on the X box on the right hand side of the title bar...

Страница 16: ...ss 802 11b Access Point SNMP Manager screen Only two menu options will be visible File and Help 4 You will need to connect to the Access Point This can be done either by having the utility search for...

Страница 17: ...t up This can be done automatically if DHCP is active on the Ethernet LAN If DHCP is not active the IP Address is assigned manually in the Bridge IP Configuration section see below In either case you...

Страница 18: ...ps Network and Window 4 Proceed with configuring the Access Point using the options in the Setup menu 6 3 2 Connect to Access Point Use this option to connect to an Access Point when you know the IP A...

Страница 19: ...ing the Access Point using the options in the Setup menu 6 3 3 Download Changes After you have made all configuration changes you need to download the configuration settings to the Access Point Note T...

Страница 20: ...the Bridge item and then the IP Configuration item 2 The IP Address field must be set to a unique IP Address 3 The IP Mask field must be set to the same sub net mask used by the wireless clients in th...

Страница 21: ...ireless LAN item 2 Click the Privacy Options item 3 Windows will bring you to the Privacy Options screen 4 The 64 bit WEP keys can be set for four different keys Key 1 Key 2 Key 3 and Key 4 Each key i...

Страница 22: ...item from the File menu to send the settings to the Access Point 6 4 3 Wireless Operational Settings 1 From the Setup tab select the Wireless LAN item 2 Select the Operational Settings item 3 Windows...

Страница 23: ...l as the other points in the wireless network The Fragmentation Threshold field sets the length of the fragment Each fragment is a frame no larger than the Fragmentation Threshold The RTS CTS Threshol...

Страница 24: ...nsfer rate for the Access Point Commands 6 5 Commands 6 5 1 Reset Device 1 From the Commands tab select the Reset Device item 2 Click the Yes button to reset the Access Point 6 5 2 Restore Defaults Th...

Страница 25: ...int 6 6 Info The Wireless Statistics screen will show you the number of packets transmitted and received for Unicast Broadcast and Multicast The Ethernet Statistics screen will show you the total byte...

Страница 26: ...shows you the traps received from the Access Point This information is primary informational 6 8 Network The Network Associated Stations screen will show the MAC address of the wireless clients that a...

Страница 27: ...27 6 9 Help The Help About SNMP Manager screen shows the release information for the SNMP Manager Configuration Utility...

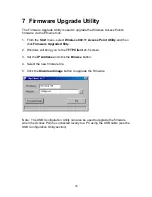
Страница 28: ...lick Firmware Upgrade Utility 2 Windows will bring you to the TFTP Client v1 1 screen 3 Set the IP Address and click the Browse button 4 Select the new firmware file 5 Click the Download image button...

Страница 29: ...erference to radio communications However there is no guarantee that interference will not occur in a particular installation If this equipment does cause harmful interference to radio or television r...

Страница 30: ...PSK 1 Mbps DQPSK 2 Mbps CCK 5 5 Mbps and 11 Mbps Operating Channels 11 Channels US Canada 13 Channels ETSI 14 Channels Japan Operating Range Indoor 120 feet at 11 Mbps 200 feet at 5 5 Mbps 240 feet at...

Страница 31: ...pgrades LED Indicator Power Ethernet Link Activity RF Link Activity Output Power 13 dBm 25 mW Emissions FCC Part 15 Power Supply 5V 800mA Operating Temperature 0 to 40 C Storage Temperature 20 to 70 C...

Страница 32: ...FROM THE FURNISHING OR FAILURE TO FURNISH PRODUCTS SPARE OR REPLACEMENT PARTS INFORMATION OR SERVICES HEREUNDER UNDER NO CIRCUMSTANCES SHALL I O BE LIABLE IN ANY WAY FOR INDIRECT SPECIAL OR CONSEQUENT...

Страница 33: ...not rent or lease the SOFTWARE You may transfer your interest in this License on a permanent basis provided you retain no copies or versions thereof and the recipient agrees to the terms of this Agre...

Страница 34: ...SSLY EXCLUDES ANY IMPLIED WARRANTIES OF MERCHANTABILITY AND FITNESS FOR A PARTICULAR PURPOSE EXCEPT AS EXPRESSLY SET FORTH HEREIN IN NO EVENT SHALL I O BE LIABLE FOR ANY CLAIMS OR DAMAGE ARISING DIREC...

Страница 35: ...pport are 12 00 noon to 8 00pm MST Monday Friday Voice mail messages may be left outside normal hours of operation Support You must have your product serial number to qualify for I O Wireless telephon...

Страница 36: ...ons Normal Replacement Return your product in it s original packaging freight pre paid to I O Wireless Upon receipt of your returned unit I O Wireless will send you a replacement product freight pre p...

Отзывы: