i-mobile IC-8 Скачать руководство пользователя страница 43

 CHAPTER 4 – Specifications & Software 

35 


Key 

3: 

The defaulted key function is to launch “Windows Media Player” 
application to play music or video. 

The user is able to redefine the key function. 
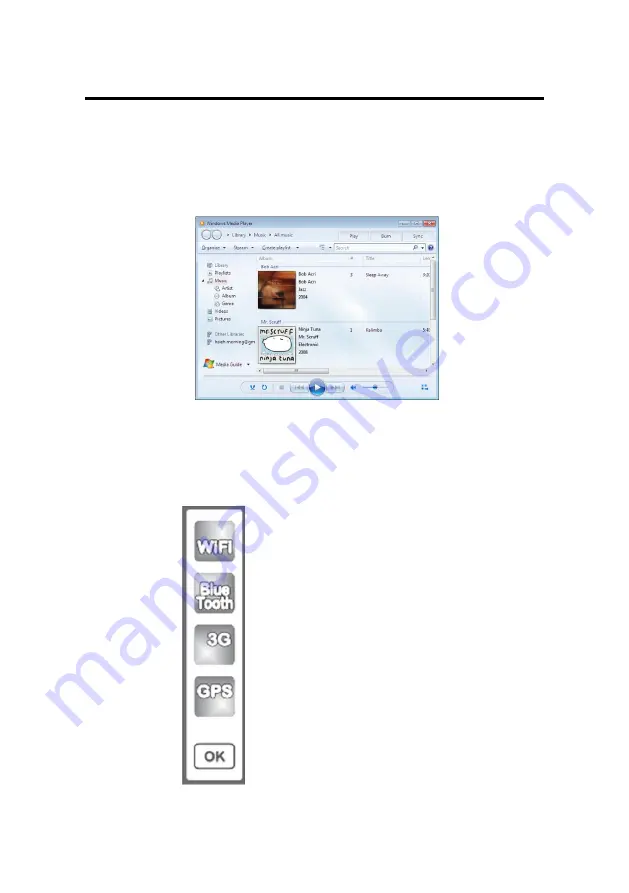


Key 

4: 

Press Key 4 to launch submenu function. The “submenu bar” 
as the following will be displayed on the desktop. 


Содержание IC-8

Страница 1: ...User s Manual IC 8 2013 Mar 31...

Страница 2: ...s the right to revise or make changes to this publication without notice or obligation of the manufacturer to notify any person of such revision or changes Software Licenses The software included with...

Страница 3: ...progress The ideal range for safe operation of the computer is from 100 240V AC 1 AC Power Cord 2 AC Adapter 3 DC Direct Current Cord Warning Using the AC adapter to power other devices can damage the...

Страница 4: ...ie Ersatz nur durch denselben oder einem vom Hersteller empfohlenem hnlichen Typ Entsorgung gebrauchter Batterien nach Angaben des Herstellers 4 Swedish Explosionsfara vid felaktigt batteribyte Anv nd...

Страница 5: ...B of Part 15 of the FCC rules Do not make any changes or modifications to the equipment unless otherwise specified in the manual If such changes or modifications should be made you could be required...

Страница 6: ...t Side View of the Computer 21 Left Side View of the Computer 22 Top View of the Computer 23 Bottom View of the Computer 23 Rear View of the Computer 24 CHAPTER 3 26 PROTECTING AND MAINTAINING 26 Cari...

Страница 7: ...Using the CMOS Camera 42 Using The RFID 43 Using the Minismart card 44 Using the Barcode Scanner 45 Using the MSR 47 Using the GPS 47 Using the Brightness Adjust 49 Trouble Shooting 50...

Страница 8: ......

Страница 9: ...and secure solution for managing all of your technology and mission critical data Scale the computer and streamline the costs of day to day business operations and multimedia demands Discover the com...

Страница 10: ...ions Multimedia LCD Display 8 inch TFT 1024x768 XGA LCD with Touch Screen Control Panel LED back light Sunlight readable and Smart Panel Application enhancing user s ability to view data outdoors and...

Страница 11: ...provide indoor and outdoor protections of no ingress of dust and water jets against enclosure without harmful effects Furthermore the computer is equipped with 4 corner buffers to avoid drop shock da...

Страница 12: ...diator heat register or in a built in cabinet unless adequate ventilation is provided 6 The computer should only be operated using the specified power indicated on the Warning Label located on the bat...

Страница 13: ...ter does not operate normally when the operating instructions are followed Adjust only those controls that are specified in the Operating Instructions or improper adjustment may require calibration ag...

Страница 14: ...C CH HA AP PT TE ER R 1 1 G Ge et tt ti in ng g S St ta ar rt te ed d Chapter Preview Unpacking and setting up the Product Packing list Power Supply The Stylus Pen...

Страница 15: ...contents preserving the integrity of the box as you may need it and all of the packing materials for future shipping 2 Inspect the contents for damage If you find any irregularities or anything appea...

Страница 16: ...arging immediately In the future you should not have to access the battery pack unless you wish to replace it with a fresh one Note 1 The Battery LED lights green when charging and will turn off when...

Страница 17: ...ition and gently put the batteries into the battery bay Then turn the lock knob to Lock position Removing Replacing the Battery Turn the lock knob to Unlock position and Turn the switch gently take ou...

Страница 18: ...o a grounded electrical outlet Use the AC adapter to power the computer or recharge the battery when it is low Caring for the AC Adapter Be sure to only use the AC adapter that comes provided with thi...

Страница 19: ...n as you normally double click an external mouse Tap the item twice with the tip of the stylus pen You need to lift the stylus pen from the screen quickly between taps To select an item as you normall...

Страница 20: ...old a pen or pencil when writing on paper Hold the computer securely when mobile and using the stylus pen Lift and tap the stylus pen quickly between double taps Avoid using the stylus pen to push the...

Страница 21: ...ontains six illustrations highlighting each external component and its respective functions Chapter Preview Front view of the Computer Right side view of the Computer Left side view of the Computer To...

Страница 22: ...board can be located by tapping the keyboard icon in the bottom right on the desktop Data can also be entered via a USB keyboard plugged into the USB port on the right side of the computer The compute...

Страница 23: ...media software The user can make a video communication in the network Power Button The computer Turn On Off Barcode On Off The button provide a Trigger function for Barcode Scanner Hot Key These 4 qu...

Страница 24: ...t signal for different skin conditions like sweaty scarred and dry to be an excellent image quality The Brightness Adjustment On MCU base programmable controller with capacitance sensors the user can...

Страница 25: ...plugging in the power cord you must first verify that the external power voltage is appropriate for your geographical area USB 2 0 Ports Permits hot plugging of USB peripheral devices to the computer...

Страница 26: ...n Pictures can be transmitted to display from computer with the HDMI cable Mini Smart Card Reader optional This device can read a various data include ATM card for business Micro SD Micro Secure Digit...

Страница 27: ...iew of the Computer Docking Port The extended multi function included the battery charger port the USB ports supporting most USB mouse and keyboard devices RJ 45 Internet port RS 232 port DC In Jack M...

Страница 28: ...ing Scan rate of up to 200 scans per second in linear emulation mode or 56 scans per second in Omni directional mode Fully compatible with Intermec s family of decoded engines MSR optional The reader...

Страница 29: ...he stylus pen is partially visible from the left side of the computer and can be located by pulling it from its secure housing Only use the tip of the stylus pen when interacting with the LCD display...

Страница 30: ...l media software Volume and equalizer control can be adjusted via the OS or additional multimedia application software Sound will mute when headphones are detected Battery Pack A n Internal battery on...

Страница 31: ...ng g M Ma ai in nt ta ai in ni in ng g Chapter Preview Caring for your Computer The System BIOS Utility Configuring DRAM HDD and SIM Card Connecting to a Local Area Network Adjusting the Resolutions...

Страница 32: ...and storing the computer in locations exposed to extreme temperature fluctuations likely condensation or direct sunlight Keep the device away from moisture such as exposure to liquids or precipitation...

Страница 33: ...er from the computer before unplugging it from the electrical outlet Caring for the Touch Screen Display Never spray liquids of any kind directly onto the display screen or allow excess liquid to drip...

Страница 34: ...dialog box 1 1 Click the right button of the mouse on the desktop and select Properties from the menu or 1 2 Click the Start button and select Control Panel Double click the Display icon 2 Select the...

Страница 35: ...C CH HA AP PT TE ER R 4 4 S Sp pe ec ci if fi ic ca at ti io on ns s S So of ft tw wa ar re e Chapter Preview Specifications and Standard Features Software...

Страница 36: ...ft Window 7 Embedded Professional Option Linux System BIOS Phoenix BIOS Memory 1x204 pin DDR III SO DIMM Socket support up to 2GB Display 8 inch TFT 1024x768 LCD Touch Panel Simulation to 1024x768 by...

Страница 37: ...CS1 CS2 CS3 and CS4 CDMA 1xEV DO High speed peak data rates of 3 1 Mbps on the downlink and 1 8 Mbps on the uplink CDMA1x Supports up to 153 6 kbps data throughput on both forward and reverse links E...

Страница 38: ...ngle speakers External volume on off controls via hot key setting Battery Internal one 1 cell 920mAh External one 6 cell 6200mAh Removable Lithium Ion Battery Pack Short circuit over charge over disch...

Страница 39: ...attery LED Green Off Battery Available Solid Battery Charging Power LED Blue Solid System Powered On Mobility Dimensions 251mm x 181mm x 39 12mm Warranty ONE year limited warranty parts Docking USB 2...

Страница 40: ...ld it until the green X appears Follow the same steps to finish the other three red X calibration Note Make sure to calibrate the screen before your first screen rotation The First Installation The fo...

Страница 41: ...APTER 4 Specifications Software 33 Using The Front Panel Hot Key Utility Please refer to the following descriptions for each of all 5 hot keys Key T A dedicated button to enable disable Barcode functi...

Страница 42: ...to launch Windows Task Manager application to manage your applications The user is able to redefine the key function Key 2 The defaulted key function is to launch Cap Sound application to enable disab...

Страница 43: ...efaulted key function is to launch Windows Media Player application to play music or video The user is able to redefine the key function Key 4 Press Key 4 to launch submenu function The submenu bar as...

Страница 44: ...r Key 1 Key 2 Key 3 and Key 4 are endowed with different functions when the submenu bar was triggered Please refer to the following descriptions Click WiFi icon or press Key 1 to enable disable the wi...

Страница 45: ...ction Click GPS i con or press Key 4 to enable disable the GPS function Click OK icon or wait for 3 seconds to Exit Define the Functions for Hot Key Utility 1 Right click the Hot Key icon in the Windo...

Страница 46: ...tions Manual 38 2 Type the correct path of the APP or browse the Folder icon to select your APP Make sure the defined APP path is correct Click Save to confirm your selections Click here select APP Yo...

Страница 47: ...of Bluetooth enabled digital devices such as cameras mobile phones headsets printers and GPS receivers Users can also create networks and exchange data with other Bluetooth enabled computers or PDAs F...

Страница 48: ...evice Red Circle Some blue tooth devices were found and listed out 4 Select Blue tooth Keyboard or other devices 5 Type the number or password for configuration 6 Selected Blue tooth device has been s...

Страница 49: ...connection Select Start Menu All Programs Sync manager Connection Manager Utility Connection Manager to launch the program The system will launch the program automatically after booting the computer C...

Страница 50: ...Select DISCONNECT to terminate the connection 2 Select Yes to confirm the disconnection Using the CMOS Camera 1 Select AMCAP ICON 2 Select device and USB Video device The first bar for the front came...

Страница 51: ...tions Software 43 Using the RFID 1 Select Holy Stone ICON 2 Type 3 for the Select COM Port 3 Put your RFID card close to the RFID Sensor The message TAG MIFARE 1K will be displayed if the computer acc...

Страница 52: ...The Instructions Manual 44 Using the Mini Smart Card 1 Select the Mini Smart icon 2 Select the PC SC button 3 Insert the Mini Smart Card into the slot and press the Connect to Card button...

Страница 53: ...CHAPTER 4 Specifications Software 45 4 The detail information will be displayed on the Result dialog box Using the Bar code Scanner 1 Select the EA15 Demo icon 2 Select the EAISDemo...

Страница 54: ...Press the Connect button and the status information will be displayed out 4 Press the T Hot Key to enable the Bar Code Scanner 5 Scan the Bar Code Stick and the detail information will be displayed on...

Страница 55: ...Cash Card or ATM Card into the MSR slot 3 The information will be displayed on the screen Using The GPS Please disable the Bar Code Scanner and follow the steps below 1 To Confirmed the GPS COM port n...

Страница 56: ...The Instructions Manual 48 2 Select the U Center 6 01 ICON 3 Select COM3 4 Select the Baud Rate 5 Receive the Satellite Channel...

Страница 57: ...49 Using the Brightness Adjustment The user can adjust the screen brightness with fingers while the computer gets into the O S status On the screen to slide fingers from left to right or right to lef...

Страница 58: ...The Instructions Manual 50 Using the Fingerprint Function Click the delta icon in the Windows system tray then Click Fingerprint icon BioExcess...

Страница 59: ...CHAPTER 4 Specifications Software 51 Select Initial Wizard bar Click Next...

Страница 60: ...The Instructions Manual 52 To swipe your finger on the fingerprint device for the enrollment Repeat 2 times...

Отзывы: