H-MS1105 (
www.hyundai-electronics.ru
)
10
Installation/Connection
Installation (Wall mounting)
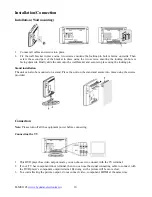
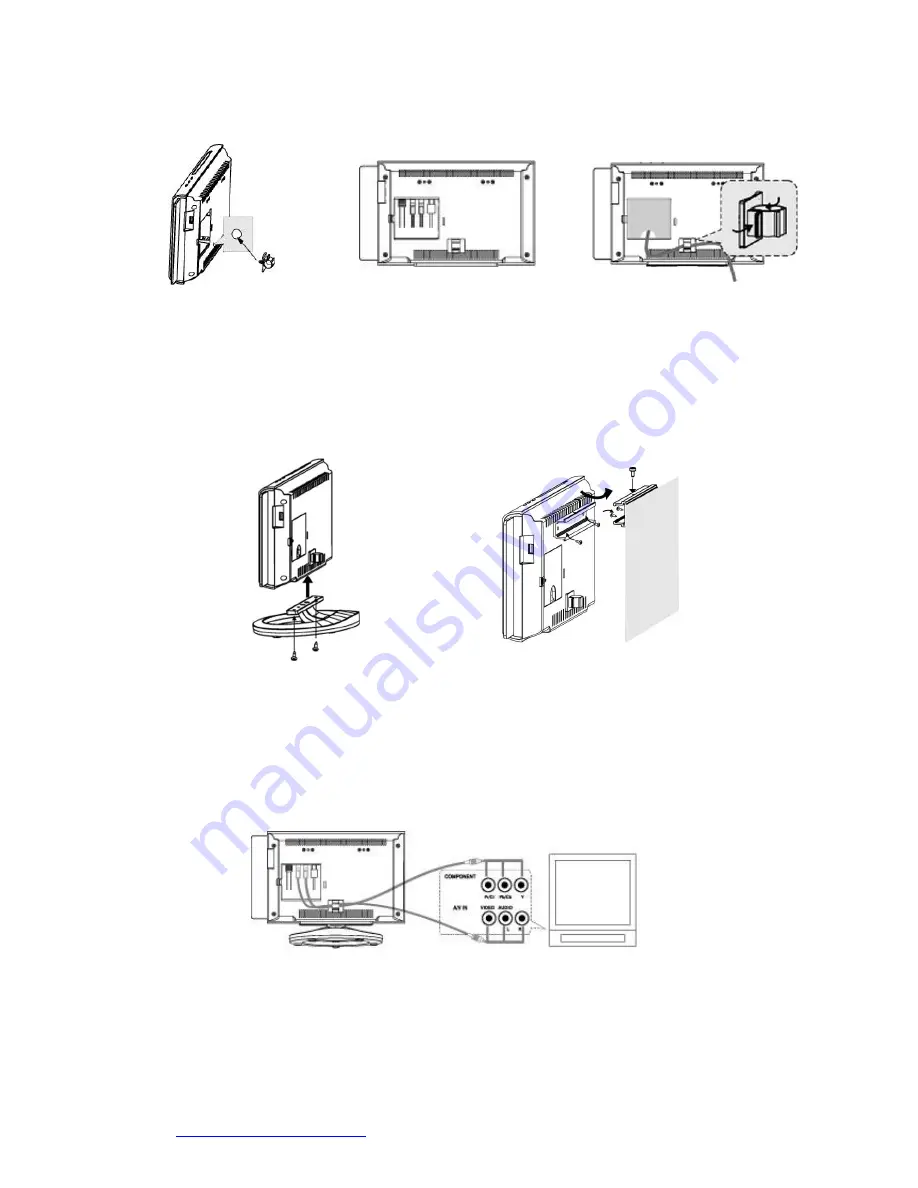
1. Connect all cables and secure into place.
2. Fix the wall bracket in place using two screws ensuring the locking pin hole is facing upwards. Then
screw the second part of the bracket in place using the two screws, ensuring the locking pin hole is
facing upwards. Finally slide the unit onto the wall bracket and secure in place using the locking pin.
Stand installation
The unit can also be mounted on a stand. Place the unit on the stand and secure into place using the screws
provided.
Connection
Note:
Please turn off all the equipment power before connecting.
Connecting the TV
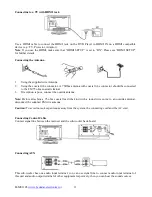
1. This DVD player has video output mode, you can choose it to connect with the TV terminal.
2. If your TV has component input terminal, then you can use the signal connecting cable to connect with
the DVD player’s component output terminal. By doing so, the picture will be more clear.
3. To avoid affecting the picture output, do not connect video, component, HDMI at the same time.
Содержание H-MS1105
Страница 1: ...H MS1105 DVD MICRO SYSTEM Instruction manual DVD ...
Страница 24: ...H MS1105 www hyundai electronics ru 24 24 25 26 26 DVD 28 29 30 30 30 30 31 32 35 39 45 46 ...
Страница 25: ...H MS1105 www hyundai electronics ru 25 100 240 1 ...
Страница 28: ...H MS1105 www hyundai electronics ru 28 DVD DVD 5 1 Dolby digital surround DTS ...
Страница 32: ...H MS1105 www hyundai electronics ru 32 1 2 1 2 3 HDMI ...
Страница 33: ...H MS1105 www hyundai electronics ru 33 HDMI HDMI HDMI HDMI HDMI HDMI 1 2 75 FM 75 3 75 FM AUX FUNCTION AUX AUX ...
Страница 34: ...H MS1105 www hyundai electronics ru 34 R L G 1 2 ...
Страница 35: ...H MS1105 www hyundai electronics ru 35 1 SETUP SETUP 2 3 4 5 ENTER 6 4 3 PS 4 3 LB 16 9 STANDBY ...
Страница 38: ...H MS1105 www hyundai electronics ru 38 1234 ...
Страница 45: ...H MS1105 www hyundai electronics ru 45 DVD 8 ...


