background image

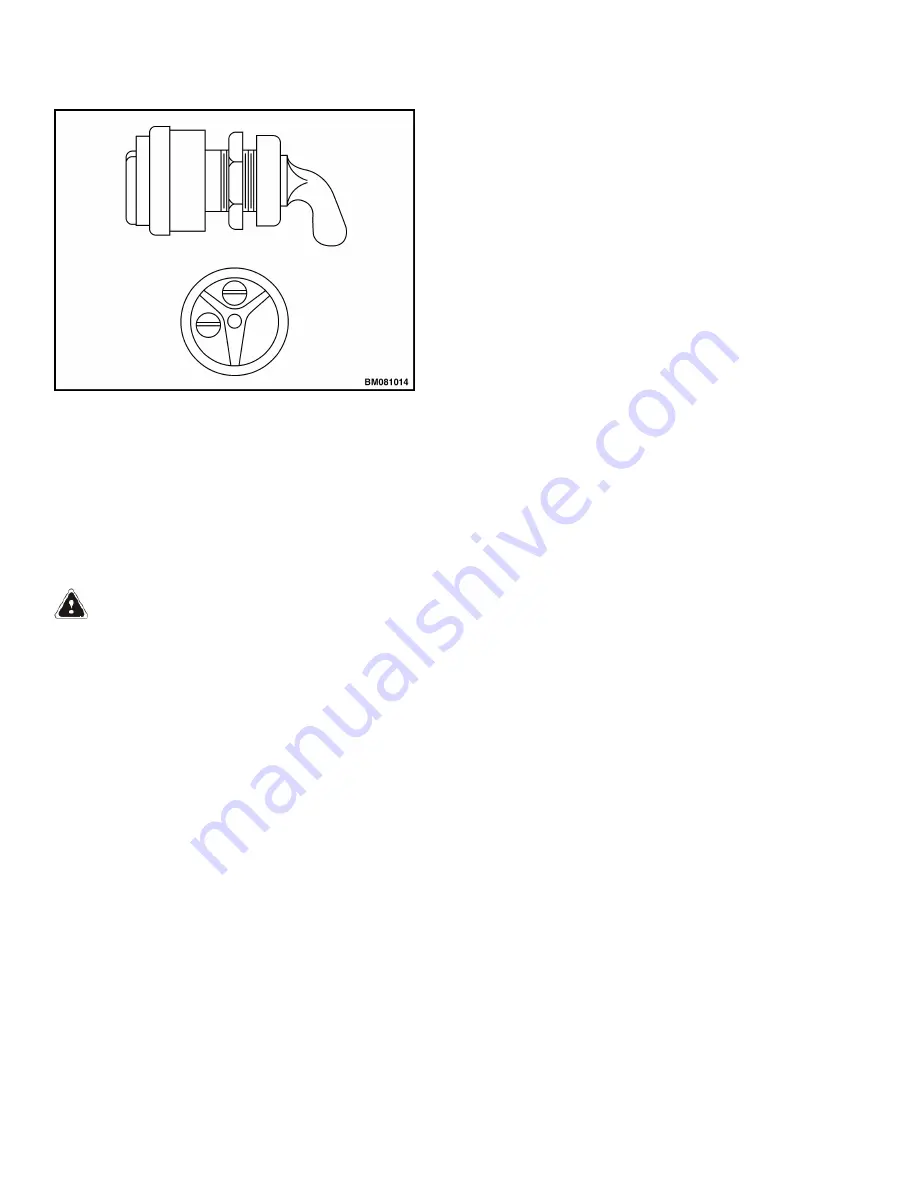
Figure 13. Parking Brake Switch

INSTALL

For the following procedures, see Figure 13.

1. 

Connect wires to proper terminals, as identified
during removal.

2. 

Install parking brake switch through mounting
hole in frame and adjust switch to proper
height by turning lower jam nut.

NOTE:  

Position switch lever according to brake

switch decal.

3. 

Install retaining nut to top of parking brake
switch. Make certain switch is properly aligned
before tightening retaining nut.

4. 

Connect battery and turn the key switch to the
ON position.

5. 

Test the key switch by turning it to the ON and
OFF positions and checking for proper opera-
tion of the brake.

6. 

Install drive unit compartment covers. See Pe-
riodic Maintenance
 8000SRM1635

Fuses

  WARNING 

The capacitor in the transistor controller can hold
an electrical charge after the battery is disconnec-
ted. To prevent electrical shock and personal in-
jury, discharge the capacitor before inspecting or
repairing any component in the drive unit com-
partment. Wear safety glasses. Make certain the
battery has been disconnected.

The motorized hand trucks use two 4-amp in-line
fuses (FU 2 and FU 5) for the control circuit, and a
single 400-amp (FU 1) fuse mounted on the control-
ler for both the drive motor and the hydraulic pump
motor. Remove and replace as required.

If it cannot be determined visually that a fuse has
failed, check for continuity using an ohmmeter.
Make certain that any replacement fuse is of the
right amperage before installation.

Parking Brake Switch

2200 SRM 1632

16

Содержание T5ZAC

Страница 1: ...Hyster C477 T5ZAC T7ZAC Forklift Service Repair Manual...

Страница 2: ...ELECTRICAL SYSTEM C80ZHD A282 C60ZHD A373 T5ZAC C476 D476 T7ZAC C477 PART NO 4096001 2200 SRM 1632...

Страница 3: ...dic Maintenance section Keep the unit clean and the working area clean and orderly Use the correct tools for the job Keep the tools clean and in good condition Always use HYSTER APPROVED parts when ma...

Страница 4: ...move 14 Install 15 Parking Brake Switch 15 Remove 15 Install 16 Fuses 16 Horn 17 Replace 17 High Speed Switch Assembly 17 Remove 17 Install 18 Control Handle 19 Disassemble 19 Hand brake 19 Upper Cove...

Страница 5: ...TABLE OF CONTENTS Continued Troubleshooting 28 General Troubleshooting 28 This section is for the following models C80ZHD A282 C60ZHD A373 T5ZAC C476 D476 T7ZAC C477 Table of Contents ii...

Страница 6: ...ore information Please click here Then get the complete manual NOTE If there is no response to click on the link above please download the PDF document first and then click on it Have any questions pl...

Страница 7: ...0SRM1283 for general information on traction motor troubleshooting and repair for lift truck models T5 T7AC See the section A C Motor Repair S N A169N03000L S N A185N03000L S N H118N03000L S N E174N03...

Страница 8: ...This section includes information on the following components Control Handle Switches Hall Effect Directional Speed Control Key Switch Parking Brake Switch High Speed Switch Hand Brake Assembly Brake...

Страница 9: ...ee Figure 2 is mounted just below the control handle The hand brake assembly consists of two independent hand levers various linkages and three switches to per form two different braking functions Whe...

Страница 10: ...DI 3 PARKING BRAKE SWITCH 4 PARKING BRAKE 5 TRACTION MOTOR 6 HORN 7 LIFT PUMP MOTOR 8 DIAGNOSTIC CONNECTOR 9 CONTACTOR 10 CONTROLLER 11 FUSE 12 BATTERY CONNECTOR Figure 3 Electrical Components C60 80Z...

Страница 11: ...INDICATOR BDI 3 PARKING BRAKE SWITCH 4 PARKING BRAKE 5 TRACTION MOTOR 6 HORN 7 DIAGNOSTIC CONNECTOR 8 CONTACTOR 9 CONTROLLER 10 FUSE 11 BATTERY CONNECTOR Figure 4 Electrical Components T5 7ZAC 2200 SR...

Страница 12: ...arge the capacitor and never put power to the controller with any power wire dis connected Never short any controller terminal or motor terminal to battery Make sure to use proper procedures when serv...

Страница 13: ...mately 1 165 or less Refer to Indus trial Battery 2240SRM0001 4 Remove the drive unit compartment covers See Periodic Maintenance 8000SRM1635 5 Discharge the capacitor See Special Precau tions in this...

Страница 14: ...ttery voltage at control fuse Connect battery or check wiring between battery and fuse 1 1 Check for battery voltage at control fuse terminal of key switch 1 1 1 Battery voltage at key switch Check fo...

Страница 15: ...wear safety glasses or approved eye pro tection when making any repairs on lift truck All checks adjustments and repairs in the drive unit compartment are done with the compartment cover removed Remov...

Страница 16: ...nstall the drive unit compartment covers See the section Periodic Maintenance 8000SRM1635 CONTROL MODULE Check The control module converts analog signals from the control handle to digital signals for...

Страница 17: ...he control handle compo nents controller and wiring Make any neces sary repairs and recheck the input values 9 If the input values are correct replace the con trol module See Remove NOTE PC Service To...

Страница 18: ...C2 AI1 First Analog Input C3 NPOT Negative of Analog Input C4 DI10 Tenth Digital Input Tilt Down C5 DI14 Fourteenth Digital Input Reach Out C6 DI11 Eleventh Digital Input Side Left C7 DI12 AI5 Twelfth...

Страница 19: ...coil using an ohmmeter to measure the resistance Use the high est resistance indication The coil should read 52 ohms 10 Remove and replace contactor if re sistance readings indicate a short circuit i...

Страница 20: ...Key Switch REMOVE Toggle switches may be used in place of key switches certain applications The term key switch will be used for both types of switches in the following instructions See Figure 11 or F...

Страница 21: ...Connect battery and test the key switch by turning it to the ON and OFF positions Check for proper operation 7 Install drive unit compartment covers See Pe riodic Maintenance 8000SRM1635 Parking Brake...

Страница 22: ...compartment covers See Pe riodic Maintenance 8000SRM1635 Fuses WARNING The capacitor in the transistor controller can hold an electrical charge after the battery is disconnec ted To prevent electrical...

Страница 23: ...the lift truck to service High Speed Switch Assembly The high speed switch is mounted to the floor of the operator s compartment The operator depresses the switch using the right foot to increase the...

Страница 24: ...actuator and actuator plate to switch by inserting screws 14 5 Place switch assembly into base as removed 6 Center the spring inside the base between the curved side and the actuator 7 Pull the switc...

Страница 25: ...entify and disconnect all wires connect ing control handle to the hand brake assembly 3 Remove hand brake assembly from control han dle by removing two capscrews 43 washers 44 and nuts 45 NOTE No furt...

Отзывы: