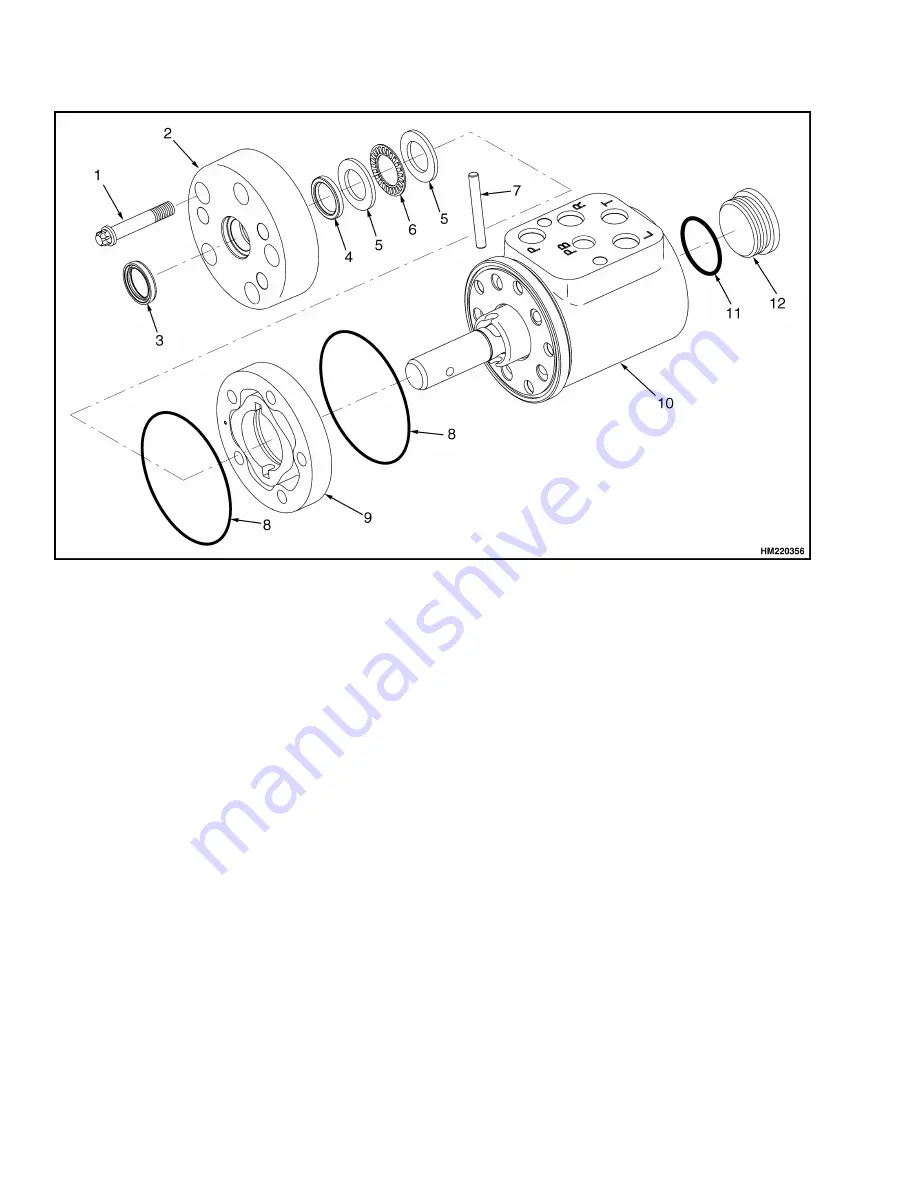
Steering Control Unit
1600 SRM 974
1.
CAPSCREW
2.
MOUNTING CAP
3.
DUST SEAL
4.
PRESSURE SEAL
5.
THRUST RACE
6.
THRUST BEARING
7.
DRIVE PIN
8.
O-RING
9.
GEROTOR
10. HOUSING
11. O-RING
12. TANK PLUG
Figure 3. Steering Control Unit (Before May 2002)
Disassemble (After May 2002)
1.
Put the control unit in a vise with soft jaws. See
Figure 2. Scribe (mark) a line across housing,
gerotor, and end cap. This is done so the unit
can be reassembled by aligning the marks. It is
critical to reassemble the SCU correctly because
there are holes drilled into the different parts to
allow oil to circulate through the SCU.
NOTE:
Refer to Figure 4 for the following instruc-
tions.
2.
Remove the capscrews that hold down the end
cap and remove the end cap.
3.
Remove both O-rings, the spacer, and seal ring
from the end cap. Carefully clean and inspect all
surfaces of the end cap.
4.
Remove the gerotor. Carefully clean and inspect
all surfaces of the gerotor.
5.
Remove drive shaft.
6.
Remove wear plate and O-ring. Carefully clean
and inspect all surfaces of the wear plate.
7.
Remove O-ring from housing.
NOTE:
The manual steering check valve may be a
check ball or a check/relief valve.
8.
Remove the plug and manual steering check
valve.
9.
Remove the spool and sleeve from the housing.
See Figure 5.
4
Содержание MAST N45XMXR3
Страница 1: ...Hyster G138 N30XMDR3 N45XMR3 Forklift...


