background image

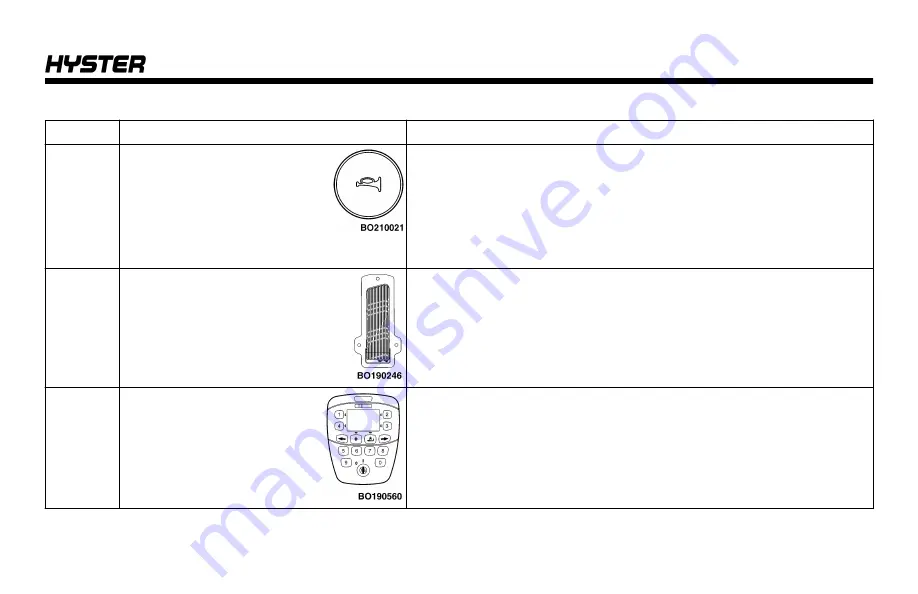
Table 1. Operator Controls (See Figure 8 and Figure 9)

Item No.

Item

Function

1

Horn Button

Push the horn button to warn pedestrians and others when
approaching intersections and other blind areas.

If lift truck is equipped with E-Hydraulic controls, there is another
horn button located on the armrest. There may also be a handle on
the rear right side overhead guard leg that has a horn button on it.
See the end of 

Table 1

 for more information.

2

Accelerator Pedal

The accelerator pedal is used with the direction control switch descri-
bed in this table and when the lift truck is not equipped with a MON-
OTROL® pedal. Push down on the accelerator pedal to increase the
speed of the lift truck

3

Display Panel

See 

Display Panel Features

 in this section, and 

Figure 10

Fig-

ure 11

Table 2

, and 

Table 3

 for a detailed description.

Model Description

27

Property of American Airlines

Содержание J30XNT

Страница 1: ...OPERATING MANUAL J30 40XNT K160 DO NOT REMOVE THIS MANUAL FROM THIS UNIT PART NO 1676236 2 17 P r o p e r t y o f A m e r i c a n A i r l i n e s...

Страница 2: ...NUMBER GROUP NUMBER GROUP NUMBER STEERING TIRE SIZE SPECIAL EQUIPMENT OR ATTACHMENTS Hyster Company 2017 All Rights Reserved HYSTER FORTIS MONOTROL and YARDMASTER are Registered Trademarks of Hyster...

Страница 3: ...he physical and mental ability to operate the equipment safely Various laws and regulations require the employer to train lift truck operators These laws and regulations include Occupational Safety an...

Страница 4: ...s from the National Safety Council Guide for Users of Industrial Lift Trucks Hyster Part No 852930 describes lift truck safety good maintenance practices and training programs and is available from yo...

Страница 5: ...ct Sensor 82 INSPECTION BEFORE OPERATION 83 Checks With the Key or Keyless Switch OFF 83 Operator Passwords 84 Operator Checklist 86 Mounting and Dismounting 89 Start Up Procedure SRO Circuit 89 Lift...

Страница 6: ...CK ON BLOCKS 139 How to Raise the Drive Tires 139 How to Raise the Steer Tire 140 HOW TO CLEAN A LIFT TRUCK 142 Maintenance Schedule 142 Maintenance Procedures Every 8 Hours or Daily 156 HOW TO MAKE C...

Страница 7: ...Tire Removal Two Piece Wheel 205 Tire Removal Three and Four Piece Wheels 206 Install the Wheel in the Tire 207 Install Wheel in Tire Three or Four Piece Wheel 208 Install Wheel in Tire Two Piece Whe...

Страница 8: ...PREPARATION FOR USE 221 Preparation After Transport 221 CHANGES TO THE OVERHEAD GUARD 221 Contents 6 r o p e r t y o f A m e r i c a n A i r l i n e s...

Страница 9: ...ipped with overhead guard and load backrest adequate for the load LOOK WHERE YOU ARE GOING IF YOU CAN T SEE DON T GO TRAVEL in reverse if load blocks forward vision MAKE SURE tail swing area is clear...

Страница 10: ...no other practical option Then use only a securely attached spe cial work platform ALLOW NO ONE under or near lift mechanism or load DO NOT move truck if anyone is between truck and sta tionary object...

Страница 11: ...lted slightly back Use minimum tilt when stacking elevated loads TRAVEL with carriage as low as possible and tilted back SLOW DOWN before turning especially without load FAILURE TO FOLLOW THESE INSTRU...

Страница 12: ...GHT 3 STEER WHEELS 4 DRIVE WHEELS 5 MAST 6 FORKS 7 CARRIAGE 8 LOAD BACKREST EXTENSION 9 OPERATOR SEAT 10 SEAT BELT AND HIP RESTRAINT Figure 1 Major Components of the Lift Truck Model Description 10 r...

Страница 13: ...hnology The trac tion motors are mounted between the left and right trans missions on the drive axle The hydraulic pump motor is mounted behind the driver and in front of the counter weight See Figure...

Страница 14: ...STICK 3 HYDRAULIC TANK 4 HYDRAULIC PUMP MOTOR 5 LEFT TRANSMISSION 6 TRACTION MOTORS 7 RIGHT TRANSMISSION Figure 2 Motor Locations Lift Trucks Manufactured Before November 2014 Model Description 12 r o...

Страница 15: ...PSTICK 3 HYDRAULIC TANK 4 HYDRAULIC PUMP MOTOR 5 LEFT TRANSMISSION 6 TRACTION MOTORS 7 RIGHT TRANSMISSION Figure 3 Motor Locations Lift Trucks Manufactured After November 2014 Model Description 13 r o...

Страница 16: ...ton If the lift truck is equipped with manual hydraulic levers the direction control switch is loca ted on the left side of the first lever See Figure 4 All lift trucks are equipped with a Battery Dis...

Страница 17: ...A E HYDRAULIC CONTROL MINI LEVERS B MANUAL HYDRAULIC CONTROL LEVERS Figure 4 Direction Control Switch Model Description 15 r o p e r t y o f A m e r i c a n A i r l i n e s...

Страница 18: ...nsion swivel seat allows the operator to move the seat to the left and to the right The seat can be moved 5 degrees to the left and 12 degrees to the right The full suspension swivel seat option allow...

Страница 19: ...Figure 5 Seat Components Model Description 17 r o p e r t y o f A m e r i c a n A i r l i n e s...

Страница 20: ...kets on the battery plate to help in removing the battery from the truck The hood and hood latch mechanism also help keep the battery within the battery compartment if a tipover occurs The hood can be...

Страница 21: ...ot allow the truck to travel unless the seat belt is fastened When equipped a seat belt interlock includes sequencing logic for the seat pres sure switch and seat belt switch The weight of the operato...

Страница 22: ...ed incomplete from the factory the Nameplate is covered by the labels shown in Figure 6 If your lift truck has this type of label do not operate the lift truck Contact your dealer for Hyster lift truc...

Страница 23: ...Figure 7 Warning Labels Sheet 1 of 3 Model Description 21 r o p e r t y o f A m e r i c a n A i r l i n e s...

Страница 24: ...Figure 7 Warning Labels Sheet 2 of 3 Model Description 22 r o p e r t y o f A m e r i c a n A i r l i n e s...

Страница 25: ...Figure 7 Warning Labels Sheet 3 of 3 Model Description 23 r o p e r t y o f A m e r i c a n A i r l i n e s...

Страница 26: ...NG Operator Controls See Figure 8 Figure 9 and Table 1 WARNING If any of the levers or pedals do not operate as descri bed in the following tables report the problem immedi ately Injury to personnel c...

Страница 27: ...Figure 8 Operator Controls Manual Hydraulic Controls Model Description 25 r o p e r t y o f A m e r i c a n A i r l i n e s...

Страница 28: ...Figure 9 Operator Controls Electro Hydraulic Controls Model Description 26 r o p e r t y o f A m e r i c a n A i r l i n e s...

Страница 29: ...de overhead guard leg that has a horn button on it See the end of Table 1 for more information 2 Accelerator Pedal The accelerator pedal is used with the direction control switch descri bed in this ta...

Страница 30: ...sure ignition switch functions properly DO NOT place a mag net near the ignition switch The lift trucks covered in this Operating Manual can be equipped with either a key switch or keyless switch Both...

Страница 31: ...t Lift trucks manufactured after November 2014 may be equipped with optional automatic front lights which activate when the key or keyless switch is turned on They will deactivate when the key or keyl...

Страница 32: ...he seat and the seat belt must be fas tened The lift lower control lever can be either the first manual lever or first mini lever to the right of the operator s seat Pull backward toward operator to r...

Страница 33: ...fas tened The tilt control lever can be either the second manual lever or second mini lever to the right of the operator s seat Push the lever forward to tilt the mast and forks forward Pull the lever...

Страница 34: ...n the lift truck the mini lever or man ual lever has the label shown at the bottom left When tilt set point delay feature is used a timer can be set so that the operator does not need to push the over...

Страница 35: ...unctions the operator must be on the seat and the seat belt should be fastened NOTE For lift trucks equipped with optional operator presence sys tem the operator must be on the seat and the seat belt...

Страница 36: ...3rd lever controls clamp func tions Trucks with clamp attachment The button on the lever enables clamp function Lever movement is inhibited until button is pressed Press the button and pull backward t...

Страница 37: ...sence system the operator mist be on the seat and the seat belt must be fastened The third electronic control mini lever is installed to the right of the electronic tilt control lever This mini lever...

Страница 38: ...ers and clamp attachment the last 3rd lever controls clamp functions Trucks with clamp attachment The button on the MLM enables clamp function in software Pull backward on the mini lever to close the...

Страница 39: ...unctions the operator must be on the seat and the seat belt should be fastened NOTE For lift trucks equipped with optional operator presence sys tem the operator must be on the seat and the seat belt...

Страница 40: ...th lever controls clamp func tions Trucks with clamp attachment The button on the lever enables clamp function Lever movement is inhibited until button is pressed Press the button and pull backward to...

Страница 41: ...astened The fourth electronic control lever is installed to the right of the third electronic control lever This lever can have two methods of opera tion depending on the attachment Trucks without cla...

Страница 42: ...ruck is equipped with four function control valve four mini levers and clamp attachment the last 4th mini lever controls clamp functions Trucks with clamp attachment The button on the MLM enables clam...

Страница 43: ...e 3rd mini lever controls the 3rd and 5th functions Trucks with clamp attachment four mini levers and five func tion control valve The third mini lever becomes a dual function mini lever Move the 3rd...

Страница 44: ...manual levers is located behind the levers The operator can disconnect all electrical power to the lift truck by pushing the emergency disconnect switch down until it clicks To reset the emergency di...

Страница 45: ...levers is located on the right side of the armrest The operator can disconnect all electrical power to the lift truck by pushing the emergency disconnect switch in until it clicks To reset reconnect t...

Страница 46: ...he right REVERSE side of the pedal is pushed the lift truck will move in the reverse direction When the left FORWARD side of the pedal is pushed the lift truck will move in the forward direction The s...

Страница 47: ...ks If the lift truck loses power and has to be towed there is a manual override handle that will disenable the APB The manual override handle is located underneath the floor mat and floor plate and mo...

Страница 48: ...an upright position and back to the original locked position Lift the lever to move the steering column to exit the truck The lever will lock when the steering column is returned to the origi nal pos...

Страница 49: ...instead of a MONOTROL pedal If the lift truck is equipped with E Hydraulic mini levers the direction control switch is located on the left side of the armrest in front of the horn button If the lift t...

Страница 50: ...rt of the slide assembly moves the armrest up and down in a diagonal direction to adjust the height of the armrest Pull up on the handle and move armrest to desired height Release handle to set armres...

Страница 51: ...all the way for ward If necessary move the armrest all the way back if lift truck is equipped with E Hydraulic control levers If lift truck is equipped with manual hydraulic levers release the latch f...

Страница 52: ...rmrest all the way back if lift truck is equipped with E Hydraulic control levers If lift truck is equipped with manual hydraulic levers release the latch for the control lever assembly and move the a...

Страница 53: ...y is the same as speci fied on the Nameplate The halves of the connector must be joined for operation Separate the halves of the connector to disconnect the battery The battery connector is in two par...

Страница 54: ...Shown in Figure 8 and Figure 9 Loosen the telescopic column locking handle Turn the locking han dle counterclockwise and slide the steering column in or out to desired setting Turn the telescopic loc...

Страница 55: ...hat the hood can be opened pull the release lever up and push the manual hydraulic control lever assembly toward the dash panel To put the manual hydraulic control lever assembly back into position fo...

Страница 56: ...unction Horn Button on Overhead Guard Leg Not Shown in Figure 8 or Figure 9 The lift trucks in this Operating Manual are equipped with a handle on the right rear overhead guard leg with a horn button...

Страница 57: ...r passwords to control oper ator access to vehicle Allows scheduled maintenance reminders to be pro grammed in and will alert the operator through an audi ble and visual alarm when scheduled maintenan...

Страница 58: ...as already been pressed and a second one is pressed right afterward the display panel will ignore the second key All key presses are accepted for a single entry and key entries cannot be repeated by h...

Страница 59: ...Figure 10 Display Panel Keys Display Panel Features 57 r o p e r t y o f A m e r i c a n A i r l i n e s...

Страница 60: ...reen contains all the necessary components for normal operation of the lift truck In this screen Key 1 is enabled to decrease Performance Mode press the 1 key to go to the next lower level of performa...

Страница 61: ...all the necessary components for normal operation of the lift truck In this screen Key 4 is enabled to increase Performance Mode press the 4 key to go to the next highest level of performance level 1...

Страница 62: ...brations Diagnostics and Truck Setup menus the 2 and 3 keys allow the operator to scroll up or down within the menu Press the 2 key to scroll up and press the 3 key to scroll down When an operator if...

Страница 63: ...display panel will to the Operator Screen When an operator if authorized is in any of the additional menus that are available Calibrations Diagnostics and Truck Setup menus the 5 key is enabled to ent...

Страница 64: ...list See Opera tor Checklist in the Operating Procedures section for more infor mation on using the Operator Checklist 7 Enter Key STAR Key This key is used for menu entry and menu navigation Use the...

Страница 65: ...e value of a selected operating function Scrolling forward through a list of possible menu selections 9 6 7 8 9 and 0 Keys The 6 7 8 9 and 0 keys are enabled to enter the numbers 6 7 8 9 and 0 for dat...

Страница 66: ...illuminated and will illuminate again only if there is a problem in that particular area The following icons and information is displayed at all times on the LCD screen when the truck is running and...

Страница 67: ...Figure 11 Display Panel LCD Screen and Warning and Indicator Lights Display Panel Features 65 r o p e r t y o f A m e r i c a n A i r l i n e s...

Страница 68: ...y in The number 1 is the slowest and the number 4 is the fastest Push the 1 key next to the tortoise to decrease the performance mode Push the 4 key next to the hare to increase the performance mode T...

Страница 69: ...n will stay illuminated for approximately 10 seconds when the Operator Screen first appears on the display panel after the key or keyless switch has been turned to the ON position The light will dis a...

Страница 70: ...ly charged the bar graph will be completely shaded As the battery discharges shaded blocks will disappear from the top of the graph on down When the battery drops below 25 percent BSOC an audible alar...

Страница 71: ...g brake has been applied the N or Arrows will dis appear and the parking brake applied icon will take its place When the parking brake is disengaged the N or Arrows will reap pear 5 Indicator Light Pa...

Страница 72: ...ake Applied Direction Indicators With software versions 4 32 and greater when a direction of travel has been selected the corresponding arrow up for Forward down for Reverse will illuminate These symb...

Страница 73: ...he screen for five seconds after the load has been removed from the forks After the five seconds have elapsed and another load is not put on the forks the system time will reappear in place of the loa...

Страница 74: ...o the operator that a possible malfunction or incorrect truck use has occurred Status Codes are code numbers for a symptom or malfunction Have an authorized service technician check and repair the lif...

Страница 75: ...t Motor Temperature High Warning CAUTION DO NOT operate the lift truck when the motor temperature is too high Damage to the hydraulic system can occur This icon will illuminate and stay illuminated wh...

Страница 76: ...igure 11 CAUTION DO NOT operate the lift truck when the hydraulic fluid is low Damage to the hydraulic system can occur This icon is only available if the lift truck is equipped with the Hydraulic Flu...

Страница 77: ...ts and an hourglass icon The hourmeter will always be visible to the operator as long as the display panel has the Operator Screen displayed Turning the key or keyless switch to the OFF position or pr...

Страница 78: ...se areas The bar graph for battery state of charge is on LCD screen If the battery is discharged to lift interrupt the battery indicator symbol will also be flashing If a battery of the wrong voltage...

Страница 79: ...re 11 and Table 3 will appear on the LCD screen After 10 seconds the seat belt low brake fluid service due if enabled motor temperature icons and low hydraulic fluid if enabled will no longer be illum...

Страница 80: ...ward Forward 3 PUSH PULL Backward Forward Backward Forward 4 ROTATE Clockwise Counterclockwise Backward Forward 5 UPENDER Up Down Backward Forward 6 SCOOP Up Down Backward Forward 7 LOAD STABILIZER Do...

Страница 81: ...ft mechanism lifts the load so that it can be moved and stacked In order to understand how the fork lift truck can pick up a load you must first know some basic things about the lift truck The lift tr...

Страница 82: ...forward and back as the mast is til ted forward and back The CG moves up and down as mast moves up and down The CG moves left and right as the traverse frame moves left and right A CG LOAD B COMBINED...

Страница 83: ...t truck will tip forward If the CG moves outside of the line represented by the lines drawn between the drive wheels and the steer ing axle pivot the lift truck will tip to that side Capacity Weight a...

Страница 84: ...section If the impact sensor option is enabled and an impact has been detected then lift truck will shut down once the Impact Shutdown Timer has expired range is from 0 to 30 seconds During this time...

Страница 85: ...NOT OPERATE and remove the key from the key switch See Checks and Inspection Procedures in the Mainte nance Section of this manual for detailed instructions Also refer to Table 1 for operation and de...

Страница 86: ...entered press the enter button and the system will check the password against the currently stored password list on the truck If less than five digits are entered pressing the enter button will have...

Страница 87: ...sswords Service Has all rights assigned to Operator and Super visor passwords Can add edit and delete Operator Supervisor and Service passwords and view all truck diagnostic information Allows access...

Страница 88: ...quipped with the optional operator checklist it can be enabled or disabled by a supervisor or service technician See Table 5 Table 5 Operator Checklist Icon Definitions Icon Definition Check Parking B...

Страница 89: ...inition Check Hydraulics Check Mast Check for Leaks Table 5 Operator Checklist Icon Definitions Continued Icon Definition Check Operator Restraint Check Pedal Movement Check Service Brake Operating Pr...

Страница 90: ...em in the checklist See Figure 15 After the operator has provided an answer the screen will move onto the next item in the checklist The process repeats itself until all items in the checklist have be...

Страница 91: ...ed posi tion or removed before starting lift truck operations Start Up Procedure SRO Circuit Lift Trucks with Software Versions Less than 4 32 The lift trucks covered in this manual are equipped with...

Страница 92: ...ion control switch See Figure 8 Figure 9 and Table 1 5 Push the MONOTROL or accelerator pedal for acceler ation Lift Trucks with Software Versions 4 32 and Greater The lift trucks covered in this manu...

Страница 93: ...e a charged battery of the correct voltage is installed and connected 2 Sit on the seat to close seat switch Fasten seat belt to close belt switch Check to ensure all operator controls traction and hy...

Страница 94: ...d Examples of this are Seat Interlock or Parking Brake Interlock Once the needed action is completed the traction motor will be enabled and the operator can con tinue to drive the lift truck HYDRAULIC...

Страница 95: ...or Pressed SRO Not Satisfied Release The Accelerator Pedal Standard OPS Accelerator Pressed SRO Not Satisfied Press Service Brake Pedal Equipped with Optional OPS Accelerator Pressed SRO Not Satisfied...

Страница 96: ...on Required Hydraulic Function 1 Out of Neutral Release Hydraulic Function 1 Lever or Button Hydraulic Function 2 Out of Neutral or Function 2 Button Out of Neutral Release Hydraulic Function 2 Lever...

Страница 97: ...lic Function 3 Out of Neutral or Function 3 Button Out of Neutral Release Hydraulic Function 3 Lever or Button Hydraulic Function 4 Out of Neutral or Function 4 Button Out of Neutral Release Hydraulic...

Страница 98: ...l by Pushing the Monotrol Pedal or Moving Direction Control Switch and Pushing Accelerator Pedal Operator out of the Seat or Seat Belt Switch Open Sit Fully in the Seat and Fasten Seat Belt Impact Det...

Страница 99: ...ature Allow Motor s to Cool off Then Recycle Key or Keyless Switch to Satisfy SRO Key Switch Not Detected in OFF Position Cycle the Key Switch Park Brake Applied Release Park Brake Battery is Not Secu...

Страница 100: ...cted Notify Service Technician to correct the Fault Truck Disabled Due to E Steer Controller Notify Service Technician to Correct the Fault Truck Disabled Due to Right Single Traction Controller Notif...

Страница 101: ...rator Action Required Truck Disabled Due to Left Traction Controller Notify Service Technician to Correct the Fault Truck Disabled Due to Pump Controller Notify Service Technician to Correct the Fault...

Страница 102: ...er There is a great risk that the operator or someone else can be killed or injured if trapped or hit by the truck as it tips over The risk of injury can be reduced if the operator stays on the truck...

Страница 103: ...rect operation of the mast carriage and attachments Check the operation of the steering system Check the operation of the MONOTROL pedal or the directional control lever and the accelerator pedal Chec...

Страница 104: ...ree lift cyl inder is present not more than maximum free lift 3 Lower the load 51 mm 2 in Stop lowering wait 1 sec ond and read the load weight This will be the most accu rate weight Waiting longer to...

Страница 105: ...list is completed the LCD screen will show the Operator Screen 4 From the Operator Screen press the scroll back left arrow key or scroll forward right arrow key to go to the Calibrations Menu Screen S...

Страница 106: ...ring operation If you have not read the warning page in the front of this Operating Manual do so now As you study the following infor mation about properly operating a lift truck remember the warnings...

Страница 107: ...ft truck operation It also means that a qualified person experienced in lift truck operation must guide the operator through several driving and load han dling operations before the operator attempts...

Страница 108: ...platform is used Before anyone is allowed in the platform lift and lower the mast slowly with the platform in place to make sure the mast functions properly Apply the parking brake Do not travel with...

Страница 109: ...between the arrows when the operator sits upright in the seat with the feet positioned on the pedals This ensures that the operator is set at the midpoint of the 40 mm 1 57 in suspension The weight ad...

Страница 110: ...3 RIDE POSITION INDICATOR 4 FORWARD BACKWARD ADJUSTMENT LEVER 5 BACKREST ANGLE ADJUSTMENT LEVER 6 ARMREST 7 SWIVEL LATCH RELEASE LEVER Figure 16 Seat Adjustment Operating Procedures 108 r o p e r t y...

Страница 111: ...s contained in this Operating Manual Driving and Direction Changes These lift trucks can have either a MONOTROL pedal or a direction control switch with an accelerator pedal If the lift truck has a MO...

Страница 112: ...nge the direction of travel while the lift truck is moving by moving the foot to the other side of the MONOTROL pedal or by moving the direction control switch for travel in the opposite direction Thi...

Страница 113: ...MPACT Because lift trucks are designed to work in a relatively small space they can turn sharper than some other vehi cles Most lift trucks are steered by the rear wheels and the rear of the lift truc...

Страница 114: ...e supervisor or service techni cian to adjust the position that the steering wheel will be in when the lift truck is traveling straight ahead The operator will notice that the steering wheel always re...

Страница 115: ...uck is equipped with a direction control switch or MONOTROL pedal and the operator leaves the seat with out engaging the parking brake the N indicator light on the LCD screen will illuminate regardles...

Страница 116: ...stened before turning the key or keyless switch ON to provide power to the lift truck If the operator leaves the seat while the truck is moving or does not apply the park ing brake before getting off...

Страница 117: ...in the seat 2 Fasten the seat belt 3 Turn the key or keyless switch to the ON position if the lift truck power was turned OFF 4 Press the service brake pedal if the operator left the seat or if lift...

Страница 118: ...1 FRONT BULKHEAD 2 MANUAL OVERRIDE HANDLE 3 TRACTION MOTOR Figure 17 Automatic Parking Brake Override Handle Operating Procedures 116 r o p e r t y o f A m e r i c a n A i r l i n e s...

Страница 119: ...le only stable loads A load can have unstable items that can easily shift and fall on someone Do not han dle a load if any loose part of it is above the load backrest or any part of the load is likely...

Страница 120: ...e left hand The right hand is used to operate the lift tilt and attachment controls The LIFT and TILT functions are controlled by separate manual levers or optional mini levers See the Operator Contro...

Страница 121: ...k is loaded or empty do not travel with the load or carriage in a raised position WARNING Keep yourself and all others clear of the lift mecha nism Never allow anyone under or on the forks WARNING NEV...

Страница 122: ...helpful but they affect side and forward stability Do not tilt in either direction more than necessary when handling a load that is raised The lift truck can tip forward if the mast is tilted forward...

Страница 123: ...d between the forks Verify that the forks do not extend past the load so that loads or equipment that are behind the load being lifted are not damaged Lift the load a small distance from the floor to...

Страница 124: ...is controlled by the position of the control lever Lower slowly and smoothly Slowly return the control lever to the Neutral position so that the load is not dropped or that the lift truck is not tippe...

Страница 125: ...t of impact 8 Move Forward slowly When the load is in position lower the load on to the stack or the rack Lower the forks just enough to remove them from under the load Do not lower the forks so that...

Страница 126: ...a lift truck that is carrying a load in the lowered travel posi tion Therefore a lift truck without a load is more likely to tip sideways especially in a turn than a lift truck with a load provided t...

Страница 127: ...strians can step into the path of travel of the lift truck Slow down when approaching blind intersections or turns Sound the horn to warn pedestrians that there is a vehicle in the area and to be aler...

Страница 128: ...bject or lift another load 9 Do not indulge in stunt driving or horseplay 10 Do not pass another lift truck traveling in the same direction at intersections blind spots or at other dangerous locations...

Страница 129: ...ve before leaving the lift truck unattended NOTE The emergency load lowering valve is to be used ONLY if the electrical signal to the main control valve has been disrupted and there is a load lifted T...

Страница 130: ...RGENCY LOAD LOWERING VALVE 2 MAIN CONTROL VALVE 3 FRONT BULKHEAD Figure 18 Emergency Load Lowering Valve Manual Main Control Valve Operating Procedures 128 r o p e r t y o f A m e r i c a n A i r l i...

Страница 131: ...1 4 turn in any direction then release by removing finger from valve See Figure 19 3 To disengage the emergency load lowering valve press back in and rotate 1 4 turn in any direction When disen gaged...

Страница 132: ...NCY LOAD LOWERING VALVE 2 MAIN CONTROL VALVE 3 FRONT BULKHEAD Figure 19 Emergency Load Lowering Valve E Hydraulic Main Control Valve Operating Procedures 130 r o p e r t y o f A m e r i c a n A i r l...

Страница 133: ...Before operating in a highway truck or railroad car observe the following DO NOT use a lift truck to move a railroad car DO NOT use a lift truck to open or close the door on a rail road car unless the...

Страница 134: ...nd of the proper capacity When entering a railroad car the operator can enter at an angle if the dock plate or bridge is wide enough This will reduce the turning required after entering Attachments WA...

Страница 135: ...uck do the following operations 1 Stop the lift truck The parking brake is automatically applied 2 Fully lower the forks or carriage Tilt mast forward until the tips of the forks touch the ground 3 Tu...

Страница 136: ...ontains a Maintenance Schedule and instructions for daily maintenance and inspection The Maintenance Schedule has time intervals for inspection lubrication and maintenance for your lift truck The serv...

Страница 137: ...personnel and facilities to do the items listed in the Maintenance Schedule Service man uals are available from your dealer for Hyster lift trucks to help users who do their own maintenance Throughou...

Страница 138: ...steep grade If the hydraulic pump motor which includes the steer ing control functions does not operate steering con trol of the lift truck can be slow This can make the control of the lift truck diff...

Страница 139: ...ed lift truck must have an operator 2 Raise the carriage and forks approximately 300 mm 12 in from the surface Install a chain to prevent the car riage and mast channels from moving 3 Tow with another...

Страница 140: ...1 FRONT BULKHEAD 2 MANUAL OVERRIDE HANDLE 3 TRACTION MOTOR Figure 22 Automatic Parking Brake Override Handle Maintenance 138 r o p e r t y o f A m e r i c a n A i r l i n e s...

Страница 141: ...tip forward Put the lift truck on blocks only if the surface is solid even and level Make sure that any blocks used to sup port the lift truck are solid one piece units How to Raise the Drive Tires 1...

Страница 142: ...nt and back of the drive tires to prevent movement of the lift truck See Figure 23 2 Use a hydraulic jack to raise the steering tires Verify that the jack has a capacity of at least two thirds of the...

Страница 143: ...1 DRIVE TIRES 2 STEER TIRES Figure 23 Putting the Lift Truck on Blocks Maintenance 141 r o p e r t y o f A m e r i c a n A i r l i n e s...

Страница 144: ...lay during the cleaning process Portions of your lift truck may be washed with a non heated pressure washer Steam cleaning is not recommended in most instances as condensation may form in electrical c...

Страница 145: ...Figure 24 Maintenance Points Maintenance Schedule 143 r o p e r t y o f A m e r i c a n A i r l i n e s...

Страница 146: ...mbly Hood Hinges and Hood Latch X Check Operation Repair as Required L Lube as Required Use Multipurpose Grease See NOTE 2 and NOTE 3 3 Frames Covers and Floor Plates X Visually Inspect for Damage Rep...

Страница 147: ...Replace if Necessary X Inspect for Kinked Flattened Stiff or Charred Hoses Replace if Necessary Hydraulic Oil X Check for Leaks Repair as Required Hydraulic Oil Standard Truck Total Capacity X C Chan...

Страница 148: ...ub Zero Construction Total Capacity X C Change Oil 22 0 liter 5 8 gal See NOTE 8 40 to 22 C 40 to 71 6 F Hydraulic Oil MIL H 5606A Hydraulic Oil Filter C Change Oil Filter See NOTE 3 and NOTE 8 See Pa...

Страница 149: ...Check Operation Repair as Required X Check for Leaks Steering Position Sensor X Check Sensor Assembly and Col umn Gear Teeth Replace Sensor or Col umn Gear as Required Telescopic Steering Column L Lub...

Страница 150: ...andle L Lubricate Pivot Pin See NOTE 3 Use Multipurpose Grease See NOTE 2 9 Service Brake X Check Operation Use Dexron III X Check for Leaks Linkage and Shafts L Lubricate Silicone Spray Lubricant Hys...

Страница 151: ...heck Lubrication See NOTE 1 Use Multipurpose Grease See NOTE 2 Sliding Surfaces X L L Lubricate as Required See NOTE 1 and NOTE 4 Use Multipurpose Grease See NOTE 2 Mast Mounting Capscrews X Tighten i...

Страница 152: ...Length See NOTE 3 L Remove Chains to Clean and Lubricate SAE 30W Engine Oil Header Hoses Hose Fittings and Clamps X Inspect for Visible Damage and Defects See NOTE 1 Adjust Repair or Replace if Neces...

Страница 153: ...ocedure or Quantity Specification Mast Fourth Function Mini Rollers L Lubricate as Required Use Multipurpose Grease See NOTE 2 X Check C Change L Lubricate CIL Check Indicator Light during operation N...

Страница 154: ...e as Required See NOTE 1 SAE 30W Engine Oil Integral Sideshift Carriage L Lubricate 2 Fittings See NOTE 1 Use Multipurpose Grease See NOTE 2 Integral Sideshift Carriage Upper Lower Bearings X Check We...

Страница 155: ...ose Grease See NOTE 2 Integral Sideshift Carriage Lower Mounting Hook X Check for Wear and Clearance See NOTE 1 and NOTE 3 0 76 mm 0 03 in Minimum Wear Limit 12 Transaxle Oil Change C Change Oil 0 6 l...

Страница 156: ...s X Check Condition Repair as Required Direction and Speed Control Pedals X L Check Operation Lubricate as Needed Use Silicone Spray Lubri cant Hyster P N 328388 Safety Labels and Operating Manual X R...

Страница 157: ...e you of the appropriate service intervals based on an application survey NOTE 4 Maximize life of surfaces by lubricating every 250 hours for first 1000 hours NOTE 5 Equalization charge is required ap...

Страница 158: ...onal checks as described in the following paragraphs of How to Make Checks With the Key or Keyless Switch OFF and How to Make Checks With the Key or Keyless Switch ON How to Make Checks With the Key o...

Страница 159: ...tant that all safety labels are installed on the lift truck and can be read Check that all safety labels are installed in the correct loca tions on the lift truck See the Parts Manual or the section F...

Страница 160: ...rust cracks or other damage The overhead guard must be free from defects to ensure protection to the operator A variety of covers and floor plates provide protection and allow easy access to systems...

Страница 161: ...OVERHEAD GUARD 2 FLOOR PLATE 3 FRAME 4 HOOD SIDE COVER 5 COUNTERWEIGHT COVER 6 STEERING COLUMN COVER Figure 26 Frame and Covers Check Maintenance 159 r o p e r t y o f A m e r i c a n A i r l i n e s...

Страница 162: ...move NOTE If lift truck is equipped with a fork positioner attach ment perform Step 1 first before going to Step 2 If lift truck is not equipped with a fork positioner attachment go to Step 2 1 Lower...

Страница 163: ...ER 2 FORKS 3 INNER FORK CARRIER 4 SIDESHIFT CARRIAGE 5 FORK POSITIONER 6 CAPSCREWS 7 FORK REMOVAL NOTCH Figure 27 Fork Positioner Prior to December 2016 Maintenance 161 r o p e r t y o f A m e r i c a...

Страница 164: ...IER 2 FORKS 3 INNER FORK CARRIER 4 SIDESHIFT CARRIAGE 5 FORK POSITIONER 6 CAPSCREWS 7 FORK REMOVAL NOTCH Figure 28 Fork Positioner After December 2016 Maintenance 162 r o p e r t y o f A m e r i c a n...

Страница 165: ...ce Slide a hook fork to the fork removal notch on the carriage See Figure 29 Lower the fork onto blocks so that the lower fork hook moves through the fork removal notch See Figure 30 and Fig ure 31 Lo...

Страница 166: ...mm 1 61 in 1524 mm 60 in 46 mm 1 81 in 1830 mm 72 in 55 mm 2 17 in 1 TIP ALIGNMENT MUST BE WITHIN 3 OF FORK LENGTH 2 CRACKS 3 LATCH DAMAGE 4 HEEL OF FORK MUST BE 90 OF DIMENSION X 5 CARRIAGE 6 LOAD B...

Страница 167: ...pecial steel using special proce dures Replace damaged forks Forks are to be replaced only in sets and not individually 1 Inspect the forks for cracks and wear Check that the fork tips are aligned as...

Страница 168: ...he fork on the carriage so that both upper and lower fork hooks engage the carriage Engage the lock pin with a notch in the top carriage bar See Figure 31 1 FORK 2 LOCK PIN 3 SPRING 4 WASHER 5 WEDGE 6...

Страница 169: ...any part of your body in or through the lift mechanism unless all parts of the mast are completely lowered and the lift truck motor is OFF 1 Inspect the welds on the mast cylinders and carriage for c...

Страница 170: ...f skin as soon as possible WARNING Never check for leaks by putting hands on hydraulic lines or components under pressure Hydraulic oil under pressure can be injected into the skin 6 Visually inspect...

Страница 171: ...the chain anchors and pins for cracks and dam age 10 Make sure the lift chains are adjusted so that they have equal tension Adjustments or replacement of the lift chains must be done by authorized pe...

Страница 172: ...dicator icon on the display panel for the seat belt The icon is ON as described in the Model Description section of this manual The indicator icon can help the operator remember to fasten the seat bel...

Страница 173: ...Figure 34 Operator Restraint System Maintenance 171 r o p e r t y o f A m e r i c a n A i r l i n e s...

Страница 174: ...ISM LIFT TRUCKS MANUFACTURED BEFORE NOVEMBER 2014 B HOOD LATCH MECHANISM LIFT TRUCKS MANUFACTURED AFTER NOVEMBER 2014 1 HOOD LATCH HANDLE 2 HIP RESTRAINT BRACKET 3 SEAT BELT Maintenance 172 r o p e r...

Страница 175: ...EMENT IS THE SAME MANUAL HYDRAULIC ARMRESTS SHOWN 1 SEAT BELT 2 WEIGHT ADJUSTMENT KNOB 3 RIDE POSITION INDICATOR 4 FORWARD BACKWARD ADJUSTMENT LEVER 5 BACKREST ANGLE ADJUSTMENT LEVER 6 HIP RESTRAINT B...

Страница 176: ...e retractor assembly Make sure the seat belt pulls out and retracts smoothly If the seat belt does not pull out of the retractor assembly the inter nal latch may be locked Pull firmly on the seat belt...

Страница 177: ...for access to the battery A gas spring helps raise and hold the hood in the up position The battery restraint system must function so that the oper ator restraint system can operate correctly Operatio...

Страница 178: ...1 BATTERY PLATE 2 REAR BULKHEAD 3 FRONT BULKHEAD 4 FRONT SPACER PLATE 5 RIGHT FRAME PLATE Figure 36 Standard Battery Restraint System Maintenance 176 r o p e r t y o f A m e r i c a n A i r l i n e s...

Страница 179: ...BATTERY PLATE 3 SIDE ROLLER 4 FRONT BULKHEAD 5 FRONT SPACER PLATE 6 REMOVABLE SIDE PLATE Figure 37 Optional Battery Restraint System With Side Rollers Maintenance 177 r o p e r t y o f A m e r i c a...

Страница 180: ...e hood to the DOWN position and pull the hood release lever toward right side of the truck and release to lock Try to lift the hood to make sure the hood is fastened correctly The hood must be locked...

Страница 181: ...Figure 38 Hood and Hood Latch Components Lift Trucks Manufactured Before November 2014 Maintenance 179 r o p e r t y o f A m e r i c a n A i r l i n e s...

Страница 182: ...A CLOSED POSITION B OPEN POSITION C FRONT VIEW D BOTTOM VIEW 1 LATCH ASSEMBLY 2 HOOD 3 HOOD RELEASE LEVER 4 HOOD MOUNTING BRACKET 5 HOOD HINGE 6 GAS SPRING Maintenance 180 r o p e r t y o f A m e r i...

Страница 183: ...Figure 39 Hood and Hood Latch Components Lift Trucks Manufactured After November 2014 Maintenance 181 r o p e r t y o f A m e r i c a n A i r l i n e s...

Страница 184: ...ments Make sure the steering column adjustment features are functioning properly If lift truck is equipped with the optional telescoping steering column make sure the tilt memory and telescoping featu...

Страница 185: ...lever and pivots as needed NOTE DO NOT use multipurpose grease to lubricate the sliding surfaces of the telescopic column Tilt Memory Feature After the tilt memory lever is released tilt the column d...

Страница 186: ...water cannot be added to the electrolyte Make sure that the voltage and the weight of the battery are correct as shown on the Nameplate See Battery Specifications to check for correct battery dimensio...

Страница 187: ...d Control Pedals Check that the direction and speed control pedals operate as described in the Model Description section of this man ual Lubricate the MONOTROL pedal or accelerator pedal joints as nee...

Страница 188: ...reverse will sound the alarm 5 Check the backup alarm on lift trucks equipped with a MONOTROL pedal by sitting in the seat turning the key or keyless switch to the ON position and pressing the revers...

Страница 189: ...gize the electrical circuits the operator must turn the switch clockwise until it pops up See Fig ure 41 A MANUAL HYDRAULIC LEVERS B E HYDRAULIC MINI LEVERS Figure 41 Emergency Disconnect Switch Steer...

Страница 190: ...ll damage the pump NOTE Some parts of the mast move at different speeds during raising and lowering Slowly raise and lower the mast several times without a load The mast components must raise and lowe...

Страница 191: ...rking Brake There is an indicator icon on the display panel for the Auto matic Parking Brake APB The icon is illuminated as described in the Model Description section of this manual If the APB is not...

Страница 192: ...prior to the seat belt switch being engaged to enable operations Oil Leaks Visually check the hydraulic system steering system brake system and transaxle for leaks How to Charge the Battery WARNING T...

Страница 193: ...ry manufacturer for charging the battery Correct use of the hydrometer and proper operation of the battery charger is important See Figure 42 Follow the instructions of the charger manufacturer Never...

Страница 194: ...ravity difference is more than 0 020 between cells of the battery after an equalizing charge there can be a defective cell Consult your battery dealer Also see the service manual Industrial Battery 22...

Страница 195: ...weight of the replacement bat tery is correct as shown on the Nameplate Before connecting the battery make sure the key or keyless switch is in the OFF position and the parking brake is set CAUTION B...

Страница 196: ...re it will not be damaged during battery removal Lift the side panels to remove them 5 Use a spreader bar and crane to lift the battery from the lift truck See Figure 43 Figure 43 Change the Battery M...

Страница 197: ...d or remove shims from under the front spacer bar to control the movement of the battery The battery must not move more than a total of 13 mm 0 50 in forward or backward See Figure 44 3 Connect the ba...

Страница 198: ...A 13 MM 0 50 IN 1 SPACER PLATE 2 ADJUSTMENT CAPSCREW 3 FRONT BULKHEAD 4 BATTERY Figure 44 Battery Compartment Adjustment Maintenance 196 r o p e r t y o f A m e r i c a n A i r l i n e s...

Страница 199: ...slide the mechanism toward the front of the truck The mechanism will lock in place Remove the battery removal door from the lift truck Position a suitable battery stand or roller tray next to the batt...

Страница 200: ...Figure 45 Optional Side Removal of Battery Maintenance 198 r o p e r t y o f A m e r i c a n A i r l i n e s...

Страница 201: ...gend for Figure 45 1 RETAINER ASSEMBLY 2 FOLD OVER NUT 3 CAPSCREW 4 VERTICAL BAR 5 BATTERY REMOVAL DOOR 6 ROLLER TRAY 7 ROLLER ASSEMBLY Maintenance 199 r o p e r t y o f A m e r i c a n A i r l i n e...

Страница 202: ...532 mm 20 0 21 2 in 970 986 mm 38 2 38 8 in 771 kg 2100 lb 998 kg 2200 lb 587 mm 23 1 in J35XNT 1385 mm 54 5 in 642 991 mm 25 3 39 in 597 635 mm 23 5 25 0 in 975 986 mm 38 2 38 8 in 953 kg 1792 lb 10...

Страница 203: ...idth is side to side The length dimension of the battery must fit within the battery compartment side to side dimension with a clearance of 0 to 13 mm 0 50 in maximum Battery width must fit within the...

Страница 204: ...eels must be changed and tires repaired by trained personnel only Always wear safety glasses CAUTION Not all makes of radials tires have sufficient sidewall strength for successful use on forklift tru...

Страница 205: ...ASSEMBLY C THREE PIECE WHEEL D FOUR PIECE WHEEL 1 WHEEL RIM 2 SIDE FLANGE 3 LOCK RING 4 FLANGE SEAT Figure 46 Types of Wheels for Pneumatic and Solid Pneumatic Tires Maintenance 203 r o p e r t y o f...

Страница 206: ...outer wheel halves together when there is air pressure in the tire Lift truck tires and wheels are very heavy Use caution when removing or installing tires and wheels or per sonal injury may occur 1...

Страница 207: ...explode caus ing serious injury or death Keep tire tools in firm contact with the wheel parts If the tool slips it can move with enough force to cause an injury 1 Remove the nuts that fasten the whee...

Страница 208: ...ool slips it can move with enough force to cause an injury 1 Loosen the tire bead from the side flange 2 Put the tire tool into the slot between the lock ring and wheel rim Remove the lock ring and si...

Страница 209: ...r to put parts together Make sure that the lock ring is in the correct position The ends of the lock ring must not touch The clearance at the ends of the lock ring will be approxi mately 13 to 25 mm 0...

Страница 210: ...l in the tire as shown in Install Wheel in Tire Two Piece Wheel Install Wheel in Tire Three or Four Piece Wheel WARNING Make sure all of the air pressure is removed from the tire before a wheel is dis...

Страница 211: ...wheel is disassembled Air pressure in the tires can cause the tire and rim parts to explode caus ing serious injury or death Keep tire tools in firm contact with the wheel parts If the tool slips it c...

Страница 212: ...re in a safety cage 2 Add 20 kPa 3 psi of air pressure to the tire See Fig ure 47 3 Check that all wheel parts are correctly installed Hit the lock ring lightly to make sure that it is in the seat 4 I...

Страница 213: ...eavy Use caution when removing or installing tires and wheels or per sonal injury may occur Remove Wheels From Lift Truck 1 Put the lift truck on blocks as described in How to Put a Lift Truck on Bloc...

Страница 214: ...between the lock ring and the wheel rim Remove the lock ring and side flange 3 Turn the tire over Put a support under the wheel rim Make sure the wheel rim is at least 150 to 200 mm 6 to 8 in from the...

Страница 215: ...se a rub ber lead plastic or brass hammer to put parts together Make sure that the lock ring is in the correct position The ends of the lock ring must not touch The clearance at the ends of the side r...

Страница 216: ...onto the wheel rim so that the side flange and lock ring can be installed 4 While the cage is holding the tire on the wheel rim install the lock ring Use a tire tool to make sure the lock ring is in t...

Страница 217: ...ay occur NOTE Solid rubber tires made from softer or harder mate rial can be installed as optional equipment The tread on solid rubber tires can be either smooth or it can have lugs DO NOT mix types o...

Страница 218: ...EERING TIRES AND WHEELS B DRIVE TIRES AND WHEELS C WIDE TREAD 1 OUTSIDE OF SOLID RUBBER TIRE 2 WHEEL 3 OVERHANG Figure 48 Tires and Wheels Maintenance 216 r o p e r t y o f A m e r i c a n A i r l i n...

Страница 219: ...keep them free of rust and dirt caused by condensation over periods when the truck is not used Operate the truck with the motor at its normal temperature for at least five minutes This operating perio...

Страница 220: ...280 will freeze at 66 C 86 8 F This self discharge is due to chemical action therefore that chemical action can be accelerated by heat resulting in a more rapid self discharge The rate of discharge ca...

Страница 221: ...ydraulic cylinders through a complete oper ation cycle to coat the interior walls with oil Operate each cylinder to the stop in both directions 5 Check all fluid levels 6 Check condition of tires How...

Страница 222: ...chain to the mast or any attachment to hold the lift truck on the transport CAUTION Make sure that any straps or chains used to fasten the lift truck to the transport do not contact any tubes hoses h...

Страница 223: ...he lift truck for damage and missing compo nents 3 Follow the steps in the section How to Make Checks With the Key or Keyless Switch OFF Changes to the Overhead Guard WARNING Do not operate the lift t...

Страница 224: ...NOTES 222 r o p e r t y o f A m e r i c a n A i r l i n e s...

Страница 225: ...Spacer 2 17 10 16 2 16 1 16 7 15 8 14 6 14 3 14 2 14 8 13 5 13 9 12 5 12 4 12 11 11 8 11 11 10 3 10 1 10 4 09 1 09 12 08 r o p e r t y o f A m e r i c a n A i r l i n e s...

Страница 226: ...OPERATING MANUAL J30 40XNT K160 DO NOT REMOVE THIS MANUAL FROM THIS UNIT PART NO 1676236 2 17 r o p e r t y o f A m e r i c a n A i r l i n e s...

Отзывы:

Похожие инструкции для J30XNT