


3-11
S
ETUP
Operator Manual
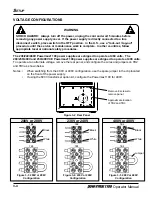
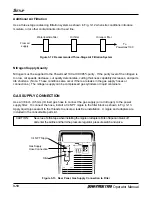
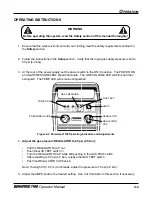
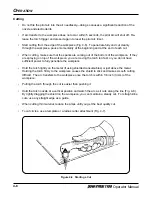
TORCH LEAD CONNECTION
To connect the torch lead to the power supply:
1. Align the connector key plug on the torch lead with the connector receptacle key slot on the
power supply and push in until the pins seat. The top of the torch connector is marked "TOP".
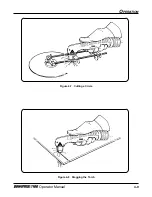
2. Before tightening, turn the connector securing ring 1/4 turn to the left to ensure that the securing
ring threads and the connector receptacle threads are aligned.
3. Turn the securing ring to the right to tighten.
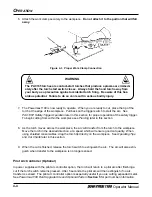
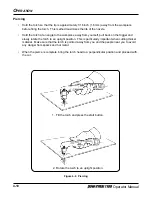
PAC135M ON/OFF Pendant Connection
To connect the on/off pendant lead to the PAC135M machine torch pigtail:
1. Align the pendant lead connector key plug with the connector receptacle key slot on the pigtail
and push in until the pins seat.
2. Turn the connector securing ring to the right to tighten.
PAC135M Torch ON/OFF Switch Connection Data
The PAC135M torch lead is supplied with a pigtail so that the on/off pendant may be used. If you want
to use a different on/off switch configuration, note that the wiring configuration to the 3-socket female
receptacle on the pigtail is as follows:
WARNING
Do not connect the cutting machine interface START signal if using the
ON/OFF pendant! (See page 3-12)
Socket A
White Wire
Socket B
Not Used
Socket C
Black Wire
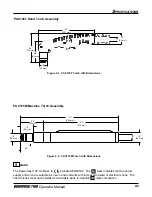
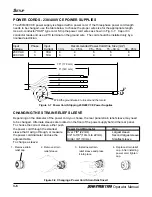
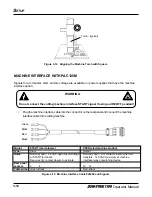
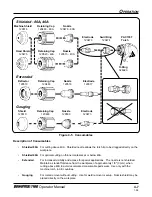
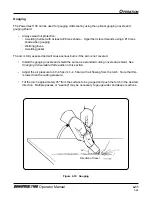
PAC135M Torch Alignment
Make sure that the machine torch is mounted at right angles to the workpiece in order to get a vertical
cut. Use a square to align the torch at 0
°
and 90
°
as shown in Fig. 3-14.


