A.
Features & Functions
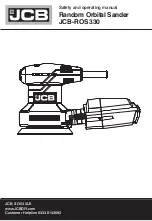
* Swivel-free finishes from its dual action pad motion.
* Built-in regulator for positive speed control.
* Orbital sander provides a pattern-less finish.
* Rotary action assures smooth and circulating sanding.
* Most suitable for sanding jobs like feather edging, metal preparation and blending
body filler and any other sanding purposes.
B.
Operating Instructions
1. Only use PAPER discs with a proper adhesive. If you need to use Velcro Face
backing pad, then a correspondent paper disc is required.
2. RPM rating for accessories should be equal or exceed the recommended speed of the
sander.
3. Fit the paper disc onto the backing pad and fit the backing pad to the thread of the
sander spindle. Make sure that the backing pad is fixed tight enough.
4. Let the sander do the work by pressing down the lever throttle to a certain degree
where you want to obtain a certain speed.
5. Do not put additional big pressure on the tool at operation.
6. Once the sander is started, immediately set it down evenly and move it slowly back
and forth on overlapping areas. When the work is finished, lift the sander off the
working area before stopping the motor.
* Notes:
-
Start sanding job with abrasive grit just coarse enough to remove the spots and
roughness. Follow with additional sanding of finer grit until desired finish is
required.
-
Swirl marks made by coarse abrasive are difficult to remove. Never go from a
coarse grit to an immediate fine grit IN ONE STEP to avoid any repeated jobs in
the whole procedure.
C.
Air Supply
(please refer to the diagram below)
1. Make sure that the air compressor being used for the air tool operation supplies the
correct output (CFM).
2. Turn the throttle in the
off
position when connecting the tool to the air supply.
3. Use normal 90psi (or ranging from 6.0 to 8.0kg.) air pressure while running the tool.
High pressure and unclean air will shorten the tool’s life due to faster wear and also
may create a hazardous situation.
4. Drain the air tank daily. Water in the air line may enter the tool and damage the tool
mechanism at the operation.
5. Clean the air inlet filter cartridge weekly. The recommended hook-up procedure can
be viewed in the diagram below.
6. Line pressure should be increased accordingly to make up for extra long air hoses
(usually over 8 meters). The minimum hose diameter should be 1/4
I.D. and the
fittings should have the same inside dimensions. But usually a 3/8
I.D. air hose is
recommended for air supply to get the best function of air tool operation.
7. Use proper hoses and fittings. We do not suggest connecting quick change couplings
directly to the tool since they may cause failure due to vibration. Instead, add a
leader hose and connect coupling between air supply and hose whip.
8. Keep hoses away from the heat, oil and sharp edges. Check hoses for wear before
individual use. Make certain that all connections are in security.
D.
Safety Instructions
1. Approved eye protector must be worn at all times. Be sure to use a dust mask since
the tool operation may creates dust which is harmful to health. If necessary, ear
protector and gloves should be used.
2. Always keep good balance of body and footing. Secure work with clamps or vice so
both hands can be free to operate the tool.
3. Be sure all clothing is tight to prevent entanglement with running tools. Remove
your jewelry and watch for safety purpose.
4. Be sure that working area is clear of foreign objects and that no people are within
immediate access of tool operation scope. The working place shall be well
ventilated.
5. Disconnect the air hose before changing or adjusting any inserted tools/accessories.
6. Be sure the tool is in
off
position before connecting it to the air hose.
7. Disconnect the tool when it is not in use. Release the on-off device in case of energy
supply failure.
8. Never carry tool by hose.
E.
Maintenance And Lubrication
1. If you are not using an air line oiler, lubricate the air motor by using an oil pot or an
oil injector through the air inlet and then run the tool. Several drops of SAE #10
6. Shut Off Valve
7. Whip Hose
8. Coupler Body And Connector
9. Drain Daily
10. 1/2” Or Larger Pipe And Fitting
1. Air Tool
2. Air Hose 3/8”(I.D.)
3. Oiler
4. Pressure Regulator
5. Filter
11. Air Dryer
12. 1” Or Larger Pipe And Fitting
13. Air Compressor
14. Auto Drain
15. Drain Daily
AIR SYSTEM LAYOUT
6
9
13
14
15
8
7
12
10
5
4
3
2
11
1


