


Assembly Instructions
11
If you need help or have damaged or missing parts, call the
Customer Helpline: 08456 400 800
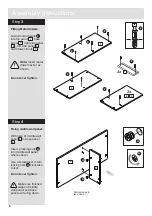
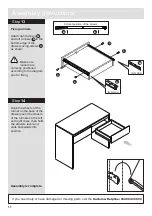
Step
13
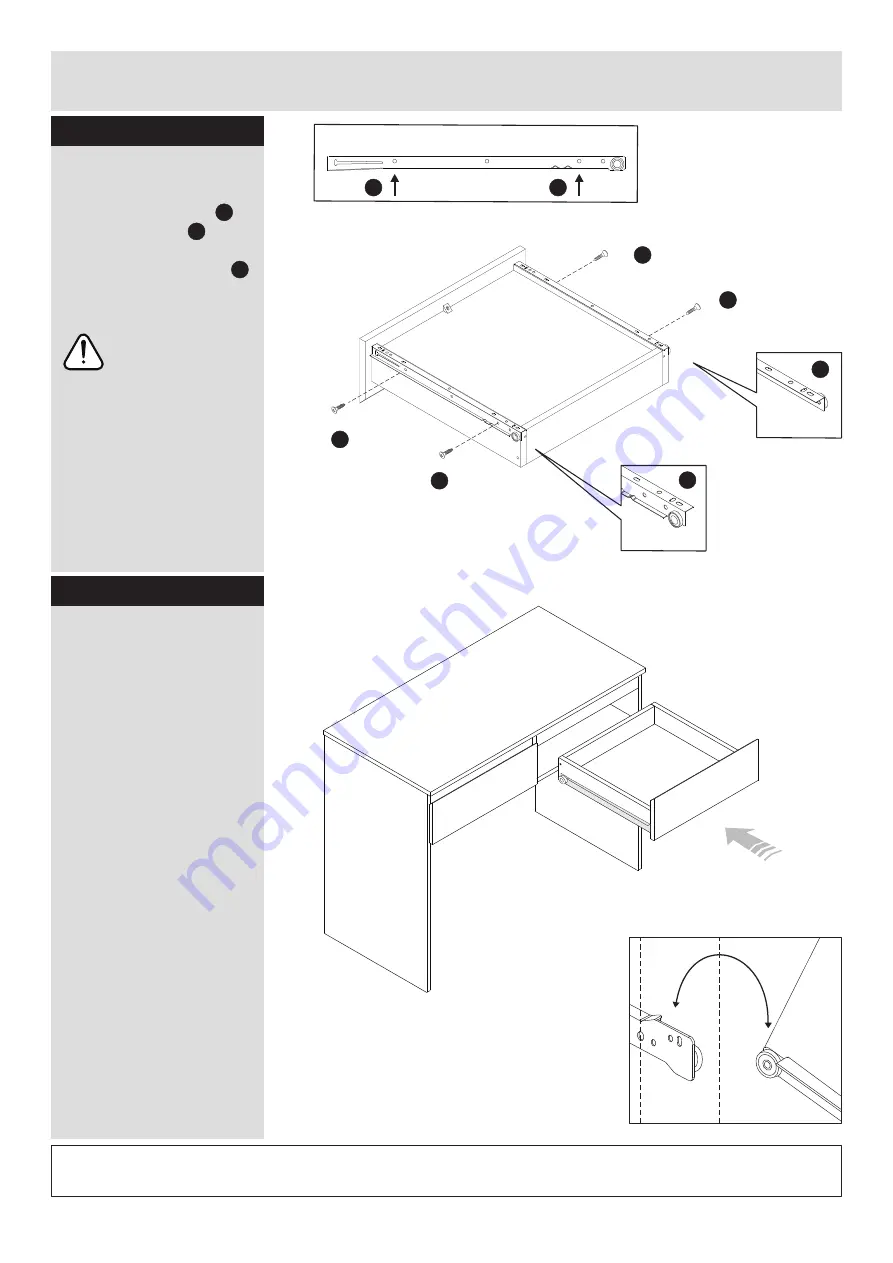
Fixing runners.
Attach right runners
and left runners
in the
bottom edge
of the
drawers using screws
,
as shown.
Make sure
runners are
correctly positioned
according to the diagram
prior to fixing.
Step
14
Hook the wheels of the
runner on the back of the
drawers over the wheels
of the runners on the left
and right sides, then hold
the drawers level and
slide backwards into
position.
Assembly is complete.
M
N
C
C
N
M
C
C
IN FLUSH
IN FLUSH
Correct position of the screws.
B
B
C


