


Hamlin
- 2 Drawers Dresser
145/8390
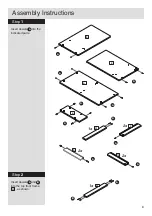
Assembly Instructions
- Please keep for future reference
Issue 1 - 28/10/13
152/5340
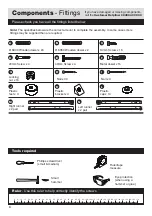
If you need help or have damaged or missing parts, call the
Customer Helpline: 08456 400 800
Important
–
Please read these instructions fully before starting assembly
Dimensions
Width - 90cm
Depth - 44,8cm
Height - 74cm
145/5726
h y g e n a


