background image

UNPACKING/ ASSEMBLY 

Note:  In  the  constant  desire  to  improve 
the  products,  the  manufacturer  states 
that  the  whole  of  this  manual  is  not 
contractual  and  reserves  the  right  to 
modify 

th 

especifications 

of 

the 

machines without notice. 


WARNING: 
Take  care  not  to  cut  the 
cables 

or 

scratch 

the 

machine’s  paintwork  when 
cutting  the  edges  of  the 
case. 


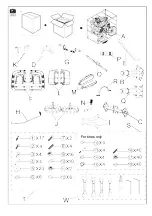
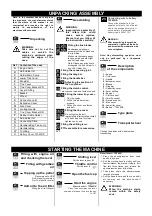
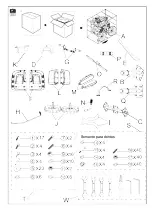
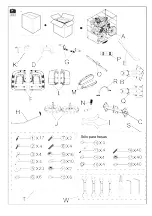
Ref.  Contents of the case 

Engine Parts 

Sub Holder 1st 

Holder Main Comp 

Lower Tidy Cover 

Drag Bar 

Tine Cover 

Tine Cover Bracket FR. 

Lever Shifting 

Blades 

Wheel 

Connection Joint 

Extionsion Cover 

Side Cover 

Locking Handle 

Tine Cover Bracket RR. 

Rubber Cable Holder 

Sub Holder 1st 

Connecting Plate 

Hardware Bag Tines only 

Hardware Bag 

Tool Bag 

Battery Cover-TF545DE


WARNING: 
Inappropriate  assembly  of 
this  rotary  tiller  could 
cause 

severe 

injuries. 

Ensure  that  you  follow  all 
the instructions carefully. 


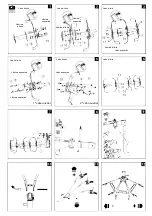
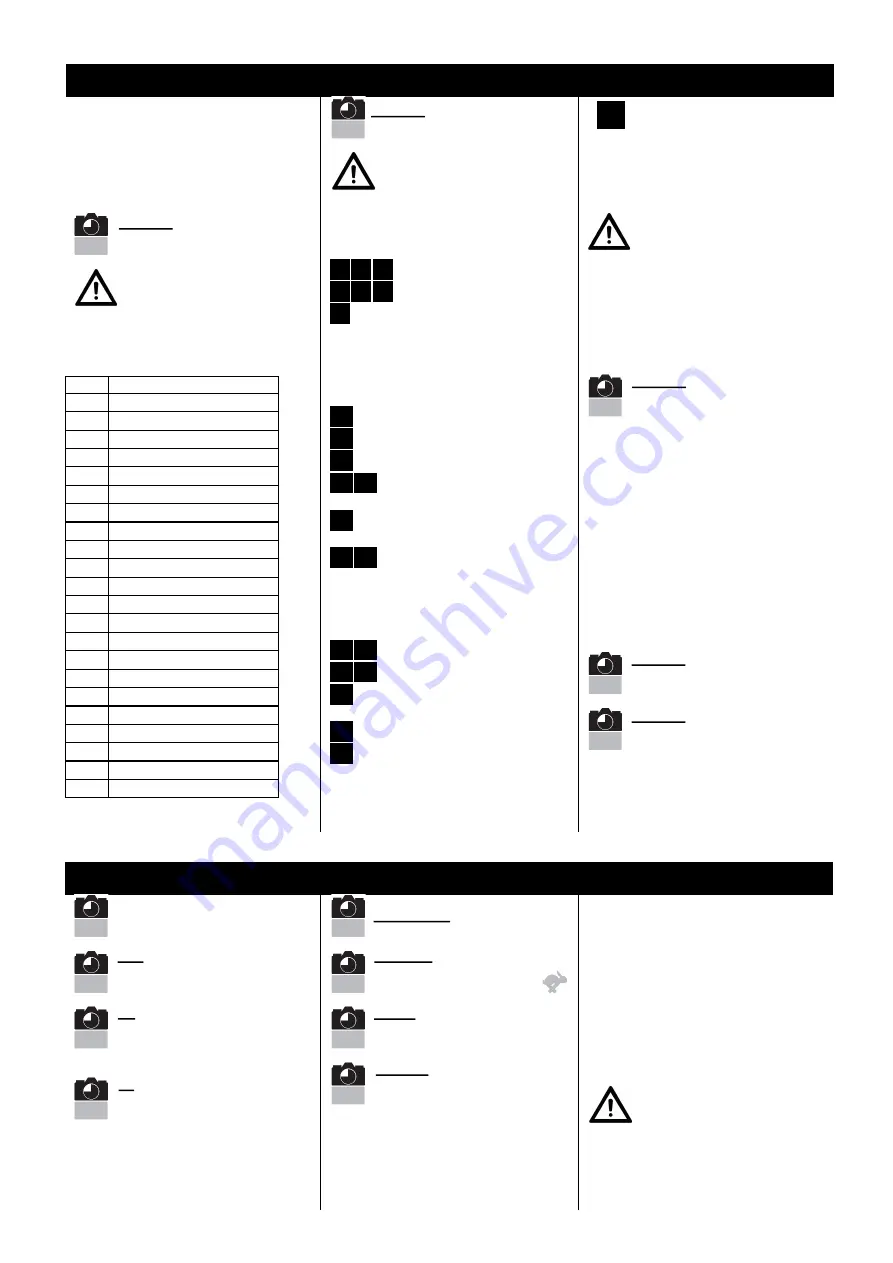
1  2  3 

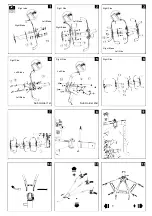
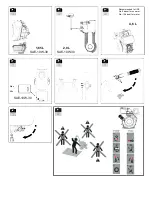
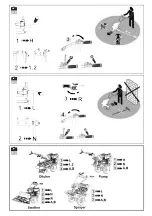
Fitting the tine blades. 

4  5  6 

Illustrations only shows 
assembly of the tin blades on 
the right side. 
Make sure that sharp edges 
face one side on both Right 
and Left side tines. 
Note: Please pay attention to 
distinguish the Sub Holder 1st 
and Sub Holder 2nd.


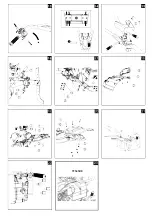
7


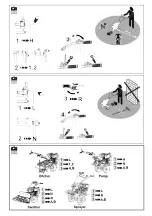
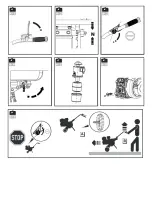
Fitting the connecting joint. 

Fitting the drag bar. 

10 

Fitting the handle bar. 

11 12 

Adjusting the position of 
the handle bar. 


13 

Fitting the clutch control. 


Turn to proper side and fasten the bolt. 

14 15 

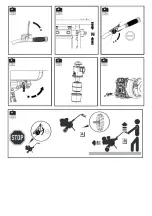
Fitting the lower tidy cover.


1. Tidy the cables, 
2. Put on the rubber holder 

properly, 

3. Put on the cover, and fasten 

with bolt.


16 17 

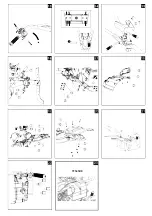
Fitting the tine cover.


18 19 

Do not tighten the bolt 
immediately after installed. Install 
all 4 bolts and nuts first, then 
tighten one by one. 

20 


21 

Fitting the shifting lever.


22 

PTO assemble for accessories.


coil


23


Connecting wire to battery -
TF545DE.


Connect the black wire to the 
negative pole (pole -) and the red 
wire to the positive pole (pole +) 
oo the battery. Recommended 
battery type is 28AH, 12V. 


WARNING: 
After assembling the machine 
completely, tighten all the bolts 
and screws with moderation:do 
not overtighten.


Note:  Any  dismantling  operation  must 
only  be  performed  by  a  Husqvarna 
workshop.


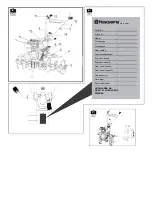
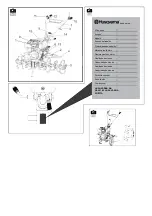
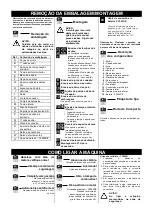
1 - 

Engine 

2 - 

Tine cover 

3 - 

Handle 

4 - 

Extension cover 

5 - 

Blades 

6 - 

Drag bar 

7 - 

Upper tidy cover 

8 - 

Lever shifting 

9 - 

Bumper 

1 - 

Clutch control 

11 - 

Throttle control 

12 - 

Reverse control 

13 - 

Side cover 

14 - 

Lower tidy cover 

15 -  

Battery – TF545DE 


Change the blades with wheels when 
transporting 


STARTING THE MACHINE 


Recoil start – TF545D 

1.  Press  the  decompression  lever  down 

and hold by hand. 

2.  Pull  the  starting  handle  slowly  until  you 

feel resistance, then return it slowly, do it 
like  this  three  times,  and  release  the 
decompression lever at last time. 

3.  Then  press  down  the  decompression 

lever and release 

4.  Pull the handle hard and fast, and pull it 

all  the  way  out.  Use  both  hands  if 
necessary 


WARNING: 
When  the  machine  starts, 
remain  within  the  safety 
zone. 


1• 1


Unpacking 

1• 2


Assembling 

1• 3


Description 

of the components 

1• 4


Type plate 

1• 3


Transport wheel 

2• 1


Filling  with  engine  oil 
and checking the level 

2• 2


Filling with gearbox 

oil 

2• 3


Topping up the petrol 

Recommend to USE  

No.0 diesel for summer, 

No.-10 diesel for winter. 

2• 4


Add oil to the air filter 

Filling the oil to Oil Level 

2• 5


Shifting lever 

Put the lever to gear 

N

.  


2• 6


Throttle control 

Put the lever to: 

2• 7


Open the fuel cap


2• 8


Start the engine 

Electric start 

– 

TF545DE  

Press the decompression lever 

down and release, then turn the key 

to ON

.


23 

Содержание TF545D

Страница 1: ... make sure you understand the instructions before using the machine Leia atentamente o manual do operador e certifique se de que tenha entendido as instruções antes de usar a máquina Lea detenidamente el manual de instrucciones y asegúrese de entender su contenido antes de utilizar la máquina English Portugese Spanish ...

Страница 2: ...For tines only ...

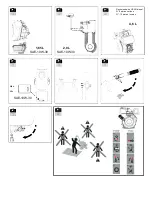
Страница 3: ...Right side Left Blade Right Side Left Blade Right Side Right Blade Right Blade Left Side Right Blade Left Blade Right Side Right Side Right Side Sub Holder 1st Sub Holder 2nd Left Side Left Blade ...

Страница 4: ...23 TF545DE ...

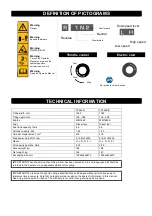
Страница 5: ...ling scope Tilling depth Gear shifting Engine displacement Engine oil quality Engine oil capacity Net weight Gear box oil quality Gear box oil capacity Nominal power Fuel octan cetan HUSQVARNA AB SE 561 82 HUSKVARNA SWEDEN Prod year ...

Страница 6: ...1 65 L SAE 10W 30 2 0 L SAE 10W 30 4 6 L SAE 10W 30 Fuel level Recommended to USE No 0 diesel for summer No 10 diesel for winter Max Min ...

Страница 7: ...H N A B L N R A B L N R A B L N R A B Mower Grass cutter Swather Pump Ditcher 20m ...

Страница 8: ......

Страница 9: ...n Do not place you hands or feet near or beneath rotating parts The engine and the exhaust system become very hot during operating Risk of burn injuries if touched If there is abnormal vibration a blockage a problem engaging or disengaging the clutch a collision with a foreign object deterioration of the engine halt cable Stop the engine immediately if the engine halt cable is severed Use the star...

Страница 10: ...ved and it is no longer used it should be returned to the dealer or to an applicable station for recycling IMPORTANT We reserve the right to change specifications and designs without prior notice so as to implement improvements Note that no legal claims are valid on the basis of information in this manual Use only genuine parts for repairs The warranty is not valid if non genuine parts are used Ne...

Страница 11: ...olts and nuts first then tighten one by one 20 21 Fitting the shifting lever 22 PTO assemble for accessories coil 23 Connecting wire to battery TF545DE Connect the black wire to the negative pole pole and the red wire to the positive pole pole oo the battery Recommended battery type is 28AH 12V WARNING After assembling the machine completely tighten all the bolts and screws with moderation do not ...

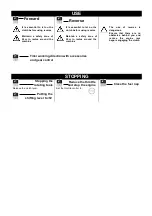
Страница 12: ... the machine The use of reverse is dangerous Ensure that there are no obstacles behind you and reduce the engine revs begore engaging the clutch STOPPING Release the clutch lever Set the throttle control to 3 1 Forward Reverse 3 2 3 3 Tiller working direction with accessories and gear control 4 1 Stopping the rotating tools 4 2 Putting the shifting lever to N 4 3 Reduce the throttle and stop the e...

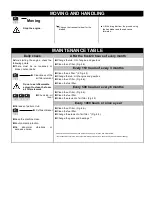
Страница 13: ...an the oil filter Fig 4 6 Every 150 hours of every 3 months Clean the air filter 2 Fig 4 5 Change the lub oil of engine and gearbox Clean the oil filter Fig 4 6 Clean the fuel filter Every 500 hours or every 6 months Clean the oil filter Fig 4 6 Clean the fuel filter Clean the element of air filter Fig 4 5 Every 1000 hours or once a year Clean the oil filter Fig 4 6 Clean the fuel filter Change th...

Страница 14: ... Somente para dentes ...

Страница 15: ...uerda Lado direito Lâmina esquerda Lado direito Lâmina direita Lâmina direita Lado esquerdo Lâmina direita Lâmina esquerda Lado direito Lado direito Lado direito 1º cabo auxiliar 2º cabo auxiliar Lado esquerdo Lâmina esquerda ...

Страница 16: ... 23 TF545DE ...

Страница 17: ...avanca de câmbio Deslocamento do motor Qualidade de óleo do motor Capacidade de óleo do motor Peso líquido Qualidade de óleo da caixa de câmbio Capacidade de óleo da caixa de câmbio Potência nominal Combustível octano cetano HUSQVARNA AB SE 561 82 HUSKVARNA SUÉCIA Ano de prod ...

Страница 18: ...1 65 L SAE 10W 30 2 0 L SAE 10W 30 4 6 L SAE 10W 30 Nível de combustível Recomenda se USAR diesel N 0 para o verão e N 10 para o inverno Máx Mín ...

Страница 19: ... L 1 2 A B H N A B L N R A B L N R A B L N R A B Cortador Cortador de grama Motocultivador Bomba Valetadeira 20m ...

Страница 20: ......

Страница 21: ... ficam muito quentes durante a operação Há risco de lesões por queimadura em caso de contato Em caso de vibração anormal obstrução problema ao engatar ou desengatar a embreagem colisão com corpo estranho deterioração do cabo de parada do motor Desligue o motor imediatamente caso o cabo de parada do motor esteja danificado use o controle de ignição para desligar o motor conforme descrito no parágra...

Страница 22: ...to e este não for mais utilizado devolva o ao distribuidor ou leve o a uma usina de reciclagem IMPORTANTE Reservamo nos o direito de alterar as especificações e o projeto sem prévia notificação de modo a implementar melhorias Nenhuma reivindicação judicial terá validade com base em informações fornecidas neste manual Em caso de reparos use apenas peças originais A garantia não terá validade se for...

Страница 23: ... depois de instalado Primeiro instale os quatro parafusos e porcas depois aperte os um por um 20 21 Encaixe da alavanca de câmbio 22 Montagem da PTO para acessórios 23 Cable de conexión a la batería TF545DE Conecte el cable negro al polo negativo polo y el cable rojo al polo positivo polo de la batería El tipo de batería recomendado es 28AH 12V Observação Qualquer operação de desmonte somente deve...

Страница 24: ...áquina O uso da marcha à ré é perigoso Certifique se da ausência de obstáculos atrás do operador e reduza a rotação do motor antes de engatar a embreagem PARADA Solte a alavanca da embreagem Coloque o acelerador em 3 1 Avançar Marcha à ré 3 2 3 3 Sentido de operação do motocultivador com acessórios e controle de engrenagem 4 1 Pare as peças rotativas 4 2 Colocar a alavanca de câmbio em N 4 3 Feche...

Страница 25: ...o de óleo Fig 4 6 A cada 150 horas ou a cada 3 meses Limpe o filtro de ar 2 Fig 4 5 Troque o óleo lubrificante do motor e da caixa de câmbio Limpe o filtro de óleo Fig 4 6 Limpe o filtro de combustível A cada 500 horas ou a cada 6 meses Limpe o filtro de óleo Fig 4 6 Limpe o filtro de combustível Limpe o elemento do filtro de ar Fig 4 5 A cada 1000 horas ou uma vez por ano Limpe o filtro de óleo F...

Страница 26: ... Sólo para fresas ...

Страница 27: ...erecho Cuchilla izquierda Lado derecho Cuchilla derecha Cuchilla derecha Lado izquierdo Cuchilla derecha Cuchilla izquierda Lado derecho Lado derecho Lado derecho Soporte secundario 1º Soporte secundario 2º Lado izquierdo Cuchilla izquierda ...

Страница 28: ... 23 TF545DE ...

Страница 29: ...o de marchas Cilindrada del motor Calidad del aceite del motor Capacidad de aceite del motor Peso neto Calidad del aceite de la caja de engranajes Capacidad de aceite de la caja de engranajes Potencia nominal Combustible octanos cetanos HUSQVARNA AB SE 561 82 HUSKVARNA SUECIA Año prod ...

Страница 30: ...1 65 L SAE 10W 30 2 0 l SAE 10W 30 4 6 L SAE 10W 30 Nivel de combustible Recomendamos que UTILICE diésel n º 0 para el verano y diésel n º 10 para el invierno Máx Mín ...

Страница 31: ... L 1 2 A B H N A B L N R A B L N R A B L N R A B Cortacésped Desbrozadora Segadora Bomba Zanjadora 20 m ...

Страница 32: ......

Страница 33: ...calentarse mucho durante el funcionamiento Riesgo de lesiones por quemaduras si se tocan Ante lo siguiente Vibración anómala Bloqueo Problemas para engranar o desengranar el embrague Colisión con un objeto extraño Deterioro del cable de parada del motor Pare el motor inmediatamente si el cable de parada del motor está roto utilice el control del mecanismo de arranque tal como se describe en el apa...

Страница 34: ...se al distribuidor o a unas instalaciones de reciclaje adecuadas IMPORTANTE Nos reservamos el derecho a modificar las especificaciones y diseños sin previo aviso para implementar mejoras Tenga en cuenta que no se pueden realizar reclamaciones legales válidas en base a la información de este manual Utilice solo piezas originales para las reparaciones La garantía no es válida si no se utilizan pieza...

Страница 35: ...e después de la instalación Instale los 4 pernos y tuercas primero y luego apriételos uno por uno 18 19 20 21 Montaje de la palanca de cambio 22 Montaje de toma de fuerza para accesorios Conectar fio à bateria TF545DE Ligue cabo preto ao pólo negativo e o cabo vermelho ao pólo positivo da bacteria Tipo de bateria recomendado é 28AH 12V ADVERTENCIA Después de montar la máquina por completo apriete ...

Страница 36: ...dor de la máquina El uso de la marcha atrás es peligroso Asegúrese de que no hay obstáculos detrás de usted y disminuya el régimen del motor antes de acoplar el embrague PARADA Suelte la palanca de embrague Coloque el acelerador en 3 1 Adelante Marcha atrás 3 2 3 3 Dirección de funcionamiento de la motoazada con accesorios y control de cambios 4 1 Parada de los implementos giratorios 4 2 Ponga la ...

Страница 37: ... Cada 150 horas de cada 3 meses Limpie el filtro de aire 2 en la figura 4 5 Cambie el aceite lubricante del motor y de la caja de cambios Limpie el filtro de aceite Fig 4 6 Limpie el filtro de combustible Cada 500 horas o cada 6 meses Limpie el filtro de aceite Fig 4 6 Limpie el filtro de combustible Limpie el elemento del filtro de aire Fig 4 5 Cada 1000 horas o una vez al año Limpie el filtro de...

Страница 38: ...www husqvarna com Original instructions Instruções originais Instrucciones originales 1158791 38 rev 2 2018 12 10 ...

Отзывы: