background image

2. Shake the container and make sure that the fuel is

fully mixed. Use a fuel container with an anti-spill

valve.

3. Fill the fuel tank.
4. Tighten the fuel tank cap carefully.
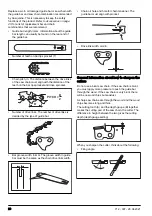
5. Move the product 3 m (10 ft) or more away from the

refueling area and fuel source before starting.

CAUTION: 

Contamination in the tanks

causes malfunction. Clean the fuel tank and

chain oil tank regularly and replace the fuel

filter one time a year or more.

To do a run-in

• During the first 10 hours of operation, do not apply

full throttle without load for extended periods.

To use the correct chain oil

WARNING: 

Do not use waste oil, which

can cause injury to you and the

environment. Waste oil also causes damage

to the oil pump, the guide bar and the saw

chain.

WARNING: 

The saw chain can break if

the lubrication of the cutting equipment is

not sufficient. Risk of serious injury or death

to the operator.

WARNING: 

This product has a function

that lets the fuel run out before the chain oil.

Use the correct chain oil for this safety

function to operate correctly. Speak to your

servicing dealer when you select your chain

oil.

Note: 

This product has an automatic chain lubrication

system. You can also adjust the oil flow. Refer to 

To

adjust chain lubrication on page 23

.

• Use Husqvarna chain oil for maximum saw chain life

and to minimise environmental damage. If

Husqvarna chain oil is not available, we recommend

you to use a standard chain oil.

• Use a chain oil with good adherence to the saw

chain.

• Use a chain oil with correct viscosity range that

agrees with the air temperature.

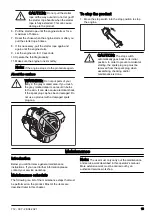
CAUTION: 

If the oil is too thin, it

runs out before the fuel. In temperatures

below 0°C/32°F some chain oils become

too thick, which can cause damage to

the oil pump components.

• Use the recommended cutting equipment. Refer to 

Accessories on page 25

.

To use the product

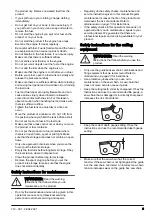
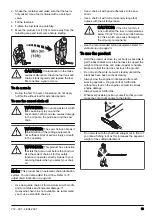
• Hold the product as close to your body as possible to

get the best balance. Use the harness to support the

weight of the machine and make it easier to handle.

• Make sure that the tip does not touch the ground.
• Do not rush the work, but work steadily until all the

branches have been cut back cleanly.

• Always slow the engine to idle speed after each

working operation. Long periods at full throttle

without any load on the engine can lead to serious

engine damage.

• Always work at full throttle.
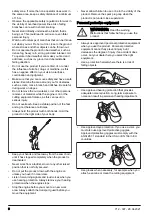
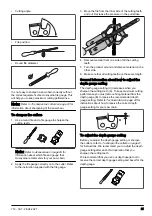
• Whenever possible position yourself so that you can

make the cut at right angles to the branch.

90°

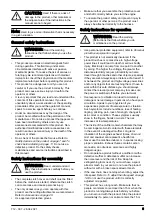
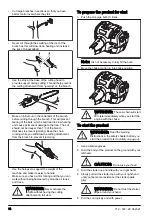
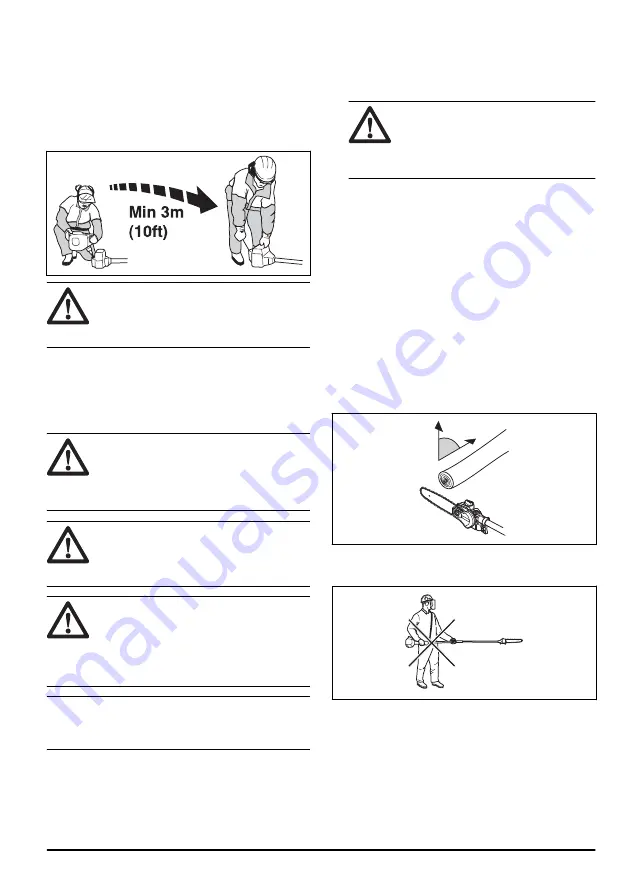
• Do not work with the shaft held straight out in front of

you (like a fishing rod) as this increases the apparent

weight of the cutting attachment.

712 - 007 - 28.04.2021

13

Содержание 525PT5S

Страница 1: ...525PT5S EN Operator s manual 2 27 DE Bedienungsanweisung 28 55 FR Manuel d utilisation 56 83 NL Gebruiksaanwijzing 84 111 SL Navodila za uporabo 112 137 ...

Страница 2: ...ons can set limit to the operation of the product Only use the product with accessories that are approved by the manufacturer Refer to Accessories on page 25 Product overview 14 15 13 12 11 10 17 18 22 23 9 5 7 26 25 24 27 28 29 6 8 3 2 1 19 21 20 16 4 1 Saw chain 2 Guide bar 3 Bar nut 4 Protective guard for saw chain 5 Locking knob 6 Chain lubrication adjustment screw 7 Chain oil tank 8 Chain ten...

Страница 3: ...f the oil flow Direction of rotation saw chain Primer bulb Choke The product agrees with the applicable EC directives yyyywwxxxx The rating plate shows the serial number yyyy is the production year ww is the production week and xxxx is the sequential number This product is not electrically insulated If the product touches or comes close to high volt age power lines it could lead to death or seriou...

Страница 4: ...ontrol systems ECM Engine control module Autotune OC Oxidizing Catalyst EM Engine modification TWC Three way catalyst Evaporative emission control systems C Coextruded Multilayer P Treated HDPE or PE N Nylon S Sealed Product liability As referred to in the product liability laws we are not liable for damages that our product causes if the product is incorrectly repaired the product is repaired wit...

Страница 5: ...product must always be attached correctly to the harness Safety instructions for operation WARNING Read the warning instructions that follow before you do maintenance on the product Use personal protective equipment refer to Personal protective equipment on page 6 This product is not electrically insulated If the product touches or comes close to high voltage power lines it could lead to death or ...

Страница 6: ... product on the right side of your body Keep your hands and feet away from the saw chain until it has stopped completely when the product is deactivated Never work from a ladder stool or any other raised position that is not fully secured Do not put the product down with the engine on unless you have it in clear view Listen for warning signals and loud voices when you use hearing protection Always...

Страница 7: ... Husqvarna servicing dealer To do a check of the throttle trigger lockout The throttle trigger lockout prevents accidental operation of the throttle control 1 Push the throttle trigger lockout A and make sure that the throttle control is released B When you release the handle the throttle control and the throttle trigger lockout move back to their initial positions A B 2 Release the throttle trigg...

Страница 8: ...e engine 2 Do a visual check for deformation and damage for example cracks 3 Make sure you attach the elements of the vibration damping system correctly To do a check of the muffler The muffler keeps noise levels to a minimum and directs exhaust fumes away from the operator In areas with a hot dry weather there is a high risk of fire Obey local regulations and maintenance instructions Do a visual ...

Страница 9: ...the fuel or put the fuel into storage Empty the fuel tank before long term storage Obey the local law on where to dispose fuel Clean the product before long term storage Remove the spark plug cap before you put the product into storage to make sure that the engine does not start accidentally Safety instructions for maintenance WARNING Read the warning instructions that follow before you do mainten...

Страница 10: ...2 Fit the cutting head on the shaft so that the screw A is aligned with the hole in the shaft as shown 3 Finger tighten the screw A Make sure that screw A fits into the hole in the shaft 4 Tighten screw A 5 Tighten screw B To assemble the bar and chain 1 Unscrew the bar nut and remove the protective cover 2 Fit the bar over the bar bolt Place the bar in its rearmost position Place the chain over t...

Страница 11: ...he knob 2 Pull out the shaft to the desired length 3 Tighten the knob To adjust the harness Always use the harness when you operate the product The harness gives maximum control during operation of the product The harness decreases the risk of tiredness in your arms and back 1 Put on the harness 2 Attach the product to the harness support hook 3 Adjust the length of the harness until the support h...

Страница 12: ...ge to the product Always use new unleaded gasoline with a minimum octane number of 90 RON 87 AKI and with less than 10 ethanol concentration E10 Use gasoline with a higher octane number if you frequently use the product at continuously high engine speed Always use a good quality unleaded gasoline oil mixture Two stroke oil For best results and performance use Husqvarna two stroke oil If Husqvarna ...

Страница 13: ... flow Refer to To adjust chain lubrication on page 23 Use Husqvarna chain oil for maximum saw chain life and to minimise environmental damage If Husqvarna chain oil is not available we recommend you to use a standard chain oil Use a chain oil with good adherence to the saw chain Use a chain oil with correct viscosity range that agrees with the air temperature CAUTION If the oil is too thin it runs...

Страница 14: ...it easier to handle Make sure you have a firm footing and that you can work without being hampered by branches stones and trees WARNING Never activate the throttle without having the cutting attachment in full view To prepare the product for start 1 Push the air purge bulb 10 times Note It is not necessary to fully fill the bulb 2 Move the choke control up into choke position WARNING The saw chain...

Страница 15: ...lso cause electrical shock if the spark plug cap has been damaged Do not use a product with a damaged spark plug cap To stop the product 1 Move the stop switch into the stop position to stop the engine CAUTION The stop switch automatically goes back to its initial position In order to prevent accidental starting the spark plug cap must be removed from the spark plug when assembling checking and or...

Страница 16: ...t distance refer to Technical data on page 24 or replace the spark plug Make sure that the spark plug is fitted with a suppres sor X Clean the outside of the carburetor and the space around it X File off any burrs from the edges of the bar X Clean or replace the spark arrestor screen on the muffler X Clean the fuel tank X Do a check of the fuel filter for contamination and the fuel hose for cracks...

Страница 17: ...n Think about of the risk of fire 1 Stop the product and let it cool down 2 Remove the cover to the muffler 3 Remove the screw holding the spark arrestor mesh 4 Clean the spark arrestor mesh if it is blocked or replace it if it is damaged CAUTION The spark arrestor mesh must be replaced if it is damaged Do not use a product if the spark arrestor mesh on the muffler is missing or defective CAUTION ...

Страница 18: ...Loss of engine power Increased wear to engine parts Too much fuel consumption To clean the air filter CAUTION An air filter that is damaged very dirty or soaked with fuel must always be replaced Clean the air filter from dirt and dust regularly This prevents carburetor malfunctions starting problems loss of engine power wear to engine parts and more fuel consumption than usual If you use an air fi...

Страница 19: ...o a check of the guide bar 1 Make sure that the oil channel is not blocked Clean if it is necessary 2 Examine if there are burrs on the edges of the guide bar Remove the burrs using a file 3 Clean the groove in the guide bar 4 Examine the groove in the guide bar for wear Replace the guide bar if it is necessary 5 Examine if the guide bar tip is rough or very worn 6 Make sure that the bar tip sproc...

Страница 20: ...s is decided by the type of guide bar Bar groove width in mm The groove width in guide bar must be the same as the chain drive links width Chain oil hole and hole for chain tensioner The guide bar must align with product Drive link width mm in General information about how to sharpen the cutters Do not use a blunt saw chain If the saw chain is blunt you must apply more pressure to push the guide b...

Страница 21: ...of all the cutting teeth 5 Turn the product around and remove material on the other side 6 Make sure that all cutting teeth are the same length General information about how to adjust the depth gauge setting The depth gauge setting C decreases when you sharpen the cutting tooth A To keep maximum cutting performance you must remove filing material from the depth gauge B to receive the recommended d...

Страница 22: ...tch cover chain brake Use a wrench 2 Tighten the bar nuts by hand as tightly as you can 3 Lift the front of the guide bar and turn the chain tensioning screw Use a wrench 4 Tighten the saw chain until it is tight against the guide bar but still can move easily 5 Tighten the bar nuts using the wrench and lift the front of the guide bar at the same time 6 Make sure you can pull the saw chain around ...

Страница 23: ... fuel type Drain the fuel tank and fill with cor rect fuel Spark plug and cylinder The spark plug is dirty or wet Make sure that the spark plug is dry and clean The spark plug electrode gap is in correct Clean the spark plug Make sure that the electrode gap is correct refer to Technical data on page 24 Make sure that the spark plug has a su pressor The spark plug is loose Tighten the spark plug En...

Страница 24: ...product for long term storage 1 Stop the product and let it become cool before you disassemble it 2 Disassemble and clean the saw chain and the groove in the guide bar CAUTION If the saw chain and guide bar are not cleaned they can become rigid or blocked 3 Attach the transportation guard 4 Clean the product Refer to Maintenance on page 15 for instructions 5 Do a complete servicing of the product ...

Страница 25: ... chain Length in cm Pitch in Gauge in mm Type Length drive links no 10 25 1 4 0 050 1 3 Husqvarna H00 58 12 31 64 Filing equipment and filing angles Using Husqvarna file gauge will give you the correct filing angles We recommend you to always use a Husqvarna file gauge to restore the sharpness of the saw chain The part numbers are given in the table below If you do not know which saw chain you hav...

Страница 26: ...H00 5 32 in 4 0 mm 85 30 0 025 in 0 65 mm 580 68 74 01 26 712 007 28 04 2021 ...

Страница 27: ...following standards have been applied EN ISO 12100 2010 EN ISO 11680 1 2011 ISO 14982 2009 CISPR 12 2009 EN 50581 2012 0404 RISE SMP Svensk Maskinprovning AB Box 7035 SE 750 07 Uppsala Sweden has carried out EC type examination in accordance with the machinery directive s 2006 42 EC article 12 point 3b The certificate for EC type examination in accordance with annex IV has the number 0404 15 2439 ...

Страница 28: ... nationale Vorschriften eingeschränkt werden Verwenden Sie das Gerät nur mit Zubehörteilen die vom Hersteller genehmigt sind Siehe Zubehör auf Seite 53 Geräteübersicht 14 15 13 12 11 10 17 18 22 23 9 5 7 26 25 24 27 28 29 6 8 3 2 1 19 21 20 16 4 1 Sägekette 2 Führungsschiene 3 Mutter der Führungsschiene 4 Schutzvorrichtung für Sägekette 5 Feststellknopf 6 Stellschraube Kettenschmierung 7 Kettenölt...

Страница 29: ...s Bedieners oder umstehender Personen lesen und befolgen Sie alle Sicherheitshinweise in der Bedienungsanleitung Lesen Sie die Bedienungsanleitung sorgfältig durch und machen Sie sich vor der Benutzung mit dem Inhalt vertraut Tragen Sie einen Schutzhelm dort wo Gegenstände auf Sie fallen können Tragen Sie einen zugelassenen Gehörschutz Tragen Sie einen zugelassenen Augenschutz Tragen Sie zugelasse...

Страница 30: ... Hinweis Weitere Symbole Aufkleber auf dem Gerät beziehen sich auf die Zertifizierungsanforderungen für andere kommerzielle Bereiche Emissionen nach Euro V WARNUNG Bei jeglichen Manipulationen des Motors erlischt die EU Typgenehmigung für dieses Produkt EPA III Die so genannte Emissions Compliance Period auf die auf dem amerikanischen Emissions Compliance Label hingewiesen wird umfasst die Anzahl ...

Страница 31: ...uationen die zu schweren oder tödlichen Verletzungen führen können zu reduzieren sollten Personen mit einem medizinischen Implantat vor der Nutzung dieses Geräts ihren Arzt und den Hersteller des Implantats konsultieren Dieses Gerät ist ein sehr gefährliches Werkzeug wenn Sie nicht aufpassen oder das Gerät unsachgemäß verwenden Dieses Gerät kann schwere Verletzungen des Bedieners oder anderer Pers...

Страница 32: ...reichender Belüftung Der Motor stößt Kohlenmonoxid aus Kohlenmonoxid ist ein geruchloses giftiges und sehr gefährliches Gas Betreiben Sie das Gerät niemals ohne oder mit defektem Schalldämpfer Ein defekter Schalldämpfer kann den Geräuschpegel und die Brandgefahr erhöhen Halten Sie einen Feuerlöscher griffbereit Verwenden Sie ein Funkenfängernetz wenn es in Ihrem Bereich notwendig ist Verwenden Sie...

Страница 33: ...Tragen persönlicher Schutzausrüstung können Verletzungen nicht vollständig ausgeschlossen werden aber im Ernstfall kann so die Verletzungsschwere reduziert werden Lassen Sie sich bei der Auswahl der richtigen Ausrüstung von Ihrem Händler beraten Tragen Sie einen Schutzhelm in Bereichen in denen Gefahr durch herabfallende Gegenstände besteht Tragen Sie einen Gehörschutz mit ausreichender Dämmwirkun...

Страница 34: ...in ihre Ausgangsposition zurückgestellt A B 2 Lösen Sie die Gashebelsperre und stellen Sie sicher dass der Gashebel in der Leerlaufstellung verriegelt ist 3 Drücken Sie die Gashebelsperre und kontrollieren Sie ob sie beim Loslassen in die Ausgangsstellung zurückkehrt 4 Prüfen Sie ob sich der Gashebel und die Gashebelsperre frei bewegen lassen und ob die Rückholfedern korrekt funktionieren 5 Starte...

Страница 35: ...Lesen Sie die folgenden Warnhinweise bevor Sie das Gerät benutzen Mischen Sie den Kraftstoff weder im Innenbereich noch in der Nähe einer Wärmequelle Starten Sie das Gerät nicht wenn sich Kraftstoff oder Öl darauf befindet Entfernen Sie den unerwünschten Kraftstoff bzw das Öl und lassen Sie das Gerät trocknen Entfernen Sie unerwünschten Kraftstoff aus dem Gerät Wechseln Sie sofort die Kleidung wen...

Страница 36: ...g WARNUNG Lesen Sie die folgenden Warnhinweise bevor Sie das Gerät warten Sie dürfen nur die Wartungs und Servicearbeiten ausführen die in dieser Bedienungsanleitung beschrieben sind Lassen Sie professionelles Wartungspersonal alle anderen Wartungsarbeiten und Reparaturen durchführen Die Kontroll Wartungs und Serviceanweisungen in dieser Bedienungsanweisung sind regelmäßig durchzuführen Durch eine...

Страница 37: ...dass die Antriebswelle am Führungsrohr in die Aussparung im Schneidkopf eingepasst wird B A 1 Lockern Sie die Schraube auf dem Schneidkopf A 2 Setzen Sie den Schneidkopf so auf die Welle dass die Schraube A wie abgebildet an der Bohrung in der Welle ausgerichtet ist 3 Ziehen Sie die Schraube A mit den Fingern fest Stellen Sie sicher dass Schraube A in das Loch in der Welle passt 4 Ziehen Sie Schra...

Страница 38: ...und dabei gleichzeitig die Schienenmuttern mit dem Kombischlüssel festschrauben 7 An einer neuen Kette muss die Kettenspannung oft kontrolliert werden bis die Kette eingefahren ist Kontrollieren Sie die Kettenspannung regelmäßig Mit einer richtig gespannten Kette wird eine gute Schnittleistung und eine lange Lebensdauer erzielt So passen Sie die Länge der Welle an 1 Den Drehknopf lockern 2 Ziehen ...

Страница 39: ...h zu herkömmlichem Kraftstoff enthält dieser Kraftstoff weniger gesundheitsschädliche Substanzen wodurch der Ausstoß schädlicher Abgase verringert wird Die Menge von Rückständen nach der Verbrennung ist bei diesem Kraftstoff niedriger Dadurch bleiben die Bauteile des Motors sauberer So mischen Sie Kraftstoff vor Benzin ACHTUNG Verwenden Sie kein Benzin mit einer geringeren Oktanzahl als 90 RON 87 ...

Страница 40: ...triebsstunden nicht über einen längeren Zeitraum Vollgas ohne Last So verwenden Sie das richtige Kettenöl WARNUNG Verwenden Sie kein Altöl das zu Verletzungen und Umweltschäden führen kann Altöl beschädigt auch die Ölpumpe Führungsschiene und Sägekette WARNUNG Die Sägekette kann reißen wenn die Schmierung der Schneidausrüstung nicht ausreichend ist Gefahr von schweren oder tödlichen Verletzungen d...

Страница 41: ...Schneiden Sie niemals in die Verdickung am Ursprung des Astes da dies die Heilung verlangsamen und das Risiko von Pilzbefall erhöhen kann Verwenden Sie den Anschlag an der Unterseite des Schneidkopfes um während des Schneidens Halt zu gewährleisten Dadurch wird verhindert dass die Schneidausrüstung auf den Ast springt Machen Sie einen Anschnitt an der Unterseite des Astes bevor Sie in den Ast schn...

Страница 42: ...das Startseil nicht um Ihre Hand 5 Ziehen Sie schnell und kraftvoll am Startseil ACHTUNG Ziehen Sie das Startseil nicht ganz heraus und lassen Sie den Startgriff nicht los wenn er ganz herausgezogen ist Dadurch kann das Gerät beschädigt werden 6 Ziehen Sie maximal 5 Mal am Startseil bis der Motor anspringt 7 Setzen Sie den Choke zurück wenn der Motor angesprungen ist oder Sie 5 Mal am Startseil ge...

Страница 43: ...erstellen dass die Gashebelsperre und der Gashebel einwandfrei funktio nieren X Prüfen ob der Stoppschalter ordnungsgemäß funktioniert X Sicherstellen dass die Sägekette im Leerlauf nicht rotiert X Den Luftfilter reinigen Bei Bedarf ersetzen X Die Sägekette auf sichtbare Risse in Nieten und Gliedern überprüfen Kontrollie ren ob die Kette steif ist oder Nieten und Glieder außergewöhnlichen Verschle...

Страница 44: ...hörigen Einstellschraube T ein die mit der T Markierung versehen ist Drehen Sie die Einstellschraube im Uhrzeigersinn bis die Sägekette sich zu drehen beginnt 4 Drehen Sie die Leerlaufstellschraube gegen den Uhrzeigersinn bis die Sägekette stehen bleibt Die Leerlaufdrehzahl ist richtig eingestellt wenn der Motor in allen Stellungen gleichmäßig läuft Die Leerlaufdrehzahl muss niedriger sein als die...

Страница 45: ...t aus folgenden Teilen 1 Lufteinlass in der Startvorrichtung 2 Gebläseflügel des Schwungrads 3 Kühlrippen des Zylinders 4 Zylinderdeckel 5 Schalldämpferabdeckung 6 Auspuffstütze 1 6 3 4 5 2 So überprüfen Sie die Zündkerze ACHTUNG Verwenden Sie stets den vom Hersteller empfohlenen Zündkerzentyp siehe Technische Angaben auf Seite 52 Die Verwendung eines falschen Zündkerzentyps kann zu Schäden am Ger...

Страница 46: ...schädigten Luftfilter unbedingt aus 5 Reinigen Sie die Innenseite des Luftfilterdeckels Verwenden Sie dazu Druckluft oder eine Bürste 6 Prüfen Sie die Gummidichtung am Luftfilter Tauschen Sie den Luftfilter aus wenn die Gummidichtung beschädigt ist 7 Achten Sie darauf dass der Luftfilter trocken ist bevor Sie ihn wieder einbauen So prüfen Sie das Kettenantriebsrad 1 Regelmäßig den Verschleiß des K...

Страница 47: ...handschuhe wenn Sie an der Sägekette eine Wartung durchführen oder sie verwenden Eine Sägekette die sich nicht bewegt kann auch zu Verletzungen führen Tauschen Sie abgenutzte oder beschädigte Führungsschienen und Sägeketten mit den von Husqvarna empfohlenen Kombinationen von Führungsschienen und Sägeketten aus Dies ist notwendig damit die Sicherheitsfunktionen des Geräts ordnungsgemäß arbeiten Unt...

Страница 48: ...ene durch das Holz zu drücken Wenn die Sägekette sehr stumpf ist gibt es keine Holzspäne sondern Sägemehl Eine scharfe Sägekette frisst sich durch das Holz und die Holzspäne werden lang und dick Der Schneidezahn A und die Tiefenlehre B sind zusammen das sägende Element der Sägekette Der Höhenunterschied zwischen den beiden sorgt für die Schnitttiefe Tiefenbegrenzerabstand A B Wenn Sie den Zahn sch...

Страница 49: ... den empfohlenen Tiefenbegrenzerabstand einzuhalten Siehe Technische Angaben auf Seite 52 für weitere Informationen zum korrekten Tiefenbegrenzerabstand für Ihre Sägekette A B C So justieren Sie die Tiefenbegrenzereinstellung Bevor Sie den Tiefenbegrenzerabstand einstellen oder die Schneidezähne schärfen lesen Sie die Anweisungen unter So schärfen Sie die Schneidezähne auf Seite 49 Wir empfehlen d...

Страница 50: ...an 6 Stellen Sie sicher dass sich die Sägekette leicht von Hand drehen lässt und nicht an der Führungsschiene herabhängt So füllen Sie Kettenöl ein 1 Öffnen Sie die Ölkappe an der Oberseite des Schienenkopfs 2 Füllen Sie Husqvarna Kettenöl ein 3 Bringen Sie die Kappe wieder an So überprüfen Sie die Kettenschmierung 1 Beim Tanken ist immer die Sägekettenschmierung zu kontrollieren Die Führungsschie...

Страница 51: ...raftstoffsorte Wechseln Sie den Kraftstoff aus Zündkerze und Zylinder Die Zündkerze ist verschmutzt oder nass Stellen Sie sicher dass die Zündker ze sauber und trocken ist Zündkerze mit falschem Elektroden abstand Reinigen Sie die Zündkerze Stellen Sie sicher dass der Elektrodenab stand korrekt ist siehe Technische Angaben auf Seite 52 Stellen Sie sicher dass die Zündkerze eine sog Funkentstörung ...

Страница 52: ...nen Transportschutz um Verletzungen oder Schäden am Gerät zu vermeiden Eine Sägekette die sich nicht bewegt kann auch zu schweren Verletzungen führen Entfernen Sie die Zündkappe von der Zündkerze Befestigen Sie das Gerät während des Transports sicher So bereiten Sie das Gerät zur Langzeitlagerung vor 1 Schalten Sie das Gerät aus und lassen Sie es abkühlen bevor Sie es auseinandernehmen 2 Zerlegen ...

Страница 53: ... Welle vorderer hinterer Handgriff 4 1 6 7 Zubehör Führungsschienen Sägekettenkombinationen Empfohlene Führungsschienen Sägekettenkombination Hinweis Diese Führungsschiene weicht vom Husqvarna Standard ab und muss vom Typ A318 sein um zum Gerät zu passen Führungsschiene Sägekette Länge Zoll cm Neigung Zoll Anzeige Zoll mm Typ Länge Treibglied Nr 10 25 1 4 0 050 1 3 Husqvarna H00 58 12 31 64 4 Die ...

Страница 54: ...m Schärfen der Sägekette immer eine Husqvarna Schärflehre zu verwenden Die Teilenummern können Sie der unten stehenden Tabelle entnehmen Wenn Sie nicht wissen welche Sägekette an Ihrem Gerät angebracht ist wenden Sie sich an Ihren Servicehändler H00 5 32 Zoll 4 0 mm 85 30 0 025 Zoll 0 65 mm 580 68 74 01 54 712 007 28 04 2021 ...

Страница 55: ...Normen werden erfüllt EN ISO 12100 2010 EN ISO 11680 1 2011 ISO 14982 2009 CISPR 12 2009 EN 50581 2012 0404 RISE SMP Svensk Maskinprovning AB Box 7035 SE 750 07 Uppsala Sweden hat die EG Typenprüfung gemäß Maschinenrichtlinie 2006 42 EG Artikel 12 Absatz 3b durchgeführt Die Zertifikate über die EG Typenprüfung gemäß Anhang IV weisen folgende Nummer auf 0404 15 2439 Weiterhin hat 0404 RISE SMP Sven...

Страница 56: ... à l utilisation du produit Utilisez uniquement le produit avec des accessoires approuvés par le fabricant Reportez vous à la section Accessoires à la page 81 Aperçu du produit 14 15 13 12 11 10 17 18 22 23 9 5 7 26 25 24 27 28 29 6 8 3 2 1 19 21 20 16 4 1 Chaîne 2 Guide chaîne 3 Écrou du guide 4 Carter de protection pour chaîne 5 Bouton d immobilisation 6 Vis de réglage de lubrification de la cha...

Страница 57: ... éviter de blesser l utilisateur ou d autres personnes lisez et respectez toutes les consignes de sécurité du manuel d utilisation Veuillez lire attentivement le manuel d utilisation et assurez vous de bien comprendre les instructions avant utilisation Utilisez un casque de protection dans les endroits où des objets peuvent tomber sur vous Utilisez des protège oreilles homologués Utilisez des prot...

Страница 58: ...nts présents sur le produit concernent des exigences de certification spécifiques à d autres zones commerciales Émissions Euro V AVERTISSEMENT toute altération du moteur a pour effet d annuler l homologation de type UE de ce produit EPA III La période de conformité aux normes en matière d émissions mentionnée sur l étiquette relative aux émissions se rapporte au nombre d heures de fonctionnement d...

Страница 59: ...actifs ou passifs Pour réduire le risque de blessures graves ou mortelles les personnes portant des implants médicaux doivent consulter leur médecin et le fabricant de leur implant avant d utiliser ce produit Ce produit est un outil dangereux si vous ne faites pas attention ou si vous l utilisez de manière incorrecte Ce produit peut causer des blessures graves voire mortelles à l opérateur ou à d ...

Страница 60: ...ilisez jamais la machine à l intérieur ou dans des espaces sans ventilation appropriée Les gaz d échappement contiennent de l oxyde de carbone un gaz inodore toxique et très dangereux n utilisez jamais un produit dont le silencieux est absent ou défectueux Un silencieux en mauvais état peut augmenter le niveau sonore et le risque d incendie Gardez des dispositifs extincteurs à proximité Si vous de...

Страница 61: ...sez le produit L équipement de protection individuel ne protège pas complètement des blessures mais il diminue la gravité des blessures en cas d accident Faites appel à votre revendeur pour vous aider à sélectionner l équipement adéquat Portez un casque de protection lorsqu il y a un risque de chute d objets Portez des protège oreilles homologués ayant un effet atténuateur suffisant Une exposition...

Страница 62: ... de la gâchette d accélération reviennent en position initiale A B 2 Relâchez le blocage de la gâchette d accélération et assurez vous que la commande d accélération est bloquée au régime de ralenti 3 Appuyez sur le blocage de la gâchette d accélération et assurez vous qu il retourne à sa position initiale lorsque vous le relâchez 4 Assurez vous que la commande d accélération et son blocage se dép...

Страница 63: ...nt d utiliser le produit Ne mélangez pas le carburant à l intérieur ou à proximité d une source de chaleur Ne démarrez pas le produit si du carburant ou de l huile moteur a été renversé e sur le produit Essuyez le carburant l huile et attendez que le produit sèche Essuyez le carburant déversé sur le produit Si vous avez renversé du carburant sur vos vêtements changez de vêtements immédiatement Évi...

Страница 64: ... les instructions qui suivent avant d effectuer l entretien du produit Effectuez uniquement les travaux de maintenance et d entretien décrits dans ce manuel d utilisation Laissez le personnel d entretien professionnel effectuer tous les autres travaux d entretien et de réparation Effectuez régulièrement les contrôles de sécurité et appliquez les instructions de maintenance et d entretien indiqués ...

Страница 65: ...e tube de transmission se place correctement dans l encoche de la tête de coupe B A 1 Desserrez la vis sur la tête de coupe A 2 Montez la tête de coupe sur l arbre de sorte que la vis A soit alignée avec le trou de l arbre comme illustré 3 Serrez à la main la vis A Assurez vous que la vis A s insère dans le trou de l arbre 4 Serrez la vis A 5 Serrez la vis B Montage du guide chaîne et de la chaîne...

Страница 66: ...le tout en maintenant levé le pignon du guide 7 La tension d une chaîne neuve doit être vérifiée fréquemment pendant son rodage Vérifiez la tension de la chaîne régulièrement Une tension correcte est synonyme de bonne capacité de coupe et de longue durée de vie Réglage de la longueur de l arbre 1 Desserrer la manette 2 Tirez sur l arbre de façon à obtenir la longueur désirée 3 Serrer la manette Po...

Страница 67: ...ible quantité de résidus ce qui permet de garder les composants du moteur propres plus longtemps Pour mélanger le carburant Essence REMARQUE N utilisez pas d essence avec un indice d octane inférieur à 90 RON 87 AKI Cela peut endommager le produit REMARQUE N utilisez pas d essence avec une concentration d éthanol E10 supérieure à 10 Cela peut endommager le produit REMARQUE N utilisez pas d essence...

Страница 68: ...chaîne appropriée AVERTISSEMENT n utilisez pas de l huile usagée susceptible de provoquer des blessures graves et de nuire gravement à l environnement L huile usagée peut aussi endommager la pompe à huile le guide chaîne et la chaîne AVERTISSEMENT la chaîne peut ralentir si l équipement de coupe n est pas suffisamment lubrifié Risque de blessures graves voire mortelles pour l opérateur AVERTISSEME...

Страница 69: ...nches en morceaux pour les faire tomber plus facilement là où vous voulez Ne coupez jamais le gonflement à la racine de la branche car cela peut ralentir la guérison et augmenter le risque d attaques fongiques Utilisez la butée à la base de la tête de coupe pour un soutien supplémentaire durant la coupe Cela permet d éviter que l équipement de coupe ne saute sur la branche Effectuez une première c...

Страница 70: ... de votre main 5 Tirez fortement et rapidement sur le câble REMARQUE Ne sortez pas complètement le câble du démarreur et ne lâchez pas la poignée du câble du démarreur lorsque le câble est complètement sorti Cela peut endommager le produit 6 Tirez sur le câble du démarreur jusqu à ce que le moteur démarre ou 5 fois maximum 7 Réinitialisez le starter lorsque le moteur démarre ou après avoir tiré 5 ...

Страница 71: ... d accélération et la gâchette fonctionnent correcte ment X Contrôlez l interrupteur d arrêt pour vérifier qu il fonctionne correctement X Assurez vous que la chaîne ne tourne pas lorsque le moteur tourne au ralenti X Nettoyez le filtre à air Remplacez si nécessaire X Vérifiez que les rivets et les maillons de la chaîne sont dépourvus de fissures que la chaîne n est pas raide et que les rivets et ...

Страница 72: ... régime de ralenti à l aide de la vis de réglage T identifiée par le repère T Tournez la vis de réglage de ralenti dans le sens des aiguilles d une montre jusqu à ce que la chaîne commence à tourner 4 Tournez la vis de réglage de ralenti dans le sens contraire des aiguilles d une montre jusqu à ce que la chaîne s arrête Le régime de ralenti est correct lorsque le moteur fonctionne sans à coups dan...

Страница 73: ...e la surchauffe du produit ce qui entraîne une détérioration du piston et du cylindre Le système de refroidissement est composé des éléments suivants 1 La prise d air dans le lanceur 2 Les ailettes de ventilation sur le volant 3 Les ailettes de refroidissement sur le cylindre 4 Capot de cylindre 5 Capot de silencieux 6 Plaque du silencieux 1 6 3 4 5 2 Pour vérifier la bougie REMARQUE Utilisez touj...

Страница 74: ...iltre à air et les filtres à air 3 Nettoyez les filtres à air avec de l eau chaude savonneuse 4 Remplacez les filtres à air s il est impossible de les nettoyer complètement Remplacez toujours un filtre à air endommagé 5 Nettoyez la surface intérieure du couvercle du filtre à air Utilisez de l air comprimé ou une brosse 6 Vérifiez le joint en caoutchouc du filtre à air Remplacez le filtre à air si ...

Страница 75: ...de vie Pour affûter la chaîne de sciage Informations relatives au guide chaîne et à la chaîne AVERTISSEMENT Portez des gants de protection lorsque vous utilisez ou procédez à la maintenance de la chaîne Une chaîne immobile peut également provoquer des blessures Remplacez un guide chaîne ou une chaîne usé e ou endommagé e par la combinaison guide chaîne chaîne recommandée par Husqvarna Cela est néc...

Страница 76: ...es dispositifs de coupe N utilisez jamais une chaîne dont les dents sont émoussées Si la chaîne est émoussée vous devez appliquer plus de pression pour pousser le guide chaîne dans le bois Si la chaîne est très émoussée vous ne produirez pas de copeaux de bois mais de la sciure Une chaîne affûtée avance dans le bois et crée des copeaux de bois long et épais La dent de coupe A et la jauge de profon...

Страница 77: ...la jauge de profondeur Le réglage de la jauge de profondeur C diminue lors de l affûtage de la dent de coupe A Afin de préserver des performances de coupe optimales vous devez retirer le matériau d affûtage de la jauge de profondeur B pour sélectionner le réglage de la jauge de profondeur recommandé Reportez vous à la section Caractéristiques techniques à la page 80 pour les instructions relatives...

Страница 78: ...manuellement 3 Soulevez l avant du guide chaîne et tournez la vis de réglage de la tension de chaîne Utilisez une clé 4 Serrez la chaîne jusqu à ce qu elle soit bien plaquée contre le guide chaîne mais qu elle puisse quand même se déplacer facilement 5 Serrez les écrous du guide chaîne à l aide de la clé et soulevez en même temps l extrémité avant du guide chaîne 6 Assurez vous que la chaîne peut ...

Страница 79: ... le débit d huile Dépannage Le moteur ne démarre pas Contrôle Cause possible Procédure Interrupteur d arrêt L interrupteur d arrêt est en position d arrêt Faites réaliser le remplacement de l interrupteur d arrêt par un agent d entretien agréé Réservoir d essence Mauvais type de carburant Vidangez le réservoir de carburant et remplissez le avec le carburant qui convient Bougie et cylindre La bougi...

Страница 80: ... transport du produit pour éviter les blessures et les dégâts causés au produit Une chaîne immobile peut également provoquer des blessures graves Déposez le capuchon de la bougie Fixez le produit pour le transporter Pour préparer votre produit pour un entreposage à long terme 1 Arrêtez le produit et laissez le refroidir avant de le démonter 2 Démontez et nettoyez la chaîne ainsi que la rainure du ...

Страница 81: ... avant arrière 6 3 5 3 Arbre allongé poignées avant arrière 4 1 6 7 Accessoires Combinaisons de guide chaîne et de chaîne Combinaison de guide chaîne et de chaîne recommandée Remarque Ce guide chaîne diffère de la norme Husqvarna et doit être de type A318 pour correspondre au produit Guide chaîne Chaîne Longueur cm po Pas po Jauge mm po Type Longueur maillons entraîneurs n 10 25 1 4 0 050 1 3 Husq...

Страница 82: ...ndons de toujours utiliser un gabarit de lime Husqvarna pour rétablir le tranchant de la chaîne Les références sont indiquées dans le tableau ci dessous Si vous ne savez pas quelle chaîne est installée sur votre produit contactez votre atelier d entretien H00 5 32 po 4 0 mm 85 30 0 025 po 0 65 mm 580 68 74 01 82 712 007 28 04 2021 ...

Страница 83: ... électriques et électroniques 2011 65 UE Les normes harmonisées suivantes ont été appliquées EN ISO 12100 2010 EN ISO 11680 1 2011 ISO 14982 2009 CISPR 12 2009 EN 50581 2012 0404 RISE SMP Svensk Maskinprovning AB Box 7035 SE 750 07 Uppsala Sweden a procédé à des tests de type CE conformément à l article 12 point 3b de la directive machines 2006 42 CE Le certificat de l examen de type CE conforméme...

Страница 84: ...kan het gebruik van dit product mogelijk beperken Gebruik het product uitsluitend met accessoires die door de fabrikant zijn goedgekeurd Zie Accessoires op pagina 109 Productoverzicht 14 15 13 12 11 10 17 18 22 23 9 5 7 26 25 24 27 28 29 6 8 3 2 1 19 21 20 16 4 1 Zaagketting 2 Geleider 3 Zaagbladmoer 4 Beschermkap voor zaagketting 5 Borgknop 6 Afstelschroef voor kettingsmering 7 Kettingolietank 8 ...

Страница 85: ... oliestroom Rotatierichting zaagket ting Balgje voor extra brandstoftoevoer Choke Het product voldoet aan de geldende EG richtlijnen yyyywwxxxx Het serienummer staat op het pro ductplaatje yyyy is het productie jaar ww is de productieweek en xxxx is het serienummer Dit product is niet elektrisch geïsoleerd Wanneer het product in contact komt met of in de buurt komt van stroomvoerende leidingen kan...

Страница 86: ...L Cilinderinhoud EXH EVP Uitlaat en verdamping SORE Kleine off road motoren ECS Emissieregelsysteem HRS Uren US EPA United States Environ mentalProtection Agen cy Uitlaatemissieregelystemen ECM Motorregelmodule Autotune OC Oxiderende katalysator EM Motorwijziging TWC Driewegkatalysator Verdampingsemissieregelsystemen C Gecoëxtrudeerd meer laags P Behandeld HDPE of PE N Nylon S Afgedicht Productaan...

Страница 87: ...het product vóór gebruik Zie Veiligheidsvoorzieningen op het product op pagina 89 en Controleren voor het starten op pagina 94 Gebruik nooit een defect product Voer de in deze handleiding beschreven veiligheidscontroles en de onderhouds en service instructies uit Veiligheidsinstructies voor montage WAARSCHUWING Lees voordat u het product gaat gebruiken deze instructies aandachtig door en zorg dat ...

Страница 88: ... die wordt afgezaagd Dit kan leiden tot ernstig of zelfs dodelijk letsel Wees alert op stukken tak die tijdens het snijden weggeslingerd kunnen worden Snijd niet te dicht bij de grond waar stenen en andere voorwerpen kunnen worden weggeslingerd Gebruik het product niet in ongunstige weersomstandigheden zoals dichte mist hevige regen harde wind en hevige koude Werken in slechte weersomstandigheden ...

Страница 89: ...g die gemakkelijk kan blijven haken aan takjes en struikgewas Draag geen sieraden korte broek of sandalen of loop niet op blote voeten Bind voor de veiligheid lang haar samen tot boven schouderhoogte Houd een EHBO doos binnen handbereik Veiligheidsvoorzieningen op het product WAARSCHUWING Lees de volgende waarschuwingen voordat u het product gaat gebruiken Gebruik het product nooit wanneer de veil...

Страница 90: ...ateur Zie Onderhoud op pagina 99 Stopschakelaar controleren 1 Start de motor 2 Zet de stopschakelaar in de stopstand en zorg ervoor dat de motor stopt Trillingsdempingssysteem controleren Het trillingsdempingssysteem vermindert trillingen in de handgrepen tot een minimum wat de bediening vergemakkelijkt Het trillingsdempingssysteem van het product vermindert de overdracht van trillingen tussen de ...

Страница 91: ... en laat de druk voorzichtig ontsnappen voordat u brandstof bijvult Zorg voor voldoende ventilatie bij het vullen met en mengen van brandstof benzine en tweetaktolie of het aftappen van de brandstoftank Brandstof en brandstofdampen zijn zeer brandgevaarlijk en kunnen leiden tot ernstig letsel bij inademing en contact met de huid Wees daarom voorzichtig wanneer u met brandstof werkt en zorg voor vo...

Страница 92: ...er u onderhoud aan de zaagketting uitvoert of de zaagketting gebruikt Ook een zaagketting die niet beweegt kan verwondingen veroorzaken Houd de zaagtanden goed geslepen Volg de instructies en gebruik de aanbevolen vijlmal Een beschadigde of verkeerd geslepen zaagketting vergroot de kans op ongevallen Zorg voor de correcte tanddiepte Volg de instructies en gebruik de aanbevolen instelling voor de v...

Страница 93: ...en 1 Draai de moer van het blad los en verwijder de beschermkap 2 Monteer het zaagblad over de zaagbladbout Plaats het zaagblad in de achterste stand Breng de ketting aan over het aandrijfkettingwiel en in de gleuf in het blad Begin aan de bovenzijde van het blad 3 Zorg dat de snijkanten van de zaagschakels naar voren wijzen op de bovenrand van het blad 4 Monteer de kap en plaats de kettingafstelp...

Страница 94: ...el afstellen Gebruik altijd het draagstel wanneer u het product gebruikt Het draagstel biedt maximale controle tijdens de bediening van het product Het draagstel vermindert het risico op vermoeidheid in uw armen en rug 1 Doe het draagstel om 2 Bevestig het product aan de ophanghaak van het draagstel 3 Stel de lengte van het draagstel zo af dat de ophanghaak ongeveer ter hoogte van uw rechterheup h...

Страница 95: ... dan 10 E10 Dit kan schade aan het product veroorzaken OPGELET Gebruik geen loodhoudende benzine Dit kan schade aan het product veroorzaken Gebruik altijd nieuwe loodvrije benzine met een minimaal octaangetal van RON 90 87 AKI en een ethanolgehalte van minder dan 10 E10 Gebruik benzine met een hoger octaangetal als u het product regelmatig gebruikt met een hoog motortoerental Gebruik altijd een go...

Страница 96: ...ie de juiste kettingolie Bespreek de keuze van de kettingolie met uw servicedealer Let op Dit product is voorzien van automatische kettingsmering U kunt ook de oliestroom regelen Zie Kettingsmering aanpassen op pagina 106 Gebruik kettingolie van Husqvarna voor een maximale levensduur van de zaagketting en voor behoud van het milieu We adviseren u om een standaard kettingolie te gebruiken als Husqv...

Страница 97: ...mt u dat de bast gaat scheuren wat kan leiden tot een langzame genezing en permanente schade aan de boom De snede mag niet dieper zijn dan 1 3 van de dikte van de tak om vastlopen te voorkomen Laat de ketting lopen terwijl u de snijuitrusting van de tak verwijdert om vastlopen te voorkomen Gebruik het draagstel om het gewicht van de machine te ondersteunen en het hanteren te vergemakkelijken Zorg ...

Страница 98: ...aken 6 Trek aan het startkoord tot de motor start of maximaal 5 keer 7 Reset de choke wanneer de motor start of nadat u 5 keer aan het startkoord hebt getrokken 8 Trek indien nodig steeds opnieuw het startkoord uit tot de motor start 9 Laat de motor 10 seconden draaien 10 Bedien de gashendel geleidelijk 11 Zorg ervoor dat de motor soepel loopt Let op Voer de procedure opnieuw uit als de motor stop...

Страница 99: ...ap X Controleer of de schroeven en moeren goed zijn vastgedraaid X Controleer de motor de brandstoftank en de brandstofleidingen op lekkages X Reinig het koelsysteem X Controleer de starter en het startkoord op beschadigingen X Controleer de trillingsdempingselementen op beschadigingen en scheuren X Maak de bougie uitwendig schoon Verwijder hem en controleer de afstand tus sen de elektroden Stel d...

Страница 100: ...t het is juist afgesteld of gerepareerd Let op Zie Technische gegevens op pagina 108 voor het aanbevolen stationair toerental Onderhoud uitvoeren aan de geluiddemper De geluiddemper zorgt dat het geluidsniveau omlaag wordt gebracht en geleidt tevens de uitlaatgassen van de gebruiker weg WAARSCHUWING Geluiddempers met een katalysator worden zeer warm tijdens het gebruik en blijven enige tijd heet n...

Страница 101: ...tationair toerental altijd juist is afgesteld b Zorg dat het brandstofmengsel correct is c Zorg dat het luchtfilter schoon is Maak de bougie schoon als deze vuil is en controleer of de afstand tussen de elektroden correct is zie Technische gegevens op pagina 108 Vervang de bougie indien nodig Luchtfilter Verwijder stof en vuil van het luchtfilter om het schoon te houden en de volgende problemen te...

Страница 102: ... het abnormaal versleten is Snijuitrusting controleren 1 Controleer op scheurtjes in klinknagels en schakels en op losse schakels Vervang indien nodig 2 Controleer of de zaagketting eenvoudig te buigen is Vervang de zaagketting wanneer deze onbuigzaam is 3 Vergelijk de zaagketting met een nieuwe om te bepalen of de klinknagels en schakels versleten zijn 4 Vervang de zaagketting wanneer het langste...

Страница 103: ...door Husqvarna aanbevolen combinatie van zaagblad en zaagketting Zo blijven de veiligheidsfuncties van het product behouden Zie Accessoires op pagina 109 voor een lijst met aanbevolen combinaties voor het vervangen van het zaagblad en de zaagketting Zaagbladlengte inch cm Informatie over de lengte van het zaagblad kunt u meestal vinden op het achterste uiteinde van het zaagblad Aantal tanden in he...

Страница 104: ...sen de twee geeft de zaagdiepte instelling dieptesteller A B Denk bij het slijpen van een zaagketting aan het volgende Vijlhoek Snijhoek Vijlpositie Diameter van de ronde vijl Het is niet gemakkelijk om zonder de juiste hulpmiddelen een zaagketting correct te slijpen Gebruik een Husqvarna vijlmal Dit helpt u om de maximale snijprestaties te behouden Let op Zie De messen slijpen op pagina 104 voor ...

Страница 105: ...derde kettingslijpbeurt We raden u aan onze vijlmal voor de tanddiepte te gebruiken om de juiste maat voor de tanddiepte en de juiste hoek van de dieptestellernok te krijgen 1 Gebruik een platte vijl en een vijlmal om de hoogte van de dieptesteller aan te passen Gebruik alleen een Husqvarna vijlmal om de juiste tanddiepte en vijlhoek te verkrijgen 2 Plaats de vijlmal op de zaagketting Let op Zie d...

Страница 106: ... van olie zichtbaar zijn op het lichte oppervlak 2 Indien de kettingsmering niet correct werkt controleer dan het zaagblad Zie De geleider controleren op pagina 102 voor instructies Neem contact op met uw servicedealer als de onderhoudsstappen niet helpen Kettingsmering aanpassen WAARSCHUWING Stop de motor voordat u de oliepomp gaat afstellen Draai de stelschroef van de oliepomp Gebruik een schroe...

Страница 107: ...opslag Controleer voor opslag en vervoer van het product en de brandstof of er geen lekken of dampen zijn Vonken of open vuur bijvoorbeeld van elektrische apparaten of ketels kunnen tot brand leiden Gebruik altijd goedgekeurde containers voor opslag en transport van brandstof Leeg voorafgaand aan transport of langdurige opslag de brandstof en kettingolietanks Voer de vloeistoffen af volgens de pla...

Страница 108: ...genniveau gemeten volgens ISO 22868 dB A 107 Geluidsniveau 11 Equivalent geluidsniveau bij oor van de gebruiker gemeten volgens ISO 22868 dB A Uitgerust met goedgekeurde accessoire origineel 89 Trillingsniveau 12 Trillingsniveaus in de handgrepen gemeten volgens ISO 22867 m s2 Korte as voorste achterste handvat 6 3 5 3 10 De gerapporteerde gegevens voor het geluidsuitgangsniveau vertonen een typis...

Страница 109: ...engte inch cm Kettingsteek inch Diepte inch mm Type Zaagblad en ketting combinaties nr 10 25 1 4 0 050 1 3 Husqvarna H00 58 12 31 64 Vijlbenodigdheden en vijlhoeken Met een Husqvarna vijlmal kunt u de tanden in de juiste hoek vijlen Wij raden u aan altijd een Husqvarna vijlmal te gebruiken voor het vijlen van uw zaagketting De onderdeelnummers vindt u in onderstaande tabel Neem contact op met uw s...

Страница 110: ...H00 5 32 inch 4 0 mm 85 30 0 025 inch 0 65 mm 580 68 74 01 110 712 007 28 04 2021 ...

Страница 111: ...EU De volgende normen zijn van toepassing EN ISO 12100 2010 EN ISO 11680 1 2011 ISO 14982 2009 CISPR 12 2009 EN 50581 2012 0404 RISE SMP Svensk Maskinprovning AB Box 7035 SE 750 07 Uppsala Sweden heeft een EG typeonderzoek uitgevoerd volgens de machinerichtlijn 2006 42 EG artikel 12 punt 3b Het certificaat voor EU typeonderzoek in overeenstemming met bijlage IX heeft nummer 0404 15 2439 Verder hee...

Страница 112: ...ejena z nacionalnimi predpisi Izdelek uporabljajte samo z dodatki ki jih je odobril proizvajalec Glejte Dodatna oprema na strani 135 Pregled izdelka 14 15 13 12 11 10 17 18 22 23 9 5 7 26 25 24 27 28 29 6 8 3 2 1 19 21 20 16 4 1 Veriga motorne žage 2 Meč 3 Matica meča 4 Ščitnik za verigo žage 5 Vrtljivi ročaj za učvrstitev 6 Nastavitveni vijak za mazanje verige 7 Posoda za verižno olje 8 Vijak za ...

Страница 113: ... zaščito oči Uporabljajte odobrene zaščitne rokavice Uporabljajte trpežno obutev ki ne drsi Gorivo Verižno olje Nastavitev dotoka olja Smer vrtenja veriga Membrana črpalke za gorivo Čok Izdelek je skladen z veljavnimi direktivami ES yyyywwxxxx Na tipski ploščici je navedena serij ska številka yyyy je proizvodno le to ww je proizvodni teden in xxxx je serijska številka Ta izdelek ni električno izol...

Страница 114: ...e vanje SORE Majhni terenski motorji ECS Sistem za uravnavanje emisij H Ur US EPA Agencija za varstvo okolja Združenih Držav Amerike Sistemi za uravnavanje emisij izpušnih plinov ECM Modul za nadzor motorja Autotune OC Oksidacijski katalizator EM Sprememba motorja TWC Trismerni katalizator Sistemi za uravnavanje emisij zaradi izhlapevanja C Koekstrudiran večsloj ni P Obdelan HDPE ali PE N Najlon S...

Страница 115: ...ite razumite in upoštevajte ta navodila Pred vžigom morata biti vodilo in ohišje menjalnika sestavljena kajti v nasprotnem primeru lahko menjalnik odpade in povzroči telesne poškodbe Edini priključki ki jih lahko uporabljate s tem izdelkom so rezalni priključki ki jih priporočamo Glejte Dodatna oprema na strani 135 Uporabljajte odobrene zaščitne rokavice Pred zagonom motorja se prepričajte da ste ...

Страница 116: ...ni bolni ali pod vplivom alkohola drog ali zdravil saj to negativno vpliva na vaš vid pozornost koordinacijo in presojo Poskrbite da se lahko varno gibate in da ste v varnem položaju Preverite ali so v okolici morebitne ovire kot so korenine kamenje veje in jarki Bodite previdni pri delu na klančinah Ne odstranjujte odrezanega materiala in ne dovolite drugim osebam odstranjevati odrezan material č...

Страница 117: ... sandalov in ne hodite bosi Lase si varno spnite nad rameni Paket prve pomoči hranite na dosegu roke Varnostne naprave na izdelku OPOZORILO Pred uporabo izdelka preberite navodila v povezavi z opozorili v nadaljevanju Ne uporabljajte izdelka s poškodovanimi varnostnimi napravami Redno preverjajte varnostne naprave Glejte poglavje Varnostne naprave na izdelku na strani 117 Če so varnostne naprave p...

Страница 118: ...ženite motor 2 Izklopno stikalo premaknite v položaj za izklop in se prepričajte da se je motor izklopil Preverjanje sistema za dušenje tresljajev Sistem za dušenje tresljajev zmanjša tresljaje v ročajih na minimum kar olajša uporabo Sistem za dušenje tresljajev izdelka zmanjšuje prenos vibracij motorne note in gredi do izdelka 1 Izklopite motor 2 Vizualno preverite da ni prisotnih deformacij in p...

Страница 119: ...e za zadosten pretok zraka Skrbno privijte pokrovček posode za gorivo da ne pride do požara Preden izdelek vklopite ga premaknite najmanj 3 m 10 čevljev stran od mesta kjer ste napolnili posodo za gorivo V posodo za gorivo ne nalijte preveč goriva Prepričajte se da med premikanjem izdelka ali posode za gorivo ne more priti do iztekanja Izdelka ali posode za gorivo ne postavljajte v bližino odprteg...

Страница 120: ...ige na strani 132 Redno vzdržujte rezalno opremo in jo ustrezno mažite Če verige ne mažete ustrezno se poveča tveganje za obrabo meča verige in pogonskega zobnika verige Montaža Namestitev protiudarnega ščitnika 1 Ščitnik namestite s tremi vijaki 2 Vijake zategnite z momentom 30 ft lbs 4 Nm 3 Po približno 20 urah uporabe izdelka vijake znova zategnite To assemble the cutting head POZOR Make sure t...

Страница 121: ... pravilno napeta ko ni povešena na spodnji strani meča vendar jo je mogoče še vedno brez težav obračati z roko Pridržite vrh meča in matice meča zategnite s kombiniranim ključem 7 Po namestitvi nove verige je treba napetost verige redno preverjati dokler se ta ne uteče Redno preverjajte napetost verige Pravilno napeta veriga nudi dobro učinkovitost rezanja in dolgo življenjsko dobo Namestitev dolž...

Страница 122: ... ostankov manjša zaradi česar so deli motorja čistejši Mešanje goriva Bencin POZOR Ne uporabljajte bencina ki ima oktansko število nižje od 90 RON 87 AKI Izdelek se lahko tako poškoduje POZOR Ne uporabljajte bencina ki ima koncentracijo etanola E10 višjo od 10 Izdelek se lahko tako poškoduje POZOR Ne uporabljajte osvinčenega bencina Izdelek se lahko tako poškoduje Vedno uporabljajte nov neosvinčen...

Страница 123: ...elek ima funkcijo ki zagotovi da goriva zmanjka prej kot verižnega olja Za pravilno delovanje te varnostne funkcije uporabite ustrezno verižno olje Za izbiro verižnega olja se obrnite na servisnega zastopnika Opomba Izdelek ima samodejen sistem za mazanje verige Nastavite lahko tudi pretok olja Glejte poglavje Nastavitev mazanja verige na strani 133 Uporabite verižno olje Husqvarna za najdaljšo ži...

Страница 124: ...den začnete rezati celotno vejo S tem preprečite trganje lubja ki lahko povzroči počasnejšo regeneracijo in tudi trajne poškodbe drevesa Za preprečevanje zatikanja rez ne sme biti globlje od 1 3 debeline veje Pri umikanju rezalnega priključka iz veje mora veriga teči naprej saj tako preprečite zatikanje žage V oporo uporabite oprtnik s katerim bo uporaba naprave preprostejša Pri delu se prepričajt...

Страница 125: ...e da motor deluje približno 10 sekund 10 Plin upravljajte postopoma 11 Prepričajte se da motor gladko deluje Opomba Če se motor izklopi ponovite postopek O Podatki o površini OPOZORILO Z nobenim delom telesa ne segajte v siva območja Če se dotaknete sivih območij lahko pride do opeklin kože V primeru poškodb pokrovčka svečke lahko pride tudi do električnega udara Izdelka ne uporabljajte s poškodov...

Страница 126: ...jo med elek trodama Nastavite pravilno razdaljo glejte Tehnični podatki na strani 134 ali zamenjajte svečko Prepričajte se da je svečka opremljena z zaščito proti mot njam X Očistite zunanjost uplinjača in prostor okrog njega X Z robov meča opilite vse grobe ostanke X Očistite ali zamenjajte mrežico lovilnika isker na dušilniku X Očistite rezervoar za gorivo X Preverite ali je filter goriva umazan...

Страница 127: ...kadar je motor v prostem teku Če se dotaknete izdelka lahko pride do opeklin kože Zavedajte se nevarnosti požara 1 Izdelek zaustavite in počakajte da se ohladi 2 Odstranite pokrov dušilca 3 Odstranite vijak s katerim je pritrjen lovilnik isker 4 Če je lovilnik isker zamašen ga očistite če je poškodovan pa ga zamenjajte POZOR Poškodovan lovilnik isker je treba zamenjati Izdelka ne uporabljajte če l...

Страница 128: ...u izdelka Izgubo moči motorja Povečano obrabo delov motorja Prekomerno porabo goriva Čiščenje zračnega filtra POZOR Poškodovan izjemno umazan ali premočen zračni filter je treba obvezno zamenjati Z zračnega filtra redno odstranjujte umazanijo in prah S tem preprečite okvare uplinjača težave pri zagonu izgubo moči motorja obrabo delov motorja in večjo porabo goriva od običajne Če filter uporabljate...

Страница 129: ...e če so na rezilih razpoke Preverjanje meča 1 Prepričajte se da oljni kanal ni zamašen Po potrebi ga očistite 2 Preglejte ali so na robovih meča grobi ostanki S pilo odstranite grobe ostanke 3 Očistite utor v meču 4 Preverite ali je utor v meču obrabljen Po potrebi zamenjajte meč 5 Preverite ali je konica meča groba ali zelo obrabljena 6 Prepričajte se da se zobnik meča prosto vrti in da mazalna o...

Страница 130: ... določa vrsta meča Širina utora na meču v palcih mm Širina utora v meču mora biti enaka kot širina gonilnih členov verige Odprtina za dolivanje verižnega olja in odprtina za napenjalnik verige Meč se mora poravnati z izdelkom Širina gonilnega člena v mm palcih Splošne informacije o brušenju rezil Ne uporabljajte tope verige Če je veriga topa morate bolj pritiskati da potisnete meč skozi les Če je ...

Страница 131: ... se da so vsi rezalni zobje enako dolgi Splošne informacije o prilagajanju nastavitve globine reza Nastavitev globine reza C se zmanjša ko nabrusite rezalni zob A Za najboljšo učinkovitost rezanja morate odstraniti odbrušeni material z globinskega zoba B da pridobite priporočeno nastavitev globine reza Za navodila kako doseči ustrezno nastavitev globine reza za verigo glejte Tehnični podatki na st...

Страница 132: ...eča 3 Dvignite sprednji del meča in zavrtite vijak za napenjanje verige Uporabite ključ 4 Verigo napnite toliko da se tesno prilega meču vseeno pa jo lahko z lahkoto premikate 5 Z izvijačem zategnite matice meča in hkrati privzdignite sprednji del meča 6 Prepričajte se da lahko verigo nemoteno premikate z rokami in da ne visi z meča Dolivanje verižnega olja 1 Odprite pokrovček za olje na vrhu glav...

Страница 133: ... goriva Izpraznite posodo za gorivo in jo na polnite s pravilnim gorivom Svečka in valj Svečka je umazana ali mokra Poskrbite da je svečka suha in čista Razmak med elektrodama vžigalne svečke ni pravilen Očistite svečko Prepričajte se da je razmak pri elektrodi pravilen glejte Tehnični podatki na strani 134 Pre pričajte se da ima svečka zaščito proti motnjam Svečka ni čvrsto nameščena Zategnite sv...

Страница 134: ...ek razstavite ga zaustavite in počakajte da se ohladi 2 Odstranite verigo ter očistite verigo in utor v meču POZOR Če ne očistite verige in meča lahko veriga postane toga ali se lahko zamaši utor 3 Namestite transportno zaščito 4 Izdelek očistite Za navodila glejte poglavje Vzdrževanje na strani 125 5 Opravite popoln servis izdelka Tehnični podatki Tehnični podatki 525PT5S Motor Gibna prostornina ...

Страница 135: ...orne žage Dolžina palci cm Korak palci Šablona palci mm Vrsta Dolžina gonilni členi št 10 25 1 4 0 050 1 3 Husqvarna H00 58 12 31 64 Oprema za brušenje in koti brušenja Šablone za brušenje Husqvarna omogočajo brušenje pod ustreznimi koti Priporočamo da za ostrenje verige vedno uporabljate šablono za brušenje Husqvarna Številke delov so navedene v spodnji tabeli Če ne veste katero verigo imate name...

Страница 136: ...H00 5 32 palcev 4 0 mm 85 30 0 025 palcev 0 65 mm 580 68 74 01 136 712 007 28 04 2021 ...

Страница 137: ...mi 2011 65 EU Uporabljeni so naslednji standardi EN ISO 12100 2010 EN ISO 11680 1 2011 ISO 14982 2009 CISPR 12 2009 EN 50581 2012 0404 RISE SMP Svensk Maskinprovning AB Box 7035 SE 750 07 Uppsala Sweden je opravil tipski preizkus v skladu z direktivo ES o strojih 2006 42 ES člen 12 točka 3b Številke certifikatov za tipski preizkus ES v skladu s prilogo IV 0404 15 2439 Poleg tega je združenje 0404 ...

Страница 138: ...138 712 007 28 04 2021 ...

Страница 139: ...712 007 28 04 2021 139 ...

Страница 140: ...Original instructions Originalanweisungen Instructions d origine Originele instructies Izvirna navodila www husqvarna com 1157426 20 2021 04 30 ...

Отзывы: