Hunter M0136-01 Скачать руководство пользователя страница 1

www.HunterFan.com

1.888.830.1326

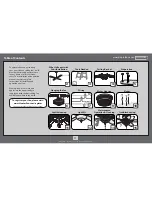
30 inches

7 feet

PA
G

E

2

What to Expect with 

Your Installation

Ceiling Bracket

Ladder

PA
G

E

3

Tools Needed

PA
G

E

6

Hanging the Fan

PA
G

E

9

Motor Housing

Table of Contents

PA
G

E

7

PA
G

E

12

PA
G

E

15

Maintenance, 

Operation & Cleaning 

Troubleshooting

Light Kit

?

?

?

PA
G

E

14

PA
G

E

5

Preparation

PA
G

E

4

Wiring

PA
G

E

11

Switch Housing

Blades

PA
G

E

10

Congratulations on purchasing 
your new Hunter® ceiling fan!  It will 
provide comfort and performance 

in your home or office for many 

years. This installation and operation 
manual contains complete 
instructions for installing and 
operating your fan.

We are proud of our work and 
appreciate the opportunity to 
supply you with the best ceiling fan 
available anywhere in the world.

To register your fan, please visit:

www.HunterFan.com/register

Save your receipt for proof of purchase.

1

M0136-01 • 05/26/17 • © 2017 Hunter Fan Company

Содержание M0136-01

Страница 1: ...Switch Housing Blades PA G E 10 Congratulations on purchasing your new Hunter ceiling fan It will provide comfort and performance in your home or office for many years This installation and operation...

Страница 2: ...ou are unfamiliar with wiring use a qualified electrician c 2 Use only Hunter replacement parts This equipment has been tested and found to comply with the limits for a Class B digital device pursuant...

Страница 3: ...nal If mounting to a support structure you will also need these tools Do not discard the hardware bags or mix parts from different bags Make note of the symbol printed on each hardware bag The symbols...

Страница 4: ...ncluded when securing to support structure with approved electrical outlet box Drill 9 64 pilot holes in support structure to aid in securing ceiling bracket with hardware found in the hardware bag Us...

Страница 5: ...ile you re doing the next couple of steps Do not remove the plastic breakaway connectors until your ceiling fan is properly attached to the ceiling Removing the plastic breakaway connector could resul...

Страница 6: ...he ceiling bracket Be sure the ground wire attached to the hanger faces out of the large opening in the ceiling bracket Ground Wire Note Fan style may vary Locking Screw Once the motor is in the ceili...

Страница 7: ...fan Note To connect the wires hold the bare metal leads together and place a wire connector over them then twist clockwise until tight Turn the splices upward and push them carefully back through the...

Страница 8: ...let box and the ungrounded wires on the other side of the outlet box Black Blue White Ungrounded Grounded Grounding Green Yello w S t r i p e Green Yello w S t r i p e Have dual switches Follow these...

Страница 9: ...ew Holes Motor Housing Screw Indentation Notch Raise the motor housing up over the motor and ceiling bracket Turn the motor housing so the screw holes align and the indentation in the housing locks in...

Страница 10: ...to the holes in the blades then secure each blade to a blade iron with screws found in the hardware bag Lightly attach the blade irons to the motor with screws found in the hardware bag then securely...

Страница 11: ...bag halfway into the motor housing It does not matter which two screw holes you choose Insert the third screw found in the hardware bag into place and then tighten all three screws Make sure the uppe...

Страница 12: ...colored markings on the connectors Align the notches in the sides of the lower switch housing with the upper switch housing screws Lift the lower switch housing Twist the lower switch housing clockwi...

Страница 13: ...ess the globe and globe keeper flush against the metal plate Thread the light pull chain through the hole in the center of the finial cap and thread the fan pull chain through the hole in the side of...

Страница 14: ...e Switch Changing the bulbs unscrew the finial and remove it from the threaded rod Remove the finial cap and unscrew the globe keeper while supporting the globe with your other hand Carefully remove t...

Страница 15: ...If so replace all of the blades Fan doesn t work Make sure power switch is on Pull the pull chain to make sure it is on Push the motor reversing switch firmly left or right to ensure that it is engage...

Отзывы: