background image

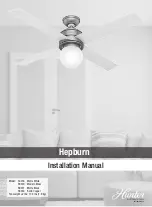
Installation Manual

©2019 Hunter Fan Co.

Model:  50276  Matte White
 

59320  Modern Brass


59321  Matte Black


59330  Satin Copper

Fan weight ±2 lbs: 17.4 lbs (7.9 kg)

Hepburn

PG3760 r052919

Содержание Hepburn 50276

Страница 1: ...Installation Manual 2019 Hunter Fan Co Model 50276 Matte White 59320 Modern Brass 59321 Matte Black 59330 Satin Copper Fan weight 2 lbs 17 4 lbs 7 9 kg Hepburn PG3760 r052919 ...

Страница 2: ... wall control switch w 4 To reduce the risk of personal injury do not bend the blade brackets when installing the blade brackets balancing the blades or cleaning the fan Do not insert foreign objects in between rotating fan blades Caution c 1 All wiring must be in accordance with national and local electrical codes ANSI NFPA 70 If you are unfamiliar with wiring use a qualified electrician c 2 Use ...

Страница 3: ...4 x1 x2 x2 x2 For installing the hanger bracket and wiring the fan For installing the blades For installing the canopy For installing the light kit Bulb Glass Upper Switch Housing Motor Lower Switch Housing Blade Downrod Canopy Canopy Screw Ceiling Bracket Wood Screw Wire Nut Washer bag Hunter Pro Tip Find a part that is missing or damaged Don t take it back to the store Let us make it right Visit...

Страница 4: ...port Structure Ceiling Outlet Box required Angled Mounting If you have a flat ceiling Hang your fan by a standard downrod Some fans come with a shorter downrod for a Low Profile installation Support Structure Ceiling Outlet Box required Standard Mounting A little more information on Angled Mounting For optimum performance and appearance a longer downrod should be used with your Hunter ceiling fan ...

Страница 5: ...Pick which one works best for your location Remove any existing bracket prior to installation Only use the provided Hunter ceiling bracket that came in your fan s box Installing the Downrod Follow below if you are using the downrod that came pre assembled in your box Need to install a longer or shorter downrod Check out the guide at the end of this manual 8 3 8 C U T S T R I P not to scale Pass al...

Страница 6: ...lass Wall Control Hanging the Fan Progress Check Your fan should look like this S l i d e c a n o p y o v e r d o wnrod and wires Place the downrod ball into the slot in the ceiling bracket NOTICE To prevent damage to fan ALWAYS lift holding either the fan housing or the downrod ...

Страница 7: ...Ceiling Bracket Downrod Hanging Fan Wiring Canopy Blades Light Bulbs Glass Wall Control Grounding G r e e n Y e l l o w S t ripe Green Yellow Stripe Black Black Ungrounded x4 bag Wire Nut Connect the three grounding wires green green yellow stripe or bare copper coming from the ceiling downrod and hanging bracket Connect the yellow wire from the receiver to the black wire from the fan Y e l l o w ...

Страница 8: ...n Wiring Canopy Blades Light Bulbs Glass Wall Control Installing the Canopy x2 Lift the canopy into place so that the screw holes are aligned Insert the two canopy screws found in the hardware bag F i t t h e c a n o p y i n place as shown bag Canopy Screw x12 bag Blade Screw x12 bag Blade Washer Let the tool do the work A magnetic screwdriver will give you more visibility when securing the canopy...

Страница 9: ...AZARD Make sure all screws are tight to secure the light fixture WARNING GLASS FALL HAZARD To prevent SERIOUS INJURY or DEATH make sure that glass is properly secured 2 of 6 Light Kit Screw bag Install the three switch housing screws found in the hardware bag Tighten all three screws 3 of 6 Light Kit Screw bag Connect the plugs from the upper and lower switch housings Make sure to line up the colo...

Страница 10: ... provided wire nuts Push all wires into the switch box 4 Installing the Wall Control Install the longer screws through the slots in the wall control into the switch box screw holes ON Turn Power Turning on the power 6 5 Installing the Wall Plate Install the shorter screws through the wall control plate and into the screw holes in the wall control The remote transmitter is already paired to the rec...

Страница 11: ...ssociated with the labor including electrician s fees required to install remove or replace a fan or any fan parts There is no warranty for light bulbs except where otherwise noted remote control batteries fans purchased or installed outside the United States fans owned by someone other than the original purchaser fans for which proof of purchase has not been established fans purchased from an una...

Страница 12: ...Check to see if any of the blades are cracked If so replace all of the blades Remote Control of Fan is Erratic Make sure the battery is installed correctly Install a fresh battery Multiple Remote Issues If you have multiple remotes or multiple remote controlled fans installed on the same circuit breaker and you are experiencing interference or faulty operation of your remote controls please go to ...

Отзывы: