background image

29

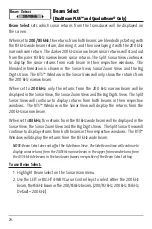
Beam Select

(DualBeam PLUS™ and QuadraBeam® Only)

Beam Select

sets which sonar returns from the transducer will be displayed on

the screen.

When set to

200/83 kHz

, the returns from both beams are blended by starting with

the 83 kHz wide beam return, dimming it, and then overlaying it with the 200 kHz
narrow beam return. The darker 200 kHz narrow beam sonar returns will stand out
from the paler 83 kHz narrow beam sonar returns. The Split Sonar View continues
to display the sonar returns from each beam in their respective windows. The
blended information is shown in the Sonar View, Sonar Zoom View and the Big
Digits View. The RTS™ Window in the Sonar View will only show the returns from
the 200 kHz narrow beam.

When set to

200 kHz

, only the returns from the 200 kHz narrow beam will be

displayed in the Sonar View, the Sonar Zoom View and the Big Digits View. The Split
Sonar View will continue to display returns from both beams in their respective
windows. The RTS™ Window in the Sonar View will display the returns from the
200 kHz narrow beam.

When set to

83 kHz

, the returns from the 83 kHz wide beam will be displayed in the

Sonar View, the Sonar Zoom View and the Big Digits View. The Split Sonar View will
continue to display returns from both beams in their respective windows. The RTS™
Window will display the returns from the 83 kHz wide beam.

NOTE:

Beam Select does not affect the Side Beam View. The Side Beam View will continue to

display sonar returns from the 200 kHz narrow beam in the upper frame and returns from
the 455 kHz side beams in the two lower frames irrespective of the Beam Select setting.

To use Beam Select:

1. Highlight Beam Select on the Sonar main menu.

2. Use the LEFT or RIGHT 4-WAY Cursor Control keys to select either the 200 kHz

beam, the 83kHz beam or the 200/83kHz beams. (200/83 kHz, 200 kHz, 83 kHz,
Default = 200 kHz)

Содержание Matrix 10

Страница 1: ...Operations Manual Operations Manual Matrix 10 Matrix 27 Matrix 20 Matrix 12 Matrix 37 531369 1_F Matrix 17...

Страница 2: ...authorized service personnel Any modification of the serial number or attempt to repair the originalequipmentoraccessoriesbyunauthorizedindividualswillvoidthewarranty WARNING This product contains ch...

Страница 3: ...t Sonar View DualBeam PLUS and QuadraBeam Only 9 Big Digits View 10 Side Beam View QuadraBeam Only 11 Bottom Presentation 12 Key Functions 14 POWER LIGHT Key 14 VIEW Key 14 MENU Key 15 4 WAY Cursor Co...

Страница 4: ...nly 32 455 kHz Balance Advanced QuadraBeam Only 32 Depth Lines Advanced 33 Surface Clutter Advanced 34 Noise Filter Advanced 35 Max Depth Advanced 35 Water Type Advanced 36 Transducer Select QuadraBea...

Страница 5: ...adraBeam Only are only available on products sold with a DualBeam PLUS or QuadraBeam transducer NOTE Entries in this Table of Contents which list International Only are only available on products sold...

Страница 6: ...transmission of the sound wave and when the sound wave is reflected off of an object it then uses the reflected signal to interpret location size and composition of an object Sonar is very fast A sou...

Страница 7: ...ideal for a wide range of conditions from shallow to very deep water in both fresh and salt water Depth capability is affected by such factors as boat speed wave action bottom hardness water conditio...

Страница 8: ...sory or GPS Receiver is attached the Matrix can display the speed of the boat and can keep a Triplog of nauticalorstatutemilestraveled Second Sonar Return when the sonar signalbouncesbetweenthebottoma...

Страница 9: ...appears as a continuous band of many gray levels moving across the display at the same depth Structure where fish may be hiding Fish fish are displayed as arches and or fish icons and the unit can be...

Страница 10: ...ar View Sonar View presents a historical log of sonar returns Depth is always displayed Readouts for temperature and speed are automatically displayed if the appropriate accessory is connected The mos...

Страница 11: ...ith Instant Image Update Pressing EXIT will exit Freeze Frame and the display will start to scroll Freeze Frame is only available in the Sonar View Understanding Sonar History It is important to under...

Страница 12: ...nar intensity through the use of grayscale The grayscale used matches the bottom view grayscale setting used in the sonar history window i e Inverse StructureID WhiteLine Bottom Black The depth of the...

Страница 13: ...y to display a magnified image of the bottom The Zoom Preview Box shows where the zoomed view is in relation to the full range view The Zoom Level or magnification is displayed in the lower left corne...

Страница 14: ...ed in the upper left hand corner You can use the Split Sonar View to make side by side comparisons between the sonar returns from the 83 kHz wide beam and the 200 kHz narrow beam The digital readouts...

Страница 15: ...o the system The Triplog shows distance traveled average speed and time elapsed since the Triplog was last reset The digital readouts in the Big Digits View cannot be customized Big Digits View Depth...

Страница 16: ...455 kHz Windows The sonar information from the side looking beams reveal bottom contour structureandfishsimilartothedown lookingbeam buttheareacoveredistotheleftand rightoftheareashowninthedown lookin...

Страница 17: ...ne across the display A Soft Bottom such as mud or sand appears as a thicker line across the display Rocky Bottoms have a broken random appearance The sonar returns from the bottom structure and fish...

Страница 18: ...strong returns will be clearly visible on the display WhiteLine highlights the strongest sonar returns in white resulting in a distinctive outline This has the benefit of clearly defining the bottom o...

Страница 19: ...the display contrast press the POWER LIGHT key to access the Light and Contrast menu Use the 4 WAY Cursor key to select Light or Contrast and then use the LEFT or RIGHT Cursor key to change the settin...

Страница 20: ...action immediately Reactivate the X PressTM Menu by using the UP or DOWN Cursor keys Main Menu Press the MENU key twice for the tabbed Main Menu System The Main Menu System is organized under tabbed h...

Страница 21: ...larm If a menu tab is selected pressing EXIT will exit the menu mode and return to the view If a menu is active pressing EXIT will return to the previous level in the menu system Pressing EXIT will cy...

Страница 22: ...in this manual as well as your accessory s Operations Manual for additional details NOTE Accessories to enable WeatherSenseTM GPS Functionality and the SmartCast Wireless Sonar Link require separate p...

Страница 23: ...ryouareinNormalorAdvancedUserMode Main Menu Tabs Less frequently adjusted menus are grouped into the Main Menu System The Main Menu system is organized under the following tab headings to help you fin...

Страница 24: ...to Normal Mode For example if you set specific views to be visible while in Advanced User Mode and then return to Normal User Mode those views will still be visible See Setup Menu Tab User Mode for sp...

Страница 25: ...C Connect use with PC Connect Cable See the following paragraphs for more information about each of these choices Normal Operation Use Normal operation for on the water operation with a transducer con...

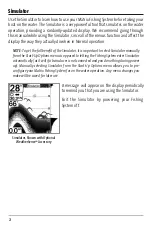
Страница 26: ...ator itisimportanttoselectSimulatormanually from the Start Up Options menu as opposed to letting the Fishing System enter Simulator automatically as it will if a transducer is not connected and you do...

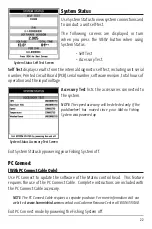
Страница 27: ...e speed accessory will be detected only if the paddlewheel has moved since your Matrix Fishing System was powered up Exit System Status by powering your Fishing System off PC Connect With PC Connect C...

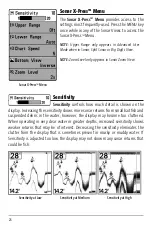
Страница 28: ...shown on the display Increasing the sensitivity shows more sonar returns from small baitfish and suspended debris in the water however the display may become too cluttered When operating in very clea...

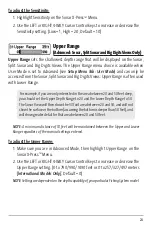
Страница 29: ...l be maintained between the Upper and Lower Range regardless of the manual settings entered To adjust the Upper Range 1 Make sure you are in Advanced Mode then highlight Upper Range on the Sonar X Pre...

Страница 30: ...will be maintained between the Upper and Lower Range regardless of the manual settings entered To adjust the Lower Range 1 Highlight Lower Range on the Sonar X PressTM Menu 2 Use the LEFT or RIGHT 4...

Страница 31: ...cture on the display Inverse represents weak returns as dark pixels and strong returns as lighter pixels This has the benefit of ensuring that weak signals will be clearly visible on the display Struc...

Страница 32: ...se Zoom to increase the display resolution to separate sonar returns that are very close together To adjust the Zoom Level 1 Highlight Zoom Level on the Sonar X PressTM Menu 2 Use the LEFT or RIGHT 4...

Страница 33: ...Beam Select and 83 kHz Sensitivity will only appear if you have a DualBeam PLUS or QuadraBeam Matrix Fishing System NOTE Depth Lines Surface Clutter Noise Filter Max Depth and Water Type only appear i...

Страница 34: ...View the Sonar Zoom View and the Big Digits View The Split Sonar View will continue to display returns from both beams in their respective windows The RTS Window in the Sonar View will display the re...

Страница 35: ...83 kHz wide beam as Hollow Fish Symbols In addition targets detected in the 455 kHz side beams are represented with Hollow Fish Symbols When Fish ID TM is turned off the Fishing System shows only the...

Страница 36: ...e Fish Sensitivity setting 1 Highlight Fish Sensitivity on the Sonar main menu 2 Use the LEFT or RIGHT 4 WAY Cursor Control keys to change the Fish Sensitivity setting Low 1 High 10 Default 5 RealTime...

Страница 37: ...on the Sonar main menu 2 Use the LEFT or RIGHT 4 WAY Cursor Control keys to set the 83 kHz Sensitivity 10 to 10 Default 0 455 kHz Balance Advanced QuadraBeam Only 455 kHz Balance adjusts the sensitivi...

Страница 38: ...either turn Depth Lines On or Off The Depth Lines menu choice is available when User Mode is set to Advanced see Setup Menu Tab User Mode To change the Depth Lines setting 1 Make sure you are in Advan...

Страница 39: ...displayed The Surface Clutter menu choice is available when User Mode is set to Advanced see Setup Menu Tab User Mode To change the Surface Clutter setting 1 Make sure you are in Advanced User Mode th...

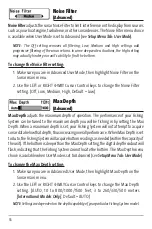
Страница 40: ...depth of operation The performance of your Fishing System can be tuned to the maximum depth you will be fishing in by setting the Max Depth When a maximum depth is set your Fishing System will not att...

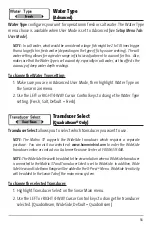
Страница 41: ...r Control keys to change the Water Type setting Fresh Salt Default Fresh Transducer Select QuadraBeam Only Transducer Select allows you to select which transducer you want to use NOTE The Matrix 37 su...

Страница 42: ...less than the menu setting To change the Depth Alarm setting 1 Highlight Depth Alarm on the Alarms main menu 2 Use the LEFT or RIGHT 4 WAY Cursor Control keys to change the Depth Alarm setting OFF 1 t...

Страница 43: ...g a trolling motor battery operated youwouldwanttosettheLowBatteryAlarmtosoundbeforethebatteryvoltagedrops too low for it to be used to start your main gasoline powered engine To change the Low Batter...

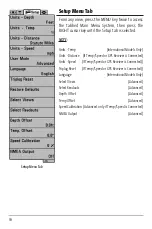
Страница 44: ...Only Units Distance If Temp Speed or GPS Receiver is Connected Units Speed If Temp Speed or GPS Receiver is Connected Triplog Reset If Temp Speed or GPS Receiver is Connected Language International M...

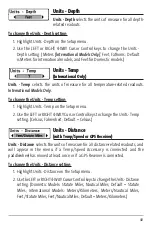
Страница 45: ...n the Setup menu 2 Use the LEFT or RIGHT 4 WAY Cursor Control keys to change the Units Temp setting Celsius Fahrenheit Default Celsius Units Distance with Temp Speed or GPS Receiver Units Distance sel...

Страница 46: ...and mph for Domestic models User Mode User Mode sets the menu system to either Normal or Advanced When set to Normal default setting only the basic menu options are shown When set to Advanced addition...

Страница 47: ...iplog 1 Highlight Reset Triplog on the Setup menu 2 Use the RIGHT 4 WAY Cursor Control key to initiate Triplog Reset 3 The Confirm dialog box will appear To reset the Triplog press the RIGHT Cursor ke...

Страница 48: ...draBeam only BigDigitsView The display status of these views can be changed only when in Advanced User Mode see Setup Menu Tab User Mode To Select Views 1 Make sure you are in Advanced User Mode then...

Страница 49: ...Mode see Setup Menu Tab User Mode Data windows can display readouts from supported accessories such as Temp Speed Each data window can either be empty or contain one of the following Speed will be dis...

Страница 50: ...key to initiate this procedure 3 The Select Readouts submenu will appear showing a list of all Readouts Use the UP or DOWN Cursor keys to select a particular Readout position then use the RIGHT or LEF...

Страница 51: ...g 1 Make sure you are in Advanced User Mode then highlight Depth Offset on the Setup menu 2 Use the LEFT or RIGHT 4 WAY Cursor Control keys to change the Depth Offset setting 10 0 to 10 0 feet or 3 to...

Страница 52: ...nced NMEA Output turns the NMEA output on or off This menu choice is available only when in Advanced User Mode see Setup Menu Tab User Mode The following NMEA sentences are output DPT Depth MTW Water...

Страница 53: ...additional menu choices that support the accessory will be added automatically See the Operations Manual that comes with your accessory for detailed information NOTE Accessories to enable WeatherSense...

Страница 54: ...om the battery terminals or wiring or actually replacing the battery if necessary Matrix Defaults to Simulator with a Transducer Attached A connected and functioning transducer will cause the newly st...

Страница 55: ...ed A mix of air and water flowing around the transducer cavitation may be interfering with the inter pretation of sonar data See your Installation Guide for suggestions on adjusting the transducer pos...

Страница 56: ...appears To determine whether the boat s engine is the source of the noise increase the RPMs while the boat is in neutral and stationary to see if the noise increases proportionately if noise appears w...

Страница 57: ...ss advanced FishingGPS trackplotter and navigation capabilities built in to your Fishing System GPS Connection Cable purchase the GPS Connection Cable in order to connect a handheld or other NMEA GPS...

Страница 58: ...kHz and 83 kHz DualBeam PLUS Matrix 17 and 27 200 kHz 83 kHz 455 kHz QuadraBeam Matrix 37 Area of Coverage 60 10 dB in 83 kHz 20 10 dB in 200 kHz 90 Total Coverage Two 45 Beams 10 dB in 455 kHz Targe...

Страница 59: ...and intended as fixed or temporary installation in transportation vehicles such as automobiles aircraft and boats In some European Union member states these vehicles are considered outside of the sco...

Страница 60: ...ys By Telephone Monday Friday 8 00 a m to 4 30 p m Central Standard Time 1 800 633 1468 By e mail typically we respond to your e mail within three business days cservice johnsonoutdoors com For direct...

Отзывы: