


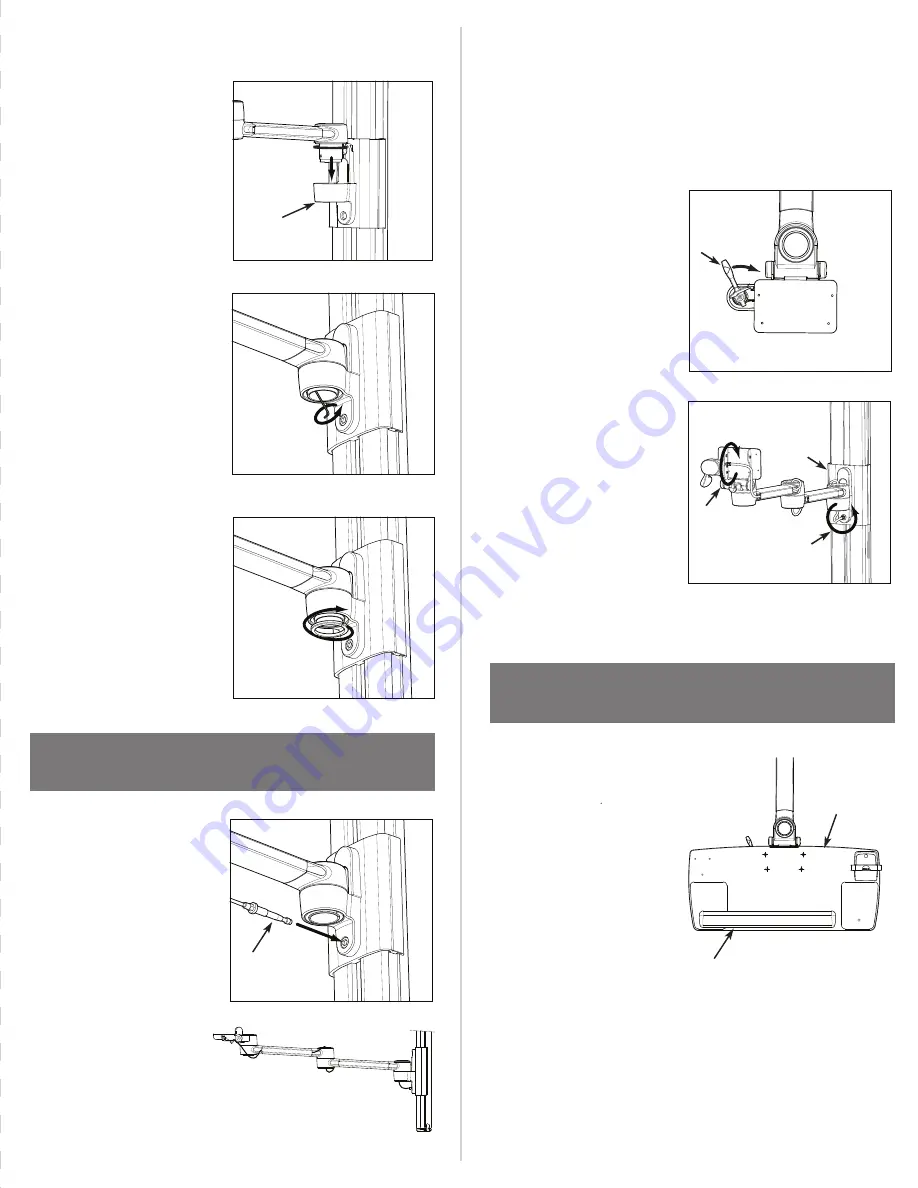
STEP 3: ATTACH KEYBOARD ARM
TO TRACK
a. Repeat Step 2 to attach
Keyboard Arm.
b. Insert Threaded Screw
attached to the length of
Cable (A) into the hole in Slider
Assembly. Tighten fully.
c. Distribute cable evenly
throughout Keyboard Arm,
ensuring equal amounts of
slack are available at each joint.
Note: Release Handle will
not function properly unless
cable is evenly distributed
throughout the arm.
d. Try Release Handle (B) to
ensure it functions properly.
Arm should move freely when
the Release Handle is
triggered.
Note: If necessary, adjust
cable tension using adjust-
ment under the Keyboard
Mount (C) and at the point
where it connects to Track
(D). Additional cable tension
adjustment can be achieved
by tightening the screw on
Mount (E).
STEP 4: ATTACH KEYBOARD TRAY
TO KEYBOARD ARM
a. Place Keyboard Tray (A) on
top of Keyboard Arm and align
holes.
b. Fasten Keyboard Tray to
Keyboard Arm using 4
Keyboard Tray Installation
Screws.
c. Snap Palm Rest (B) into the
holes on Keyboard Tray.
2d
2c
2b
3d
3b
3d note
b. Slide Aluminum Bushing into
top Slider Assembly (B),
ensuring set screw is aligned
with the small notch in the
mount. Be sure Plastic Washer
sits between Monitor Arm and
Track Mount.
c. Using the ball end of the
2mm Hex Key (provided),
tighten Set Screw located
inside Aluminum Bushing.
Note: Set Screw does not
need to be fully tightened,
but should prevent Bushing
from rotating.
d. Reattach the aluminum nut
to the bottom of Aluminum
Bushing. Tighten using
Two-Prong Spanner Wrench
(provided).
B
3c
A
B
A
B
D
E
C
Содержание V7
Страница 1: ...Installation Instructions V7 ...


