QUICK REFERENCE GUIDE
999
50-Q
ui
ck R
ef
ere
nc
e G
ui
de
-Silh
ou
et
te Slin
gs
-R
ev 0
3 (06 2
01
8)
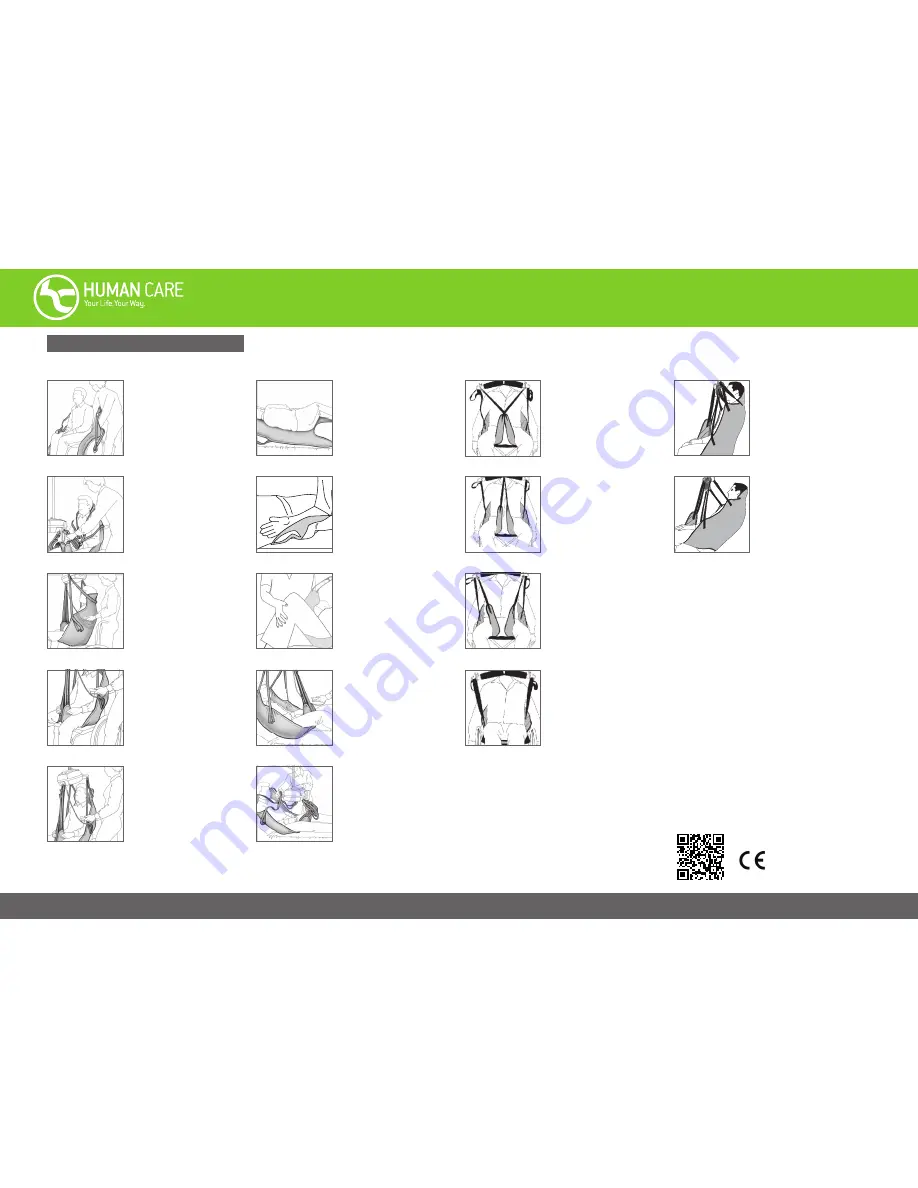
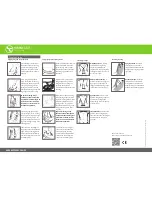
Sling Positioning
Applying sling from a seated position
Stand behind or to the side of
the patient and hold the sling
with the label facing up and
away from the patient. Have
patient lean forward (assist if
needed).
Place sling behind patient’s
back. The bottom of the sling
should be in line with patient’s
coccyx. Pull the leg sections
through to the front of the pa-
tient. Raise each leg and pull the
leg strap under patient’s legs.
Important! The leg straps
should surround the hips and
be pulled to the same length on
both sides! Colour match the
loops! Do not let the material
fold under the patient!
Position legs (may be neces-
sary to lift legs). Note: if lifting
with a 2-point or 4-point suspen-
sion, cross the leg straps. For
a 3-point suspension, draw one
leg strap through the loop of the
other leg strap.
Lower the lift to the height of
the patient’s chest and affix the
upper straps, ensuring colours
are matched. Hold the lift with
one hand away from the patient
and slowly raise.
Applying sling from a supine position
Stand to side of patient and turn
them to their side. Place the
gathered sling with the label
towards the patient’s head end
and facing up and away from
their skin.
Roll the patient on their back
and gently pull the gathered
sling towards you with your
palms up and knuckles
towards the bed to prevent skin
shearing.
Bend the knee and pull the leg
straps through and around the
leg. Note: if lifting with a 2-point
or 4-point suspension, cross
the leg straps. For a 3-point
suspension, draw one leg strap
through the loop of the other
leg strap.
Important! The leg straps
should surround the hips and
be pulled to the same length on
both sides! Colour match the
loops! Do not let the material
fold under the patient!
Lower the lift to the height of
the patient’s chest and affix
the upper straps, ensuring
colours are matched. Hold the
lift with one hand away from
the patient and slowly raise.
Positioning the legs
Open position
: To achieve this
position, bring the leg supports
up between the thighs and
attach the leg straps to the end
of the carry bar.
Divided position
: To achieve
this position, bring the leg
supports up between the
thighs and thread one leg strap
through the loop of the other in
a cross over style.
Divided relaxed position
: To
achieve this position, bring the
leg supports up between the
thighs and attach the leg straps
to the center of the carry bar.
Closed position
: To achieve this
position, pull one leg support,
then the other under both thighs
and attach to the end of the
carry bar.
Positioning the body
Upright position
: To achieve
this position, use the short
loops of the head and shoulder
straps and the long loops of the
leg straps.
Reclined position
: To achieve
this position, use the middle
or long loops of the head and
shoulder straps and the middle
or short loops of the leg straps.
Models: 25015, 25020
Human Care HC AB. All Rights Reserved.


