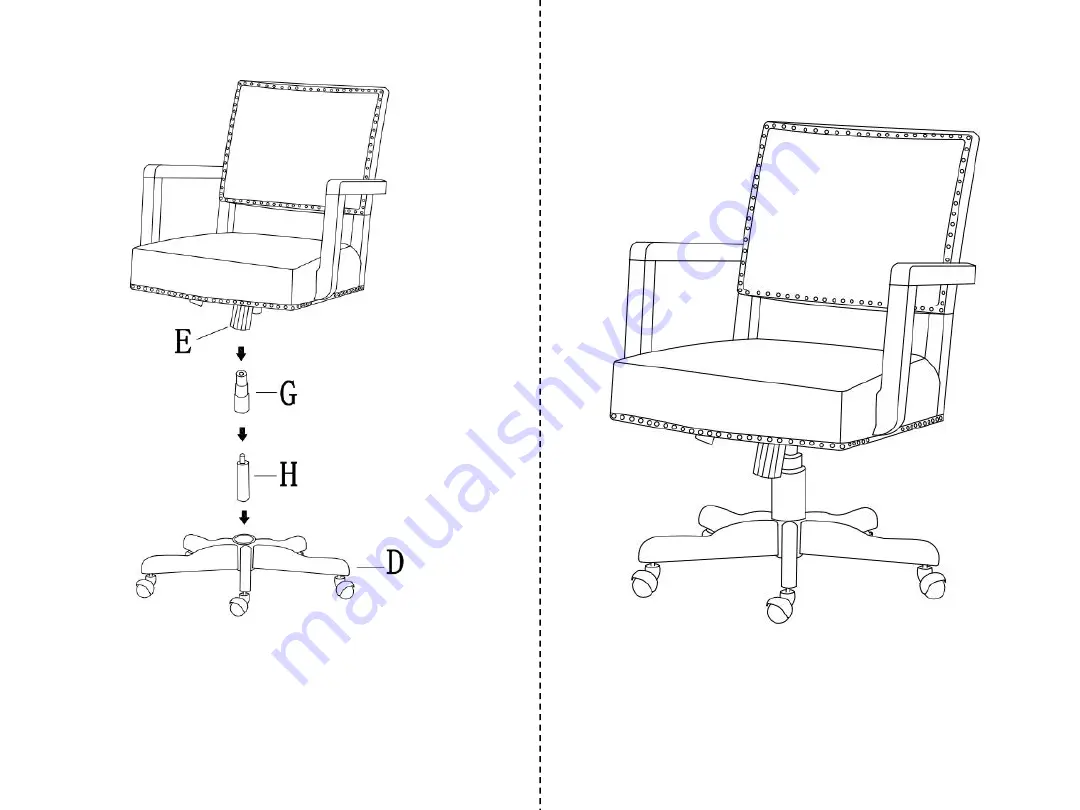
STEP 6:
Insert gas lift H then place plastic cover G on
top of gas lift and place seat/back assembly on above.
STEP 7:
Assembly completed.
Страница 1: ...em Each customer must provide a record of their order such as the order number or item receipt for any items that are out of the warranty period you may also still receive replacement parts by purchas...
Страница 2: ...mild soap with warm water clean spills Mix 1 10 soap to water Do not place furniture under direct sunlight material will possibly fade over time Do not use on site dry Cleaning machine Children shoul...
Страница 3: ...rts which may have come loose inside the carton during shipment STEP 1 Place cushion B upside down on clean padded surface Use flat washer 1 bolt 5 allen key 4 to attach mechanism E on bottom of the s...
Страница 4: ...nnect backrest A with seat cushion B Please don t fasten any bolt until next step STEP 3 Carefully align screw holes and use bolt 2 allen key 4 to connect armrest C with backrest A seat cushion B make...
Страница 5: ...STEP 4 Insert wood plug 3 to cover the bolt holes STEP 5 Place spide base D upside down on clean padded surface insert casters F to each end of the base arm...
Страница 6: ...STEP 6 Insert gas lift H then place plastic cover G on top of gas lift and place seat back assembly on above STEP 7 Assembly completed...