background image

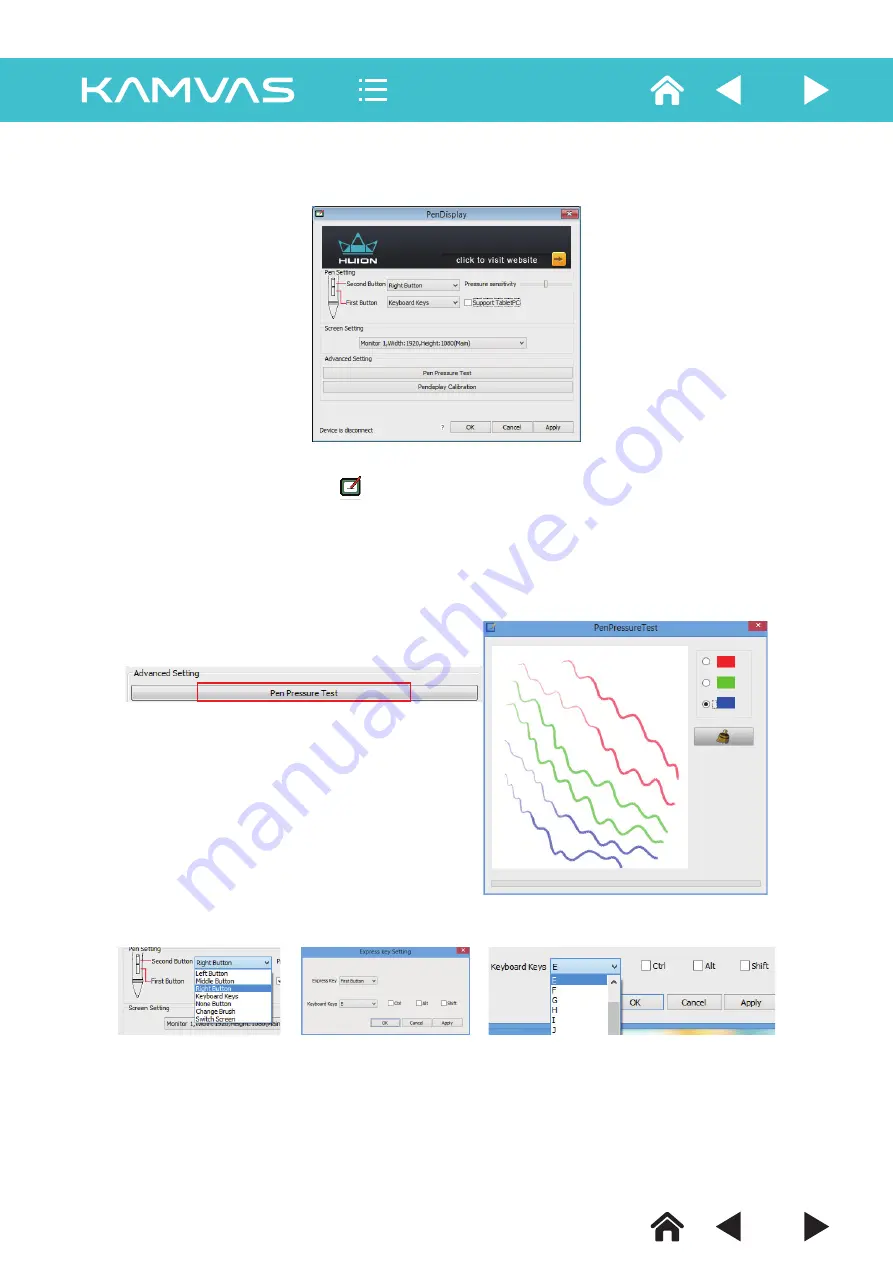
2.2 Pen Pressure Tes

t

Click  Pen Pressure Test  into Pressure Sensitivity Testing  

2.3 Pen setting

Picture 4

Picture 5

Picture 6

2. Driver Interface Introduction

2.1 Control Interface

When you double click the Pen display icon (       ) which normally appears in the system tray at the corner of the screen, you 

will see the control panel (pictured above). It will display driven-related information. Controlling the panel by enclosed 

rechargeable pen can set up functions for the rechargeable pen, regulate the pen pressure sensitive and modify the working 

area and shortcut keys.

2.3.1 Key Functions
You can configure various mouse functions for the rechargeable pen (

Picture 4

): "Mouse Left Button, Mouse Middle Button, Mouse Right Button, None Button, 

Switch Screen and Keyboard key" from the corresponding right drop-down menu of the "Second Button and First Button.
Note:
(1)"Left Button, Middle Button, Right Button" functions represent a normal mouse left, middle, right button functions.
(2) When choosing "Middle Button", the corresponding pen button will have the same "press" function as a normal mouse, but will not have the "scroll" function.
(3) When choosing the "Keyboard Keys", there will appear an "Express Key Setting (as 

Picture 5-6

). You can set up pen button functions in the same way like 

      any "Express Key" or "Keyboard Key" functions.

7

-7-

Содержание KAMVAS GT-190

Страница 1: ...User Manual Graphic Pen Display For Windows GT 190 1 1 ...

Страница 2: ... in use During blackouts or when not in use for longer time unplug the monitor from the socket in order to prevent surges impacting the monitor through the power wire 11 Do not overload the socket or lengthen the power wire it may lead to electric shocks 12 Make sure no foreign bodies get inside the monitor trough grooves as to prevent short circuit or fire Prevent liquid from splashing on the mon...

Страница 3: ...ion 2 6 Pen Pressure Sensitivity Settings 3 Rechargeable Li ion Battery Tip 4 Using OSD Screen Image Adjustment 5 Possible Breakdowns and Solutions 5 1 Possible Breakdowns Related to the Pen Display 5 2 Possible Breakdowns Related to Hand Input Function 5 3 Support TabletPC 6 Product Specifications 6 1 Specifications of the Monitor 6 2 Specifications of Pen Input 4 4 4 5 7 7 7 7 8 8 8 9 10 12 12 1...

Страница 4: ...esolution 1 2 2 Overview of the push button area After opening the packing please confirm that the following articles are in the packing box 1 1 Packing List LCD screen 1 AC adapter 1 VGA cable 1 USB cable 1 Pen charging cable 1 Power cable 1 Rechargeable pen 1 Pen tips 8 Pen clip 1 Pen holder 1 Manual 2 For Windows and Mac Driver software CD 1 1 POWER Power switch It can switch on off the monitor...

Страница 5: ...this port and then connect the AC adapter to the nearest AC socket 3 DVI HDMI Connect the DVI or HDMI port with PC through which hand input screen can display the PC screen 1 2 3 Overview of the rear 1 2 4 The Adjustment of the Monitor Support The angle of the monitor can be adjusted manually Remarks The angel of the stand can be adjusted from 15 to 80 1 3 Installation 1 3 1 Operating System Requi...

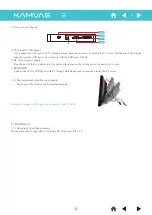
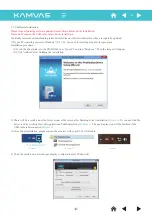
Страница 6: ...he driver disk into the CD ROM drive of your PC and run Setup exe Then the image will appear 2 Click confirm after finishing the installation 4 Click the small icon enter into pen display configuration for Windows8 Picture 1 Picture 2 Picture 3 2 There will be a small icon at the lower corner of the screen after finishing driver installation Picture 1 Or you can find the driver icon by clicking St...

Страница 7: ...hortcut keys 2 3 1 Key Functions You can configure various mouse functions for the rechargeable pen Picture 4 Mouse Left Button Mouse Middle Button Mouse Right Button None Button Switch Screen and Keyboard key from the corresponding right drop down menu of the Second Button and First Button Note 1 Left Button Middle Button Right Button functions represent a normal mouse left middle right button fu...

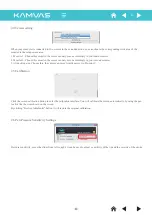
Страница 8: ...econd monitor 3 All desktop area Choose this the cursor can move from Monitor 1 to Monitor 2 Click the screen calibration button to enter the calibration interface You will calibrate the screen automatically by using the pen to click the the cross shown on the screen By clicking Restore to Defaults button it will restore the original calibration 2 5 Calibration Pressure sensitivity move the slider...

Страница 9: ...ep if not used for a period of time Note If the line is unstable it means you have to charge Plug in USB cable to charge The LED indicator flashes during charging and stops when finished Charging time about 1 hour Charging port Pen tip Button 2 Button 1 Gently unscrew the pen holder in the counter clockwise direction You will see one pen tip replacement tool 8 spare pen tips inside B Push the pen ...

Страница 10: ...ghtness with the button and Picture Phase Clock H Position V Position 1 Phase Adjusting the horizontal blinking of characters on the screen 2 Clock Adjusting the vertical blinking of characters on the screen 3 H Position Adjusting images left and right by using the buttons and 4 V Position Adjusting images downward and upward by using the buttons and Color Color Temperature Red Green Blue Color 82...

Страница 11: ...Vertical Transparency OSD Time Out 1 Language There are eight languages that you can choose from 2 Mute You can turn on or turn off the sound 3 Input There are 2 signal inputs VGA DVI 4 Display Size There are 3 sizes of the monitor you can choose from 5 Volume Adjusting the volume left and right by using the button and 6 Reset All the options are restored to the default positions Setup Language Mu...

Страница 12: ...al wire after starting the laptop In the option of display mode settings switch to the external RGB display mode There are different switch methods for different laptops Please refer to the PC user s manual and other documents 4 Whether the pilot lamp is green or not If the monitor and the PC are in hibernation please press the keyboard and mouse to restart the system 5 Is the signal wire broken o...

Страница 13: ...essure sensitivity under Office 2007 Journal or later version For Sketchbook 6 0 Photoshop CC2014 or later on Windows8 or later system checking Support TabletPC is needed to support pressure sensitivity As for other drawing software please read the software instruction carefully to see whether it supports windows TabletPC or not and try to disable Support TabletPC if it is needed 13 13 ...

Страница 14: ... Features Display Equipment Effective Display Size Resolution Dot Pitch Display Colors Viewing Angles Input Temperature Humidity VGA input Environmental Requirements Wattage Power Supply Package Size Weight Adjustable Range of the Support OS Compatibility Video Interface TFT LCD 19 inch 409 8mm H 255mm V 1440 x 900 0 283mm x 0 283mm 16 700 000 colors 80 to the right 80 to the left 70 upward and 70...

Страница 15: ...Technology Co Ltd Tel 86 755 32998548 Fax 86 755 23313505 Email service huion com Http www huion com Address Building 28 Quater 4 HuaiDeCuiGang Industrial Park Fuyong Street Bao an District Shenzhen China FACEBOOK WEBSITE 15 15 ...

Отзывы: