background image


                                                                                          KAMVAS GT-156HD V2


1 / 20


www.huion.com 


Precautions 

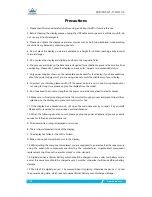
1. Please read this manual carefully before using, and keep it well for future reference. 

2. Before cleaning the display please unplug the USB cable and wipe with a soft damp cloth, do 
not use any kind of detergents. 

3. Please don

t place the display near water sources such as bathtub, washbasin, sinks, washing 

machine, damp basement, swimming pool, etc. 

4. Do not place the display on where is unstable or a height for children reaching easily in order 
to avoid danger. 

5. Do not place the display and digital pen close to the magnetic field. 

6. The grooves and holes on the back case is designed for ventilation to prevent the monitor from 
overheating. Please don

t place the display on beds, sofas, carpets or in embedded device. 

7. Only power supplies shown on the nameplate can be used for the display. If you have questions 

about the power supply which you are using, please consult the distributor of your display. 

8. To protect your display, please switch off the power when it is not in use. During blackouts or 

not using for long time, please unplug the display from the socket. 

9. Don

t overload the socket or lengthen the power wire, which may lead to electric shocks. 

10. Make sure no foreign bodies get inside the monitor through grooves and prevent liquid from 

splashing on the display as to prevent short-circuit or fire. 

11. If the display has a breakdown, do not open the main case and try to repair it by yourself. 

Please ask for a service for proper repair and maintenance. 

12. When the following situations occur, please unplug the power adapter and you may need a 
service for full repair and maintenance: 

A. The power wire or plug is damaged or worn out; 

B. There is liquid splashed inside of the display; 

C. The display has fallen or the LCD is broken; 

D. When obvious abnormalities occur to the display。 

13. While getting the components replaced, you are supposed to guarantee that the repairman is 
using  the  substitute  components  specified  by  the  manufacturer.  Unauthorized  component 
replacement might cause fire, electric shocks or other dangers. 

14. Digital pen has a lithium battery, which should be charged in time under low battery mode, 
and at the same time should be charged every 3 months; otherwise it will cause lithium battery 
damage. 

15. The nib of the digital pen can’t be pressed when it is placing, otherwise the pen can’t enter 
the power-saving state, which is easy to cause lithium battery over-discharge damage. 


Содержание KAMVAS GT-156HD V2

Страница 1: ...KAMVAS GT 156HD V2 User Manual For Windows and Macintosh OS...

Страница 2: ...rload the socket or lengthen the power wire which may lead to electric shocks 10 Make sure no foreign bodies get inside the monitor through grooves and prevent liquid from splashing on the display as...

Страница 3: ...2 Using the Display 11 2 3 OSD Function 11 3 Function Setting 12 3 1 Device Connection Prompt 12 3 2 Working Area Setting 12 3 3 Press Keys Function Setting 14 3 4 Pen Button Setting 15 3 5 Pressure...

Страница 4: ...lines and colors just as the pen writes on the paper which brings you a real shock experience To give you a better understanding and using of your Kamvas please read this user manual carefully The us...

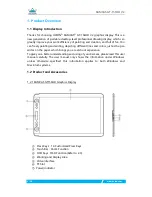
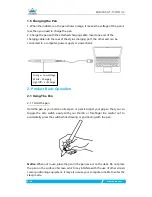
Страница 5: ...hargeable pen with 8192 levels pressure sensitivity and can be used for 350hrs with full battery Charging Port LED Indicator Upper Button Mouse Right key Function Lower Button Switch Brush Nib Mouse L...

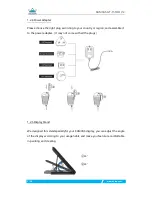
Страница 6: ...r country or region and assemble it to the power adapter It may not come with all the plugs 1 2 5 Display Stand We designed this standspeciallyfor your KAMVAS display you can adjust the angle of the d...

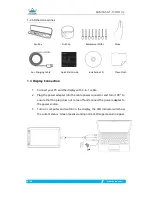
Страница 7: ...ble power connector and turn it 90 to ensure that the plug does not come off and connect the power adapter to the power source 3 Turn on computer and switch on the display the LED indicator will show...

Страница 8: ...nge to color which means the driver has already recognized the display and you can start using it now Notice 1 Before installing you need to uninstall other driver of similar products including the ol...

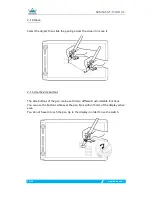
Страница 9: ...c Operation 2 1 Using The Pen 2 1 1 Hold the pen Hold the pen as you hold a normal pen or pencil Adjust your grip so that you can toggle the side switch easily with your thumb or forefinger Be careful...

Страница 10: ...sor will move to the new position accordingly Press the pen tip on the screen to make a selection Tap the screen once with the pen tip or touch it to the screen with enough pressure to register a clic...

Страница 11: ...s the screen to move it 2 1 5 Use the side buttons The side buttons of the pen can be set to two different customizable functions You can use the buttons whenever the pen tip is within 10mm of the dis...

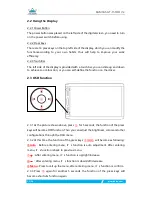
Страница 12: ...e the function on the driver 2 3 OSD Function 2 3 1 As the picture shown above press for 5 seconds the function of the press keys will become OSD function Then you can adjust the brightness colors and...

Страница 13: ...ltiple Monitors When the KAMVAS and other monitors are used in the same system the movement of the screen cursor on the standard display depends on the system configuration If the secondary display is...

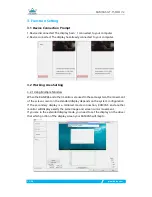
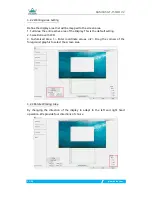
Страница 14: ...ire active area of the Display This is the default setting 2 Same Ratio with LCD 3 Customized Area 1 Enter coordinate values or2 Drag the corners of the foreground graphic to select the screen area 3...

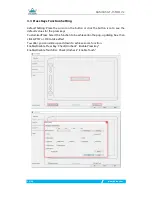
Страница 15: ...ton icon to see the default values for the press keys CustomizedPress Select the function to be achievedon the pop up dialog box then click APPLY or OK to take effect TouchBar you can slide up and dow...

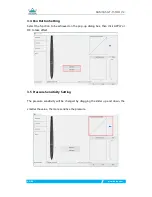
Страница 16: ...Select the function to be achieved on the pop up dialog box then click APPLY or OK to take effect 3 5 Pressure Sensitivity Setting The pressure sensitivity will be changed by dragging the slider up a...

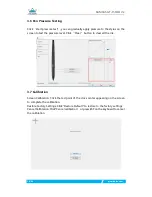
Страница 17: ...pressure level Click Clear button to clear all the ink 3 7 Calibration Screen Calibration Click the red point of the cross center appearing on the screen to complete the calibration Restore Factory Se...

Страница 18: ...Pen features are supported in such as Microsoft Office Windows Journal Adobe Photoshop CC SketchBook 6 and so on 3 9 Data Export and Import The driver supports exporting and importing your customized...

Страница 19: ...g Height 12mm Report Rate 233PPS Pen Model PE330 Type Cordless Active Net Weight 16 5g Dimension 13 5x 177 5mm Tilt Angle 45 Buttons Two Customized Press Key Battery Capacity 80mAh Charge Time 1 3hrs...

Страница 20: ...e regional color temperature is different so minor chromatic aberration is a normal phenomenon Images jitter or ripple images appear It is likely that there is electric equipment nearby that brings ab...

Отзывы: