Chapter 3 • Installing the antenna and radio assembly
1037750-0001 Revision A
31
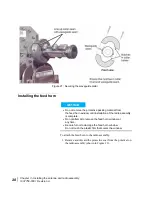
5. Insert two Allen screws into the collar and tighten to secure
the feed horn in place.
6. At this point, fully tighten any hardware that is not
tight—however, leave nuts that are used for pointing
adjustments slightly loose or just snug.
Installing the antenna
assembly onto
the mast pipe
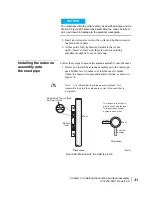
Follow these steps to mount the antenna assembly onto the mast:
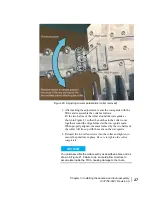
1. Before you install the antenna assembly onto the mast pipe,
use a bubble level to make sure that the mast is plumb.
Check the mast at two perpendicular locations, as shown in
Figure 26.
NOTICE
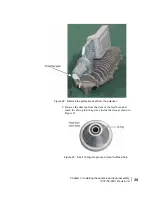
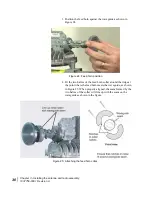
You must assemble the collar exactly as described above and as
shown in Figure 25 before fully assembling the collar. Failure to
do so will result in damage to the polarizer waveguide.
Note:
It is critical that the antenna mast is plumb. It is
impossible to adjust the antenna to correct for a mast that is
not plumb.
Figure 26: Making sure the mast is plumb
T0144012
Top view
To make sure the mast is
plumb, check with the level
in two positions at right
angles to each other.
Level
Mast
2nd level
position
Mast
Bubble must be centered
between marks.
Bubble
level
Side view
Содержание AN8-098P
Страница 1: ...1037750 0001 Revision A January 30 2009 98m Ka Band Antenna Installation Guide Model AN8 098P ...
Страница 8: ... Tables viii 1037750 0001 Revision A ...
Страница 16: ... Understanding safety alert messages xvi 1037750 0001 Revision A ...
Страница 22: ...Chapter 1 Overview 6 1037750 0001 Revision A ...
Страница 32: ...Chapter 2 Antenna parts and required tools 16 1037750 0001 Revision A ...
Страница 50: ...Chapter 3 Installing the antenna and radio assembly 34 1037750 0001 Revision A ...
Страница 58: ...Chapter 4 Cabling and connections 42 1037750 0001 Revision A ...
Страница 64: ... Adjusting the antenna azimuth and elevation 48 1037750 0001 Revision A ...
Страница 66: ... Acronyms and abbreviations 50 1037750 0001 Revision A ...


