11
Gimbal features
Precision of control
±0.03°
Range of motion
Pitch: + 80 ° to -50 °
Stability features
Shock ab software stabilization
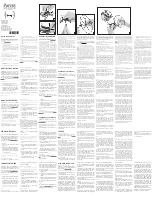
(云台安装示意图)
2
云台信号控制线
3
相机图像传输线
2.3.2 Checking gimbal operation and handling
2
Gimbal signal transmission line
Camera FPV transmission cable
4
Gimbal power line
3
1
4
2
3
3
2
2.3 The 3-axis gimbal
After the gimbal and camera are installed and the aircraft powered on, the gimbal will also power on and test itself for
issues. The gimbal’s movement (pitch) may be controlled by the H906A transmitter/remote control.
2.3.1 Installing the 3-axis gimbal
1) With the back of the camera facing the rear of the aircraft, align the gimbal’s frame with the belly of the aircraft.
Slide the gimbal horizontally onto the drone.
2) Plug the gimbal’s signal transmission line to the gimbal and camera interface as shown in the figure below.
3) Plug the camera’s FPV transmission cable to the left of the gimbal’s signal transmission cable as shown in the
figure below.
After gimbal installation is complete, power the aircraft on. The gimbal will also power on and perform a self-testing
procedure.
(Gimbal installation diagram)
●
Anomalies in the gimbal’s movement may manifest if the aircraft is placed on uneven ground/grass or the
gimbal runs into foreign objects present. This may also happen if the gimbal experiences excessive external
movement/force (being hit or broken). Please make sure the aircraft is on flat, open ground before taking off; do
not move or disturb the gimbal while taking off.
●
Flying in fog or in cloud cover will most likely cause condensation on the gimbal and camera. If this occurs,
simply wipe the units dry with a soft cloth.


