


Pub. 42004-533F
HUBBCOM™ GSC3100/GSC4100 Dual-Port Flush-Mount Smart Controllers
Page 8 of 10
P:\Standard IOMs - Current Release\42004 Instr. Manuals\42004-533F.docx
11/20
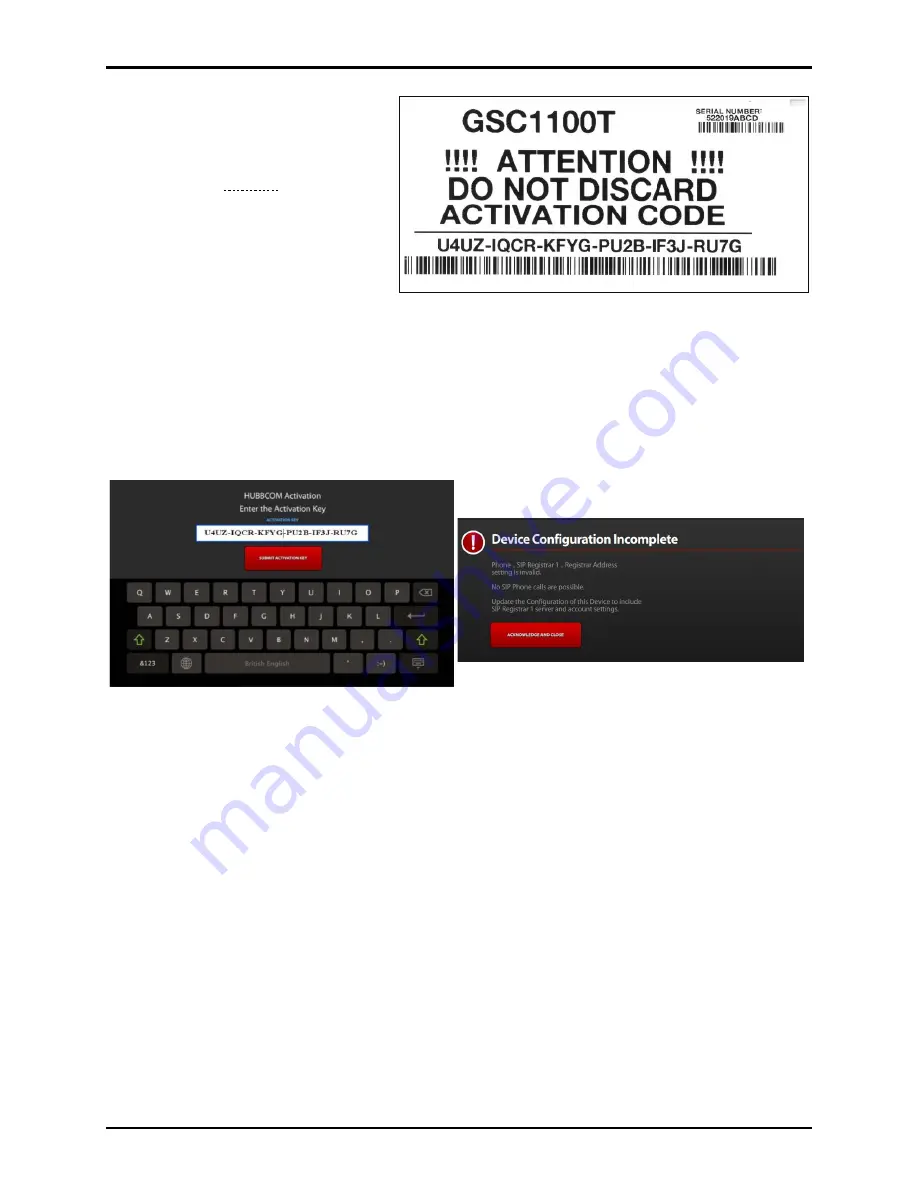
The HUBBCOM smart controller
will reboot to activate. The smart
controller takes 40–50 seconds to
reboot before the device
configuration notification screen
displays (see Figure 7). The screen
may flicker several times during
boot-up.
6.
Use the GUDA to complete the
configuration of the HUBBCOM
smart controller.
N
OTE
:
Enter additional station
parameters while
activating the smart controller to save time. The smart controller accepts and sets all entered
parameters regardless of correct activation code entry. Changing the network parameters of
a HUBBCOM smart controller prevents the PC from connecting to the smart controller until
the PC’s IP address is on the same subnet as that smart controller.
7.
Connect additional HUBBCOM smart controllers to the network and repeat the procedure to activate
and configure them.
Activation without DHCP
Activate a HUBBCOM smart controller on a network without a DHCP server as follows:
1.
Connect the HUBBCOM smart controller to the network.
2.
Apply power to the smart controller.
•
The smart controller displays the HUBBCOM screen but does not continue to the activation
screen.
•
The smart controller assigns itself an APIPA (automatic private IP address) after approximately
one minute.
3.
Configure a PC, with the GUDA installed, for DHCP, or manually assign a static IP address in the
APIPA range.
•
A PC configured for DHCP will assign itself an APIPA after approximately one to two minutes.
•
A PC configured with a static IP address in the APIPA range will boot normally.
4.
Run the GUDA software.
Figure 6. Device License Key Entered
Figure 7. Activation Complete
Figure 5. Device Activation Label


