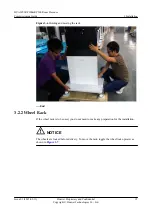
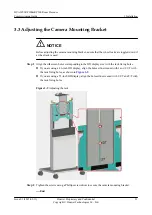

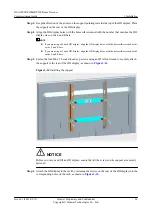

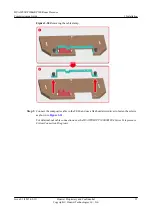


Step 5
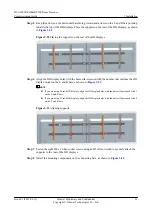
Keep the arrows on the horizontal bars facing inward and arrows on the L and R bars pointing
towards the top of the HD displays. Place the supports on the rear of the HD displays, as shown
in
.
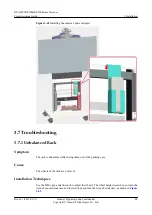
Figure 3-22
Placing the supports on the rear of the HD displays
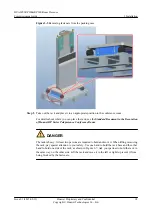
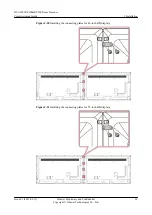
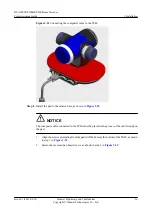
Step 6
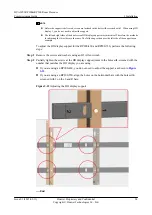
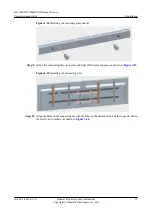
Align the HD display holes with the holes silk-screened with the number that matches the HD
display model on the L and R bars, as shown in
NOTE
l
If you are using 46-inch HD displays, align the HD display holes with the holes silk-screened with 1
on the L and R bars.
l
If you are using 55-inch HD displays, align the HD display holes with the holes silk-screened with 2
on the L and R bars.
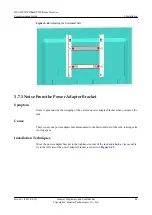
Figure 3-23
Aligning supports
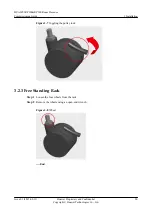
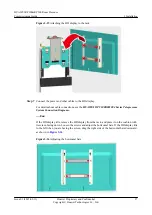
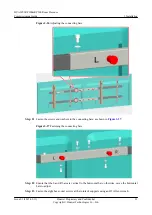
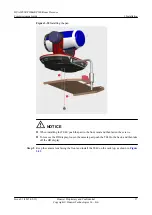
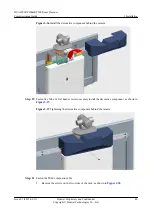
Step 7
Fasten the eight M6 x 20 hex socket screws using an H5 Allen wrench to securely attach the
supports to the rear of the HD displays.
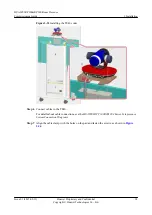
Step 8
Install the mounting components on the connecting bars, as shown in
.
HUAWEI RP100&RP200 Room Presence
Commissioning Guide
3 Installation
Issue 01 (2015-02-12)
Huawei Proprietary and Confidential
Copyright © Huawei Technologies Co., Ltd.
31